Ford Explorer Radiator Replacement - Page 3
Everything should be now disconnected from the radiator, the oil lines (both transmission and oil), both radiator hoses and the overflow hose. Just need to remove the fan shroud and you are now ready to unbolt and remove the radiator. This is easy, it is held in by 2 bolts near the top sides of the radiator. Then it simply lifts right on out. Have your 10mm wrench or socket ready for this.
You can Navigate to any of the pages in this project by the BELOW drop down menu or use the NEXT or PREV links
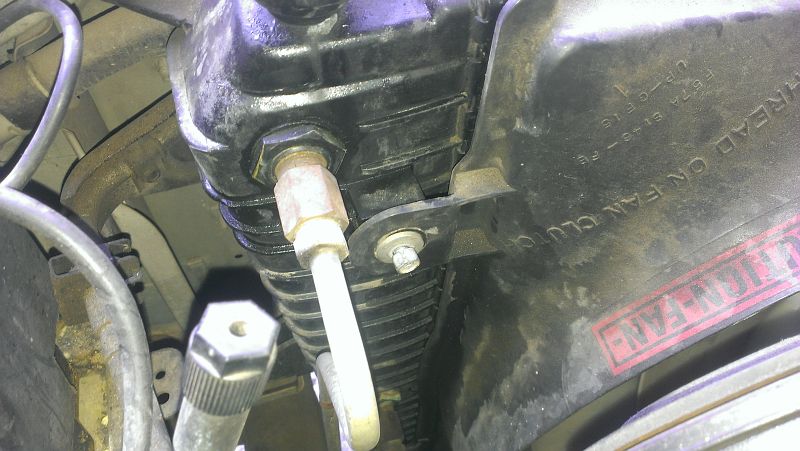
Fan Shroud Mounting Bolts
The last thing that needs to be removed before pulling the radiator out is to remove the fan shroud bolts. These are on each side of the radiator and are 10mm bolts. The shroud is held by the top 2 bolts and the bottom is held in by a small slip in bracket. Remove the top 2 bolts and lift UP on the shroud. You can push it back out of the way once this is done.
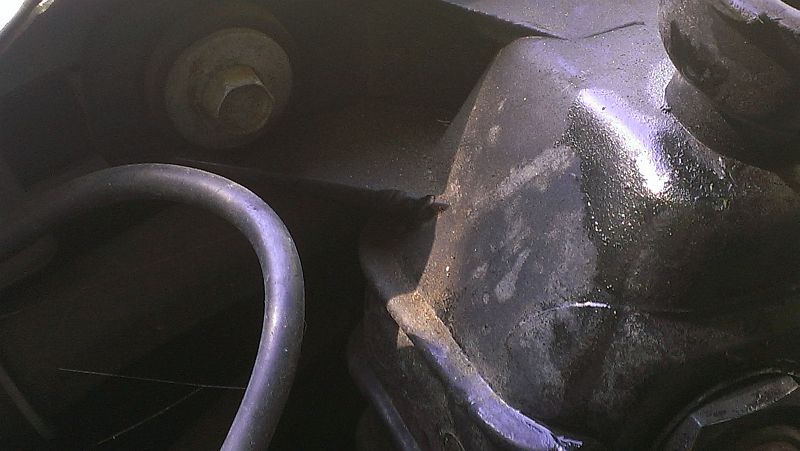
Radiator Mounting Bolts
The radiator is held in by two 10mm bolts. One on each side of the radiator right near the top. These are easy to get to with a 10mm socket. The rubber washer should stay attached to the radiator, just the bolt needs to be removed. Once both top bolts are removed you can lift the radiator UP and out of the car. You may have to move around the cooler lines and the fan shroud a bit, but it will lift out. Note that when you do you will be spilling some residual antifreeze and transmission fluid that is in the radiator, so keep some cardboard or rags under the area when you lift it out.
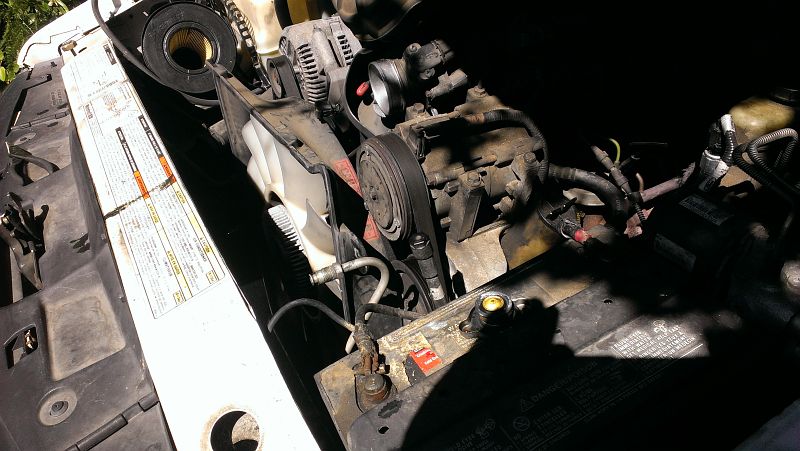
Radiator Removed
This is the scene with the radiator removed. Note fan shroud still on the fan. Your half way home!
Ford_Explorer_Radiator_2.html