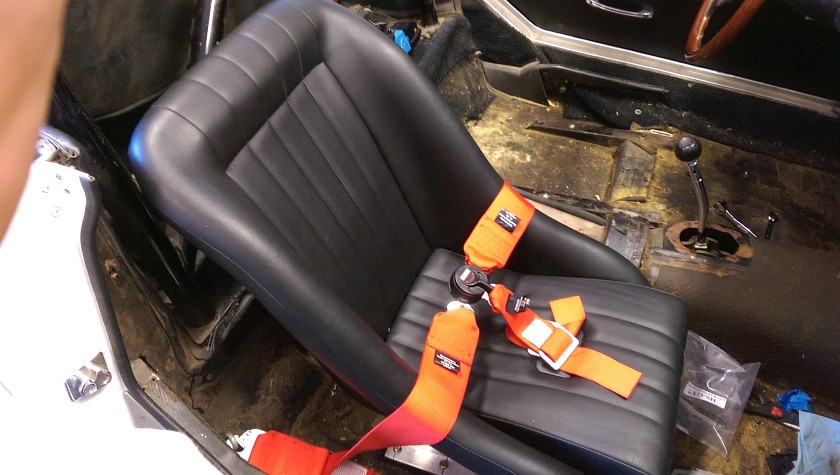
Vintage Cobra Seat Anti-submarine Belt Install


After installing the Cobra seats (that's the name of the company not the car) in the Sunbeam Tiger project I never
realized that it didn't have an anti-sub belt slot. What's an anti-sub belt slot? Well it's the place right under your crotch
that you pass one or two belts though to typically the floor board of your vehicle. These are typically included on 5 and
6 point harnessed. The purpose of this belt (in my mind) is to do a couple of things, one is to keep you from sliding
out of the seat as well as keeping the lap belt at the correct height. No mention of crunching up your privates will be
made here. Below is the simple step by step process I used to install the 'grommet' for the porthole for the sub-belt
(s).

As with all safety systems please follow the manufacturers directions, and my disclaimer is that I'm NOT AN
EXPERT IN THIS AREA SO DO NOT TAKE THIS AS THE PROPER WAY TO DO IT, BUT JUST THE WAY I
DID IT TO SHOW AN EXAMPLE. BE SAFE TALK TO THE MANUFACTURER OF YOUR HARNESS IF YOU
HAVE ANY QUESTIONS!

Tools and Supplies Needed

Sharp Razor Knife
Tape Measure
Sharpie
Long Screwdriver or stick
3M Blue Tape (all project will need blue tape if that's not already been said...)
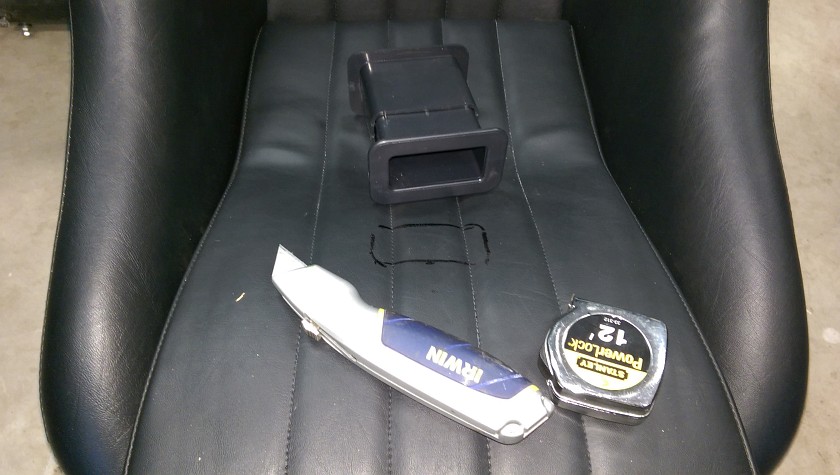
Marking Cobra seat
Start Cutting Your New Seat

Measuring and Marking Cut out for Anti-Sub Belt


The best way that I could figure this out was to go to a seat that had one and see where it ended up when I sat in it. The hole was a bit in front of my crotch, I measured from the back of the seat so I could duplicate it on the second seat when I get to it.
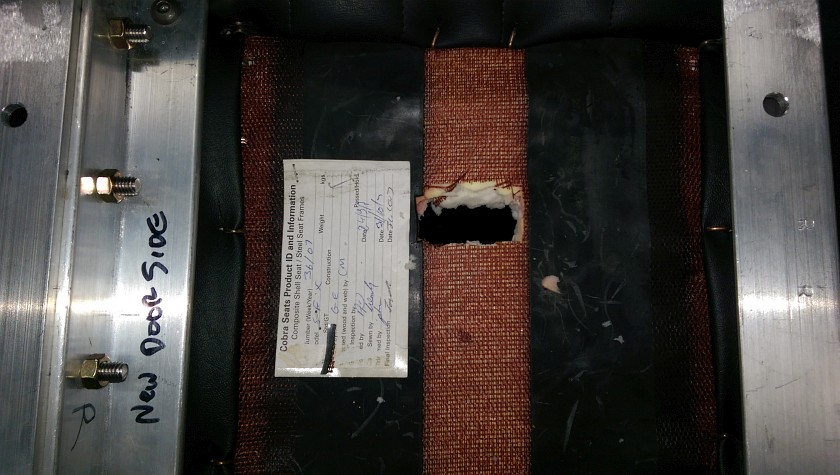
Cobra Seat Finished Bottom Cut

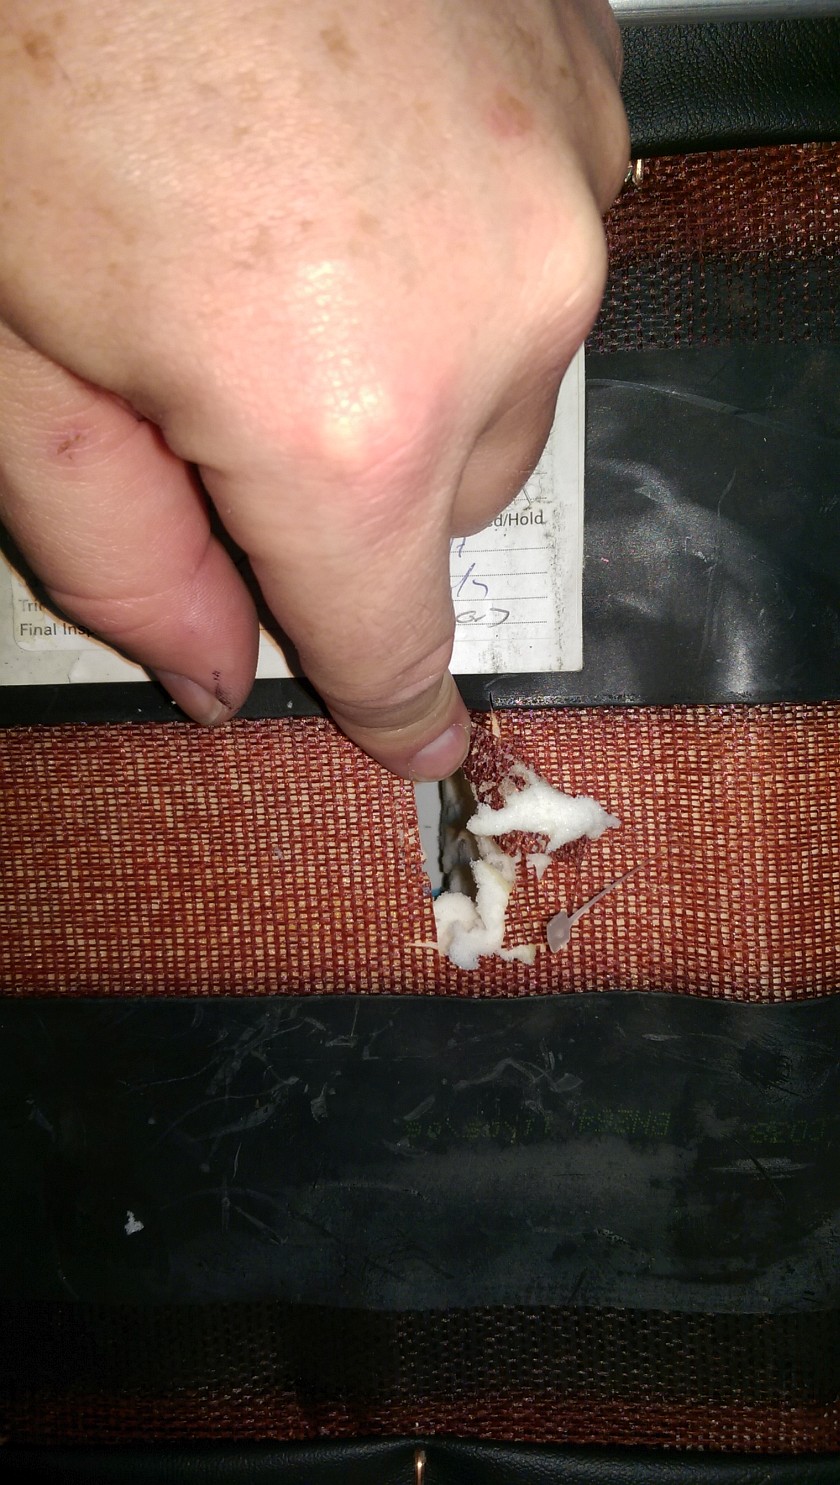
Bottom of seats webbing


Once you get to the bottom you will see the outline where you poked though. Mark where you need to cut. You may need to put the grommet in the top to get a feel for where it needs to be cut. Try to steer clear of the rubber belts if you can, although on my install I had to cut a tick into them.
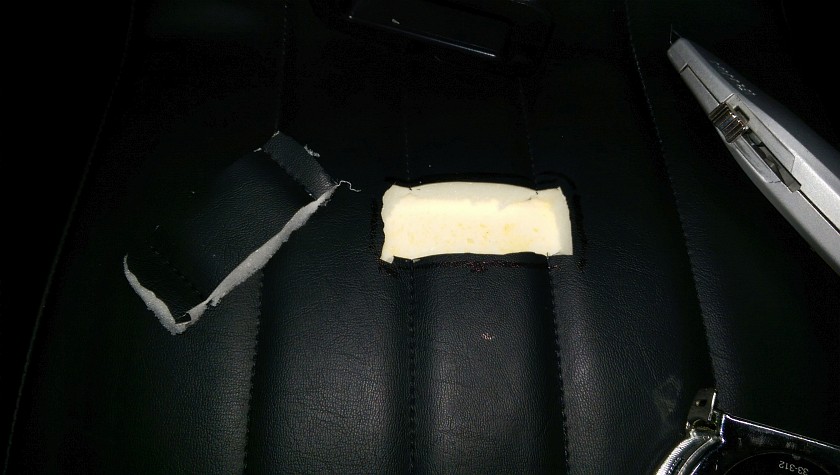
Cutting Seat Foam
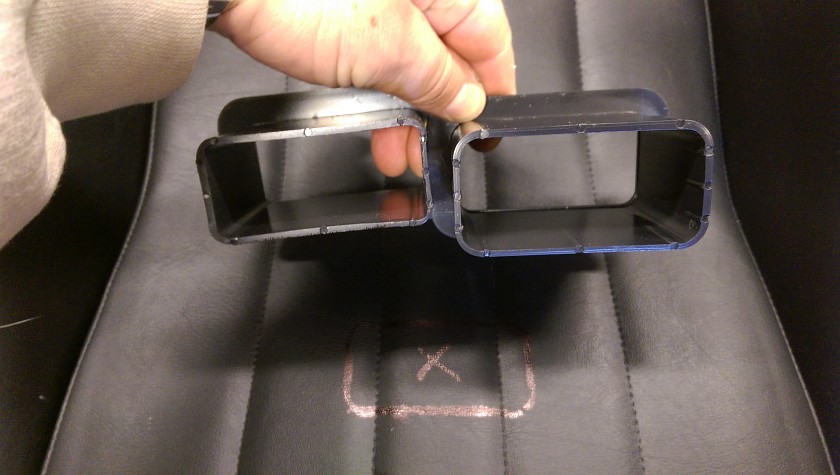
Seat Grommet for Anti-Sub Belt

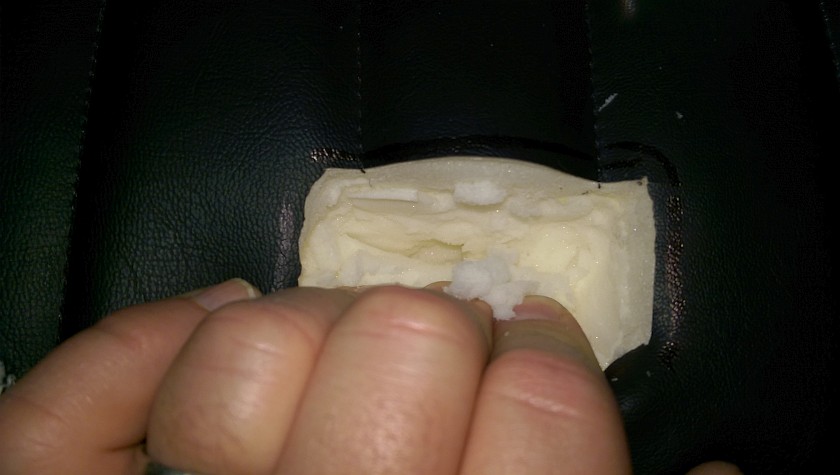
Cutting Seat Foam


As you start cutting you might find the foam tearing instead of cutting. If you hold things tight as you cut down through the thick foam it will help. Cut out a full rectangle and then rip it out, as you get lower and lower until you hit the webbing. These seats do not have any metal in the webbing on the bottom of the seat so be careful if yours does and think how the cut will be positioned. If you are thinking that now, you are likely too late.

Cobra Seat Finished Bottom Cut


After a bit more trimming (again leave somewhat smaller then the grommet) here is the final cut. Note I had to cut a tick into the rubber strapping, not enough to worry however.
Bottom of seats webbing
Top Installed Anti-Sub Grommet

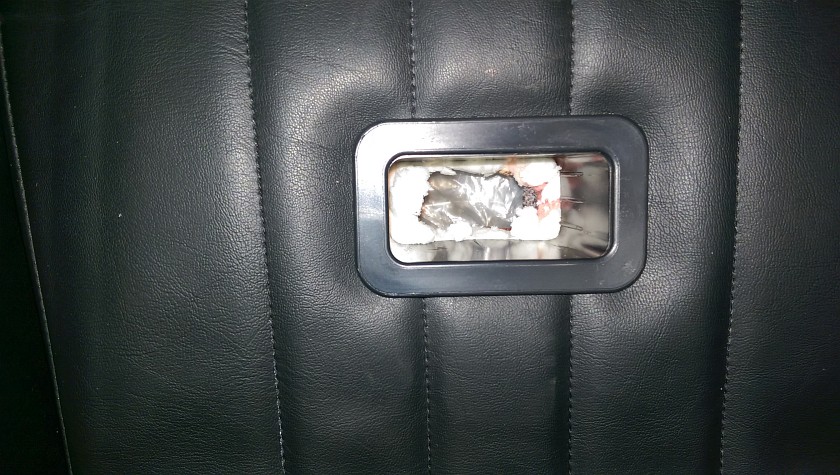
Installed Top Grommet


Once done wtih the bottom cut carefully install the top part. This will be the smaller sized part, so you won't see the overlap on the 2 parts as it will face down. As you install the grommet through the material it should not be tearing, but should fit snugly stretching the material a bit as it pushes though
Bottom Installed Anti-Sub Grommet

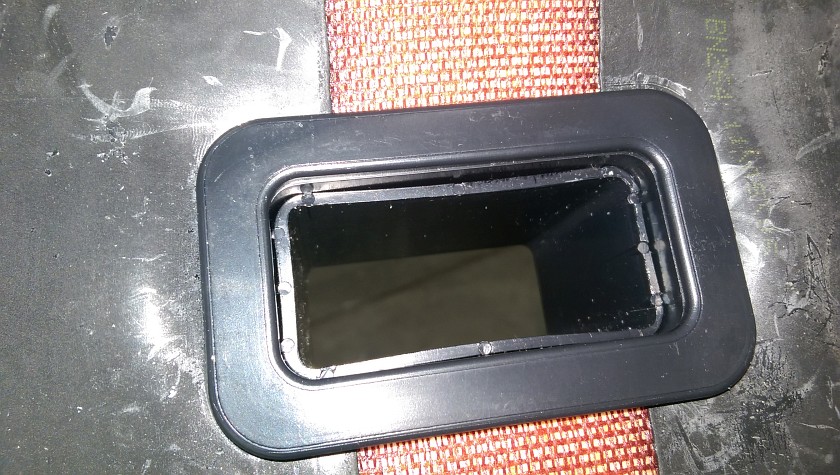
Installed Bottom Grommet Half


See, this is why you want the bottom half to be the larger half. You don't want to look at this when viewing the seat from the top. My grommet halves fit tightly and held very well with no pull out. If yours don't, you might try a very little PVC glue on the bottom part were they fit together. Know know that it will permanent at this point. Again, my didn't need anything but a pushing together.
Custom Sharpie Marking Tool
Anti-sub Belt Completed Install

Seat Grommet


After some lengthy searching for an online source for these seat grommets, I found a place called Sector 111, here is the page link to the Seat Grommets from them. The are not inexpensive, but they had them and they were very good with quick delivery and follow up. Sector 111 Corbeau Seat grommets.

Start Cutting Your Seat!


After you mark the spot where you want, make sure you cut so the vinyl (or leather) will be tight to the smaller section of the grommet. This will ensure a nice fit when all pressed together. Note that the grommet has two different size parts, so one can fit in the other. The smaller will go through the top.
GTSparkplugs Header
Click for Contact Page Click for Contact Page

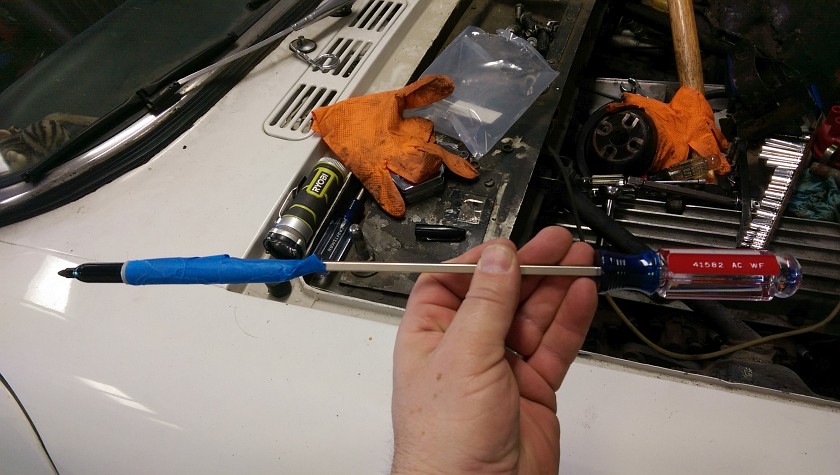
Custom Sharpie Marking Tool


See I told you the blue tape would come in handy. For the next phase of my install I needed to mark the chassis where the 'hole' ended up so I could figure out where to place my mounting points for the sub belts.
Marking Cobra Seat Location

Marking Anti-submarine Belt Opening


After re-mounting the seat (it has only one fixed position for me) I marked where the opening for the sub-belt hole would be. This will make it easier for the mounting points.

Again please see your harness instructions for safe mounting positions, this is where I chose to mount them and I make no claims to them being good.

Harness Sub-belt Mounting


Since the in my case the Sunbeam Tiger has the seats offset to the rails a bit it was a good thing I marked the opening. The eyelets and hooks fit nicely under the seat and are below any point where they could be an issue. Again check your harnesses instructions for safe mounting positions or you may die in the event of a bad wreck.
Sub-belt Harness Mounting Points

Completed Install Anti-Sub Belts


Well not totally complete as their are no shoulder belts yet. But in test fitting it seems all good. My harness is a 6 point harness and has 2 sub-belts.

Conclusion

This was a pretty easy install. The few key things are to figure out where you want to cut the hole. I would sit in the seat and mark thing with a Sharpie as you figure it out. Make sure that you won't have any trouble with running into metal in the seats. This might be more of a problem with stock style seats, but good to know before you cut things up. It important to take a few measurements once you finish your marking so you can duplicate to the second seat.

Lastly FOLLOW your harness manufacturers directions and if you have any doubt call them before doing anything.

And of course - SAFE and happy motoring!