Shelby Mustang Export Brace Support
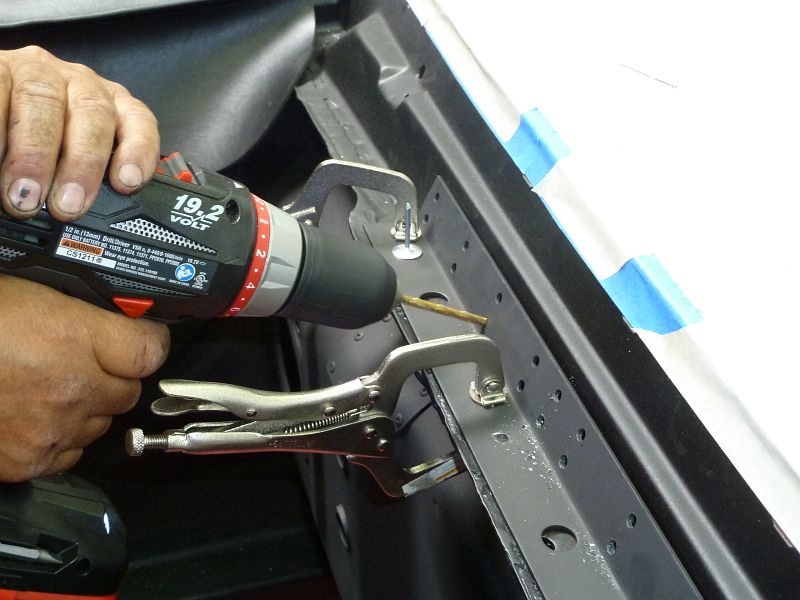
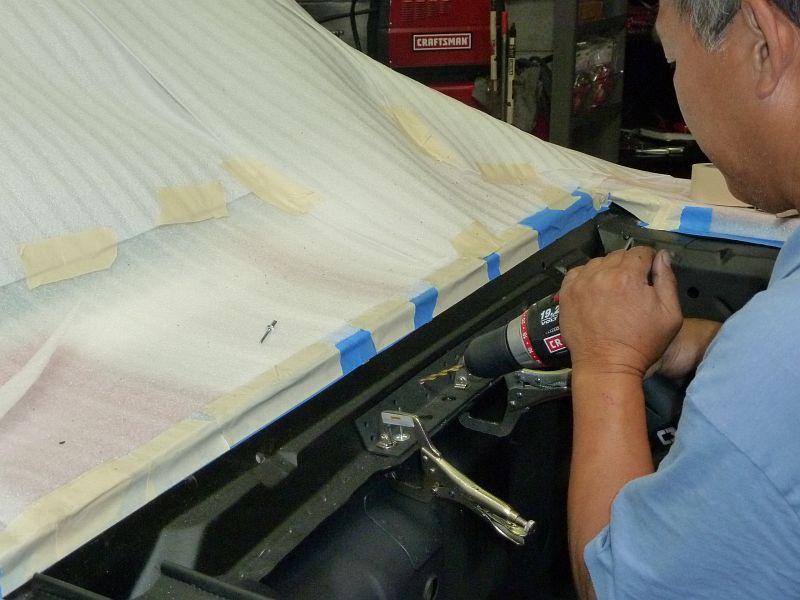
If you are doing any serious driving in your 1965-1966 Mustang (similar on other models too) one of the more effective solutions to fixing some of the chassis flex is the addition of an after market Export Brace. One problem that the old Shelby folks found was that the additional forces on the cowl sheet metal was not a good thing as it was thin and not supported well to keep it from flexing. Their solution was a metal brace that connected the lip of the cowl to the back of the cowl to tie it all together. Pretty simple, and I would expect you could make your own, but the one I used was inexpensive and had the correct 'tweak' to it. Again nothing you couldn't do with a bit of hammering, just easy to get the right part. I used 3/16" rivets on this project as it will see a lot of load, stainless is your best bet. Shelby American in their installation just welded up the bracket and was done. This way is just as strong and requires no welding or paint burning! The Shelby GT350 is a nice car, but nothing more then a Mustang with a few easy to add bits and pieces. Get moving you can do this yourself!
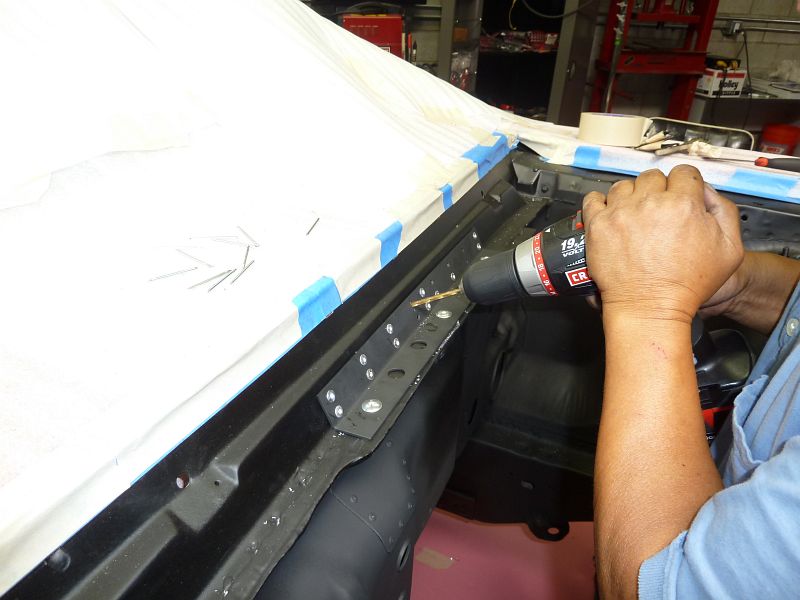
Note if you are looking to keep this a bolt on deal forget it.The original Shelby folks welded this into place. My installation is not quite as bad, but will leave some non-removable marks. The work in the pictures below was done for the Craftsman Restoration Roll Out Mustang that I did a while back. I initially did the same on The Ripper. Special thanks to Dale for the help on this install while I took pictures.
Ford Falcon Note:
Also note from one of the readers (or web views) I have been told that this is similar to how the Ford Falcon install goes, but with a different export brace. Your mileage may vary on the Falcon install as I can't attest to it but the Falcon and Mustang are close siblings so would not be too far a stretch.

Mustang Export Brace
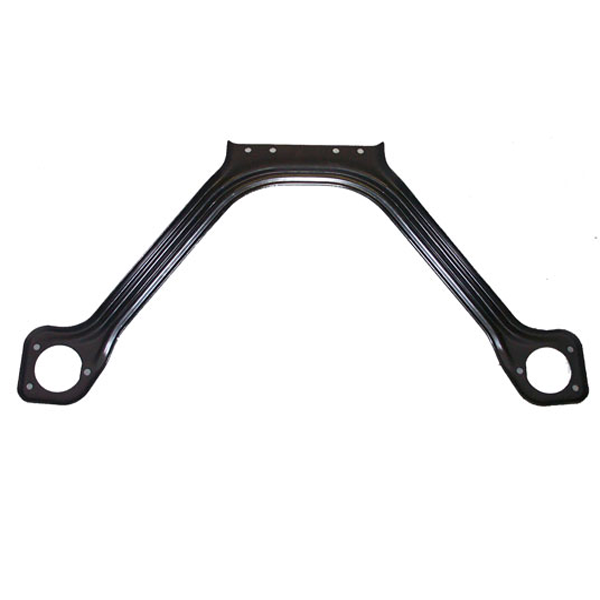
This is a shot of the typical stock export brace. You can get them in a few different finishes like Chrome, or styles like billet aluminum. They basically all do the same thing and tie the flimsy Mustang chassis together. If you do get one of the fancy ones with rod ends make sure you get all the parts that make it triangulate to the Monte Carlo bar otherwise they will be much less effective. You can also see the spacing for the mounting hole, this one is the 'un-even' style. Make sure you get the correct one for your chassis. Also you still will likely be doing some drilling as the holes don't always align well, especially after you install the support.
Rivet Tool
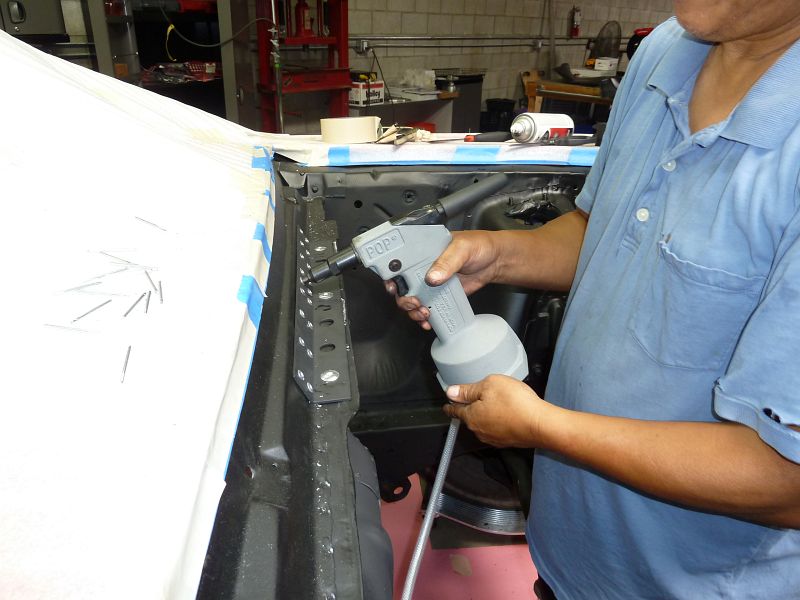
I used an air rivet tool to make the job easy. If you are using Stainless rivets you might find that you will need a break as they take a lot of strength with a regular gun. The air gun makes of quick work of them, and figured a good reason to have the tool.
NOTE ABOUT RIVET SIZE
Used the larger 3/16" rivets for this project as the typical 1/8" seemed too weak and small for something that is potentially highly stressed. I would not use plain steel since rust is not your friend and it is difficult to get into the cowl of the Mustang so your best bet is Stainless, second would be Aluminum with aluminum mandrel.
Final Fitment
Once the brace is instally you may need to drill out the 4 bottom holes to make them match the cowl. In this car they were off about 3/8" on all of them. Use the brace as your guide, do not drill new holes on the brace. Other then that it's add you choice of export brace and start the bolting back in. Start by putting the export brace on the shock towers and toss a couple of nuts on the studs. If you find it difficult to get things aligned it's best to keep all bolts loose and use a screwdriver (large phillips works well) to help moving things into place. Sometimes jacking up the car in odd ways can help too.
One last thing is if you car had welded on supports like many did you will need to use an angle grinder (messy) to remove the welded on versions from the shock towers. The car in the above photo was gutted so it was an easy task. It was also done on the Ripper Mustang as well.
The parts pictured were purchased from Tony D. Branda and were very inexpensive vs. the time it would take to make your own, unless you have plenty of free time!


