Excursion, Expedition, Explorer Steering Wheel Swap


If you have a leather steering wheel on your Ford Truck or SUV it's likely getting pretty worn. You have a few options,
one is a steering wheel cover. I hate those stupid things, but they work find for a lot of folks. If you are good you can
pull the wheel yourself and re-do the leather. It's not for the faint of heart, but I have done it on a simple Leather wheel
on a sports car. The more modern wheels seem more complicated, they have switches, some with wood trim, etc. My
plan was to see if I could find a NOS Ford wheel for the Excursion. Figured would be easy since it's the same as the
F250 and F350 Super Duty  trucks.Their seems to be a lot of NOS wheels, but non with the extended controls (A/C,
Radio, Cruise, etc). I did find a couple of places that sell them refurbished, but they were expensive as they factor in
the cost of a new (or refurbished) steering wheel. In looking around I found a guy on eBay that would just recover mine.
Still not cheap, but under $200. So I had picked up a cheap wheel to stick on the truck while I drive it and will send that
wheel out for repair.

CAUTION : THIS INVOLVES MESSING WITH THE AIRBAG. IF YOU ARE NOT COMFORTABLE DOING THAT
TAKE IT TO A SHOP THAT CAN ASSIST YOU.

Needed Tool and Supplies


Replacement Steering Wheel
8mm 1/4" drive socket and driver for Airbag bolts
T25 Torx Wrench for steering wheel trim bolts (Bondhus set is awesome)
T50 Torx Wrench for main steering wheel bolt (Low cost NEIKO worked well if you need larger sizes too)
Red Loctite 271 or other High Strength Thread Locker

** Before Starting CENTER your steering Wheel **

Torque Center Bolt to -  22-29 ft/lbs
Remove Passenger Battery Connection
GTSparkplugs Header
Click for Contact Page Click for Contact Page

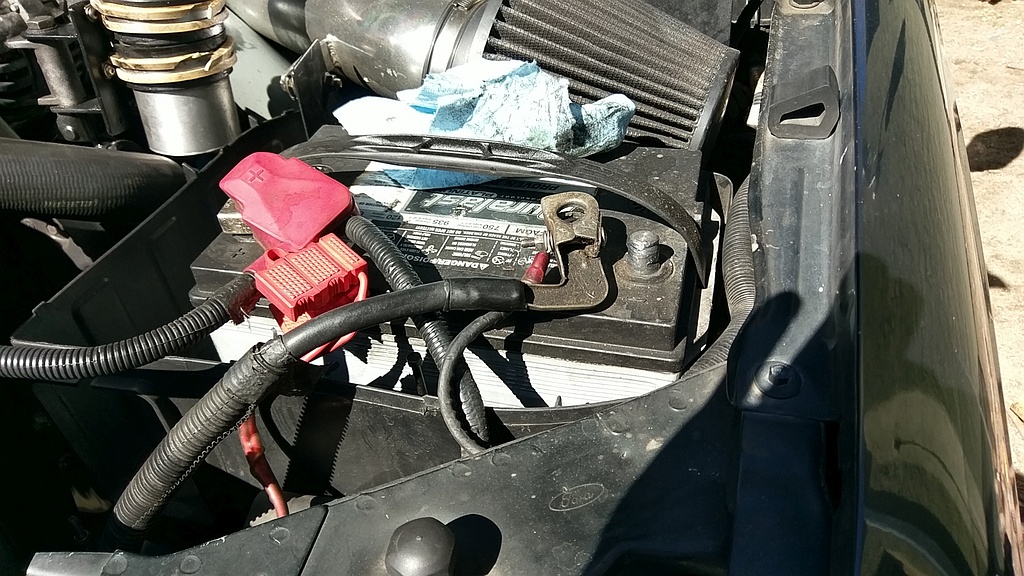
Remove Battery Connections


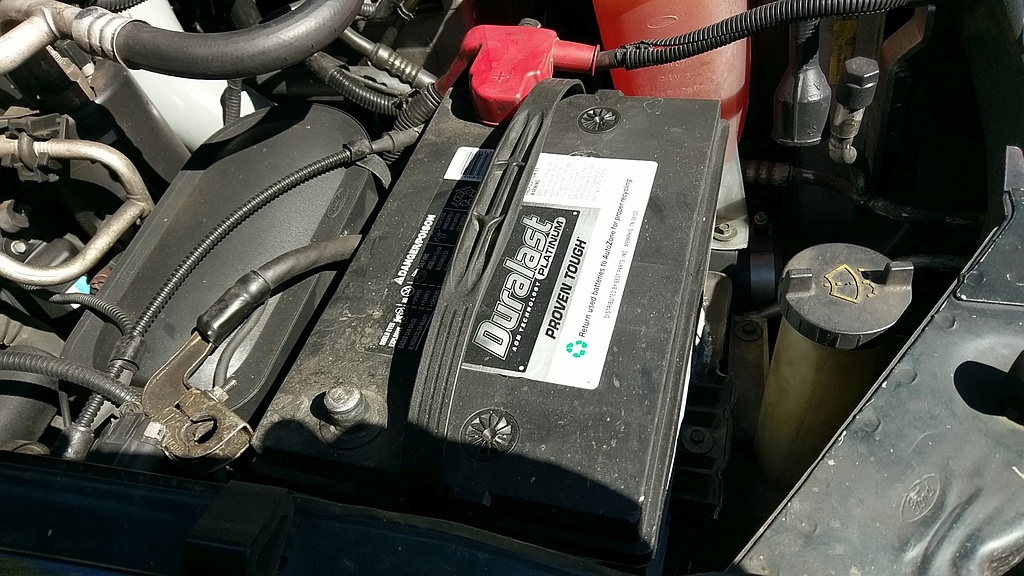
Before stating this project you should remove the battery connections. NOTE if you have a Diesel you will likely have 2 batteries, make sure you remove the ground connections from each battery. This will ensure you have no power as the airbag is triggered by electricity! You should also wait at least 5 or 10 minutes for any possible charges to dissipate before messing with the airbag.

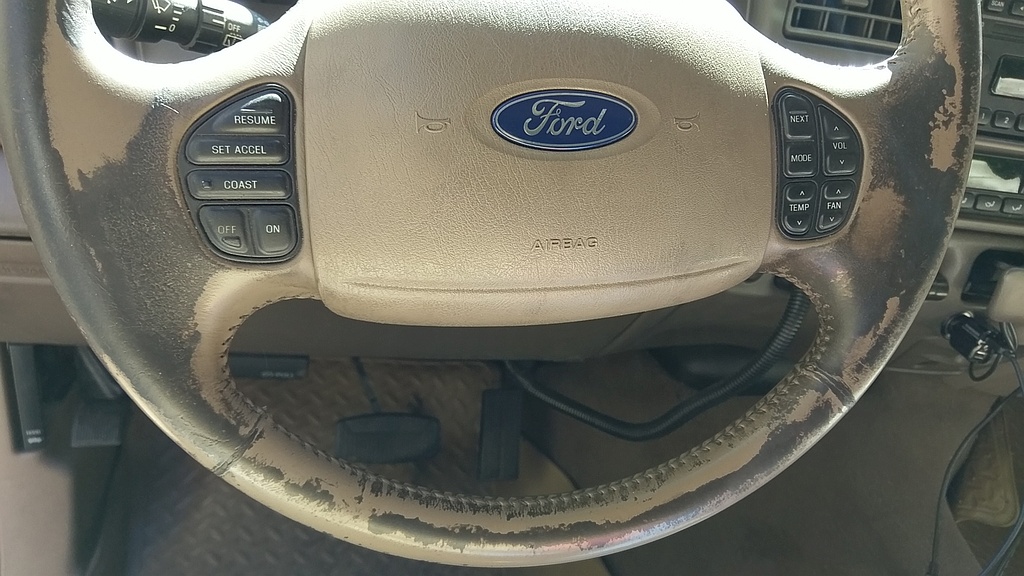
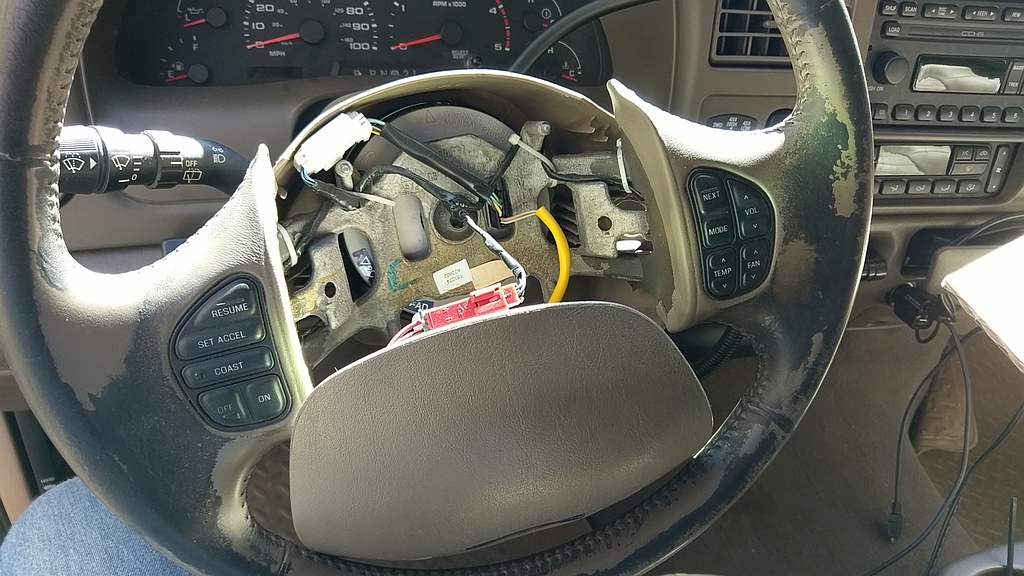
My Tired Excursion Steering Wheel


After 15 years of service the leather has started to decompose. Not much to do be remove it and have it re-covered. Things that can also impact the life of your steering wheel are sharp rings, sweaty hands, dirty grubby $hit head mechanics that don't wipe their hands before a test drive...
Tired Excursion Steering Wheel

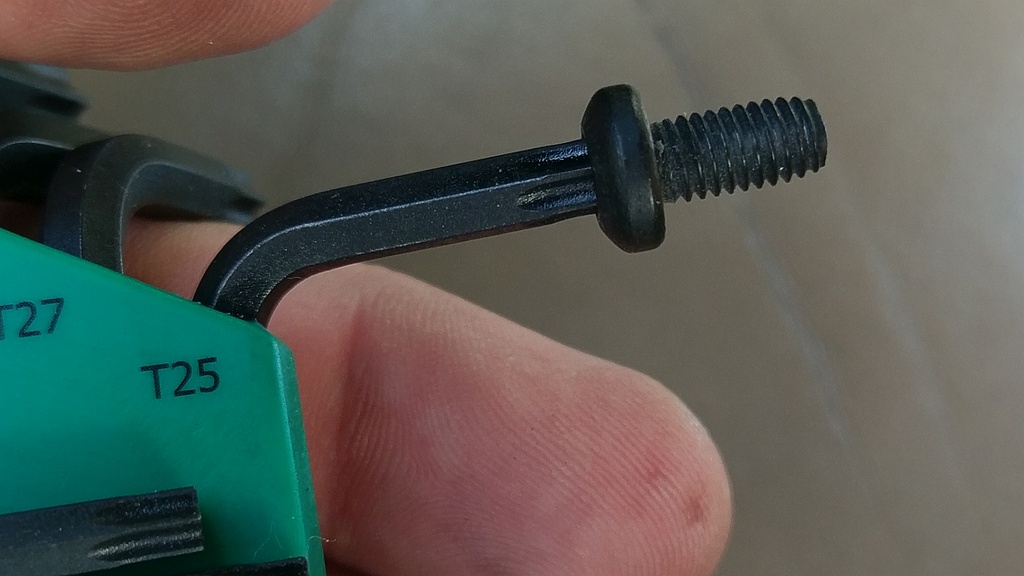
Closer Look at the Trim Bolt


This is the bolt you are trying to remove, again a Torx T25 bit is what I used for the Excursion.
Torx Trim Bolt

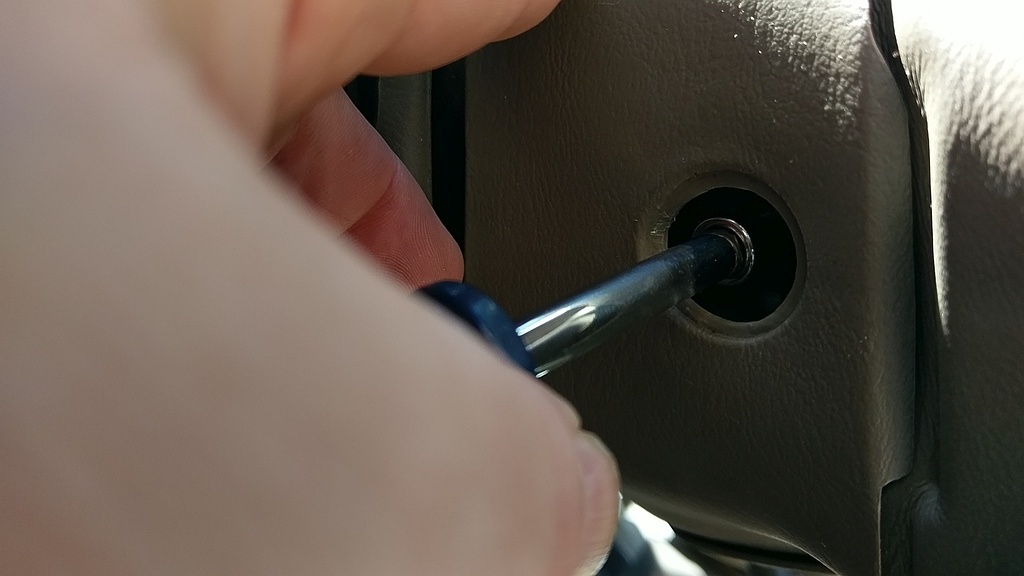
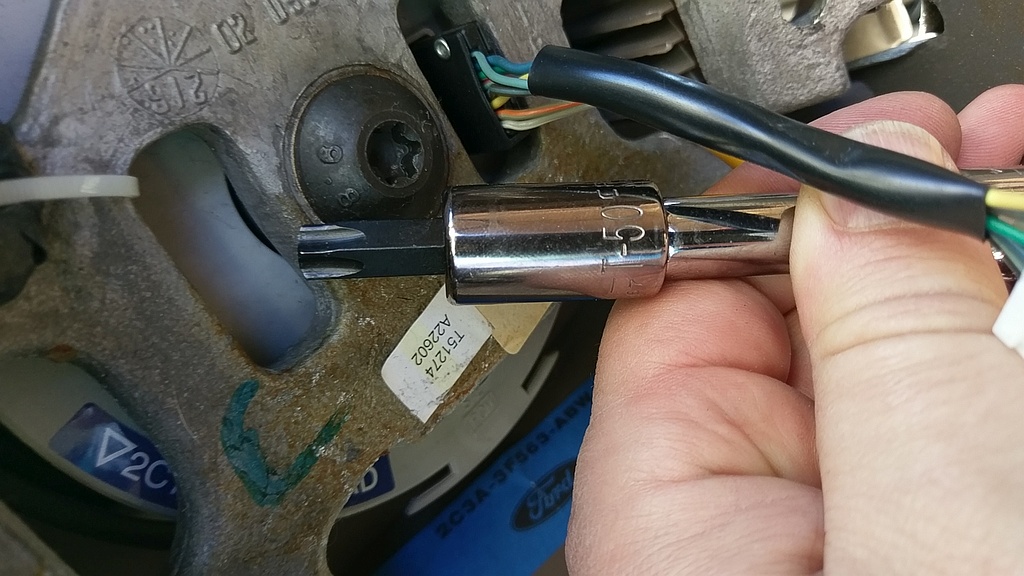
Remove Airbag Bolts


Now we need to switch to an 8mm socket. I used a 1/4" nut driver to get at them. If they are stubborn you may need to use a ratchet with an extension to get them out. Note the angle. These go in differently than the trim bolts. Use a small flashlight to peek inside if you can't get it.
Remove Airbag Bolts

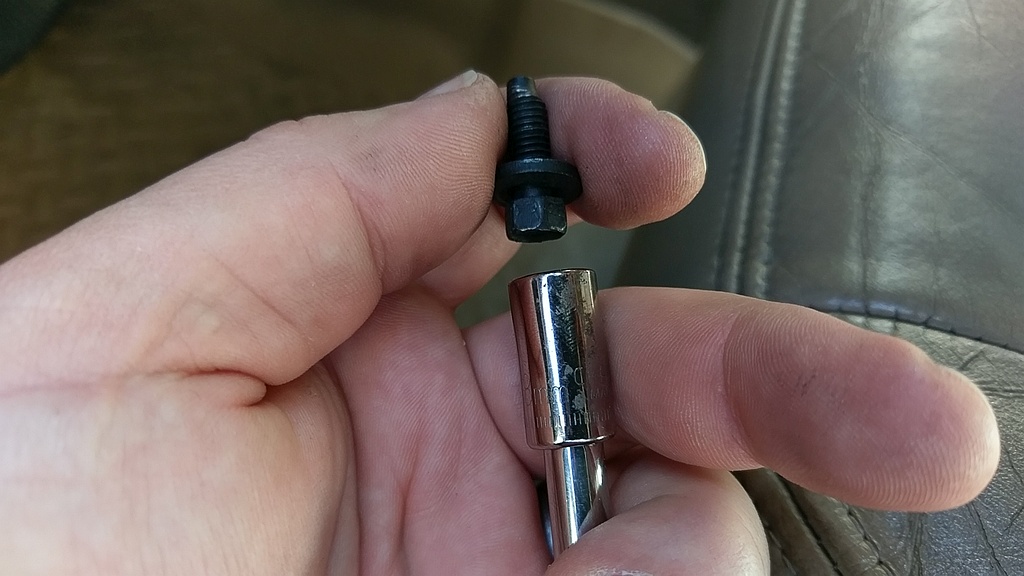
Remove Both Airbag Bolts


Their are 2 bolts that hold in the Airbag assembly. In my case they were 8mm as I mentioned.
Airbag Bolts

Remove Airbag to Expose Wiring


Now you need to do some electrical work. Relax, it's not too bad. Their are a few connectors that need to be removed on the airbag assembly. Hopefully your battery (or batteries) are disconnected before messing with this stuff.

Just be careful not to pull or strain any of the wires.
Remove Airbag

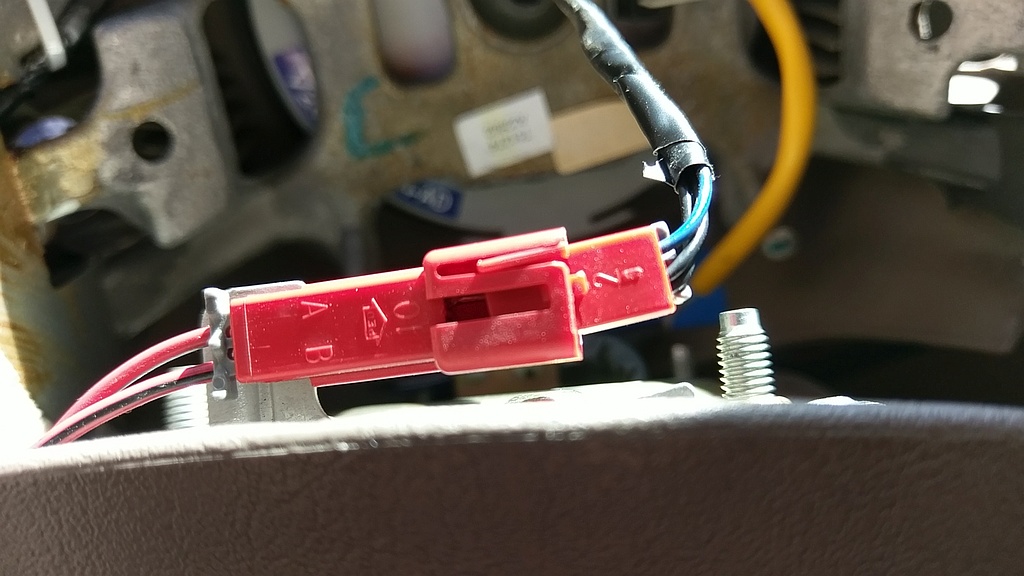
Airbag Main Connector


I'm guessing this is the main connector to blow the airbag. It's red so it must be important. Be careful with this connector as it's mounted to a sheet metal bracket. You may have to squeeze and wiggle (CAREFULLY) a small screwdriver to get it to disconnect.
Airbag Connector

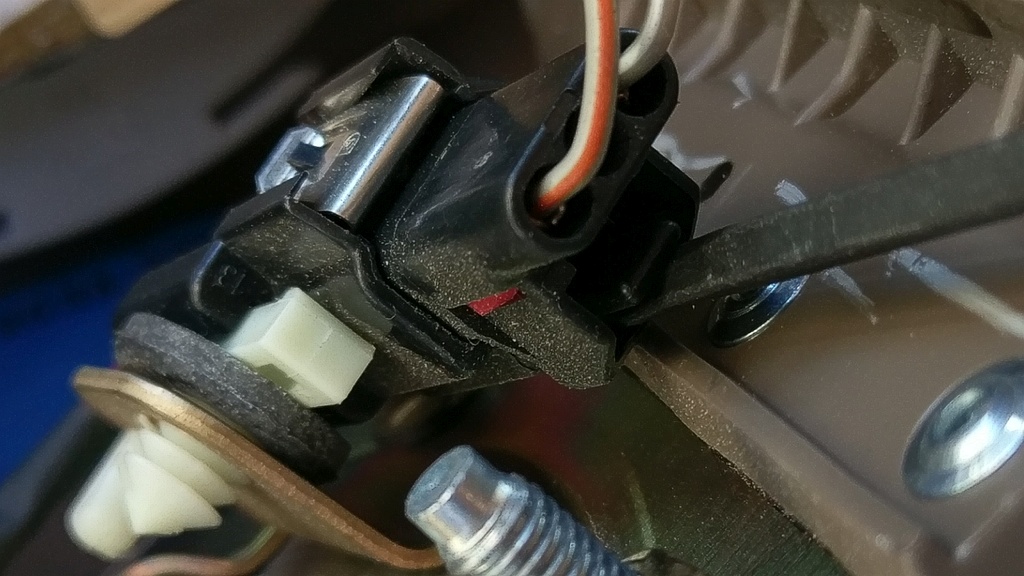
Larger Power Connector


Not sure if this is a main power connector or Horn connector. But it must also be removed. This one is pretty easy, just carefully shove (like that term) small screwdriver as shown above. The little clip will bend in and you can pull apart the connector. This should free the airbag from the steering wheel..
Steering Wheel Horn Connector
Remove Driver Battery Connection
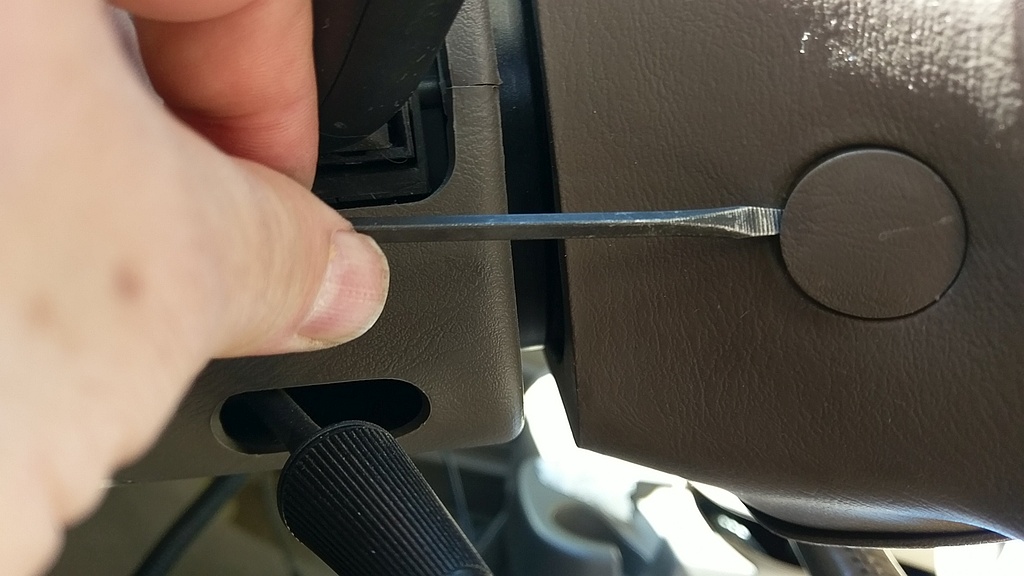
Remove Trim Caps

Remove Steering Wheel Trim Caps


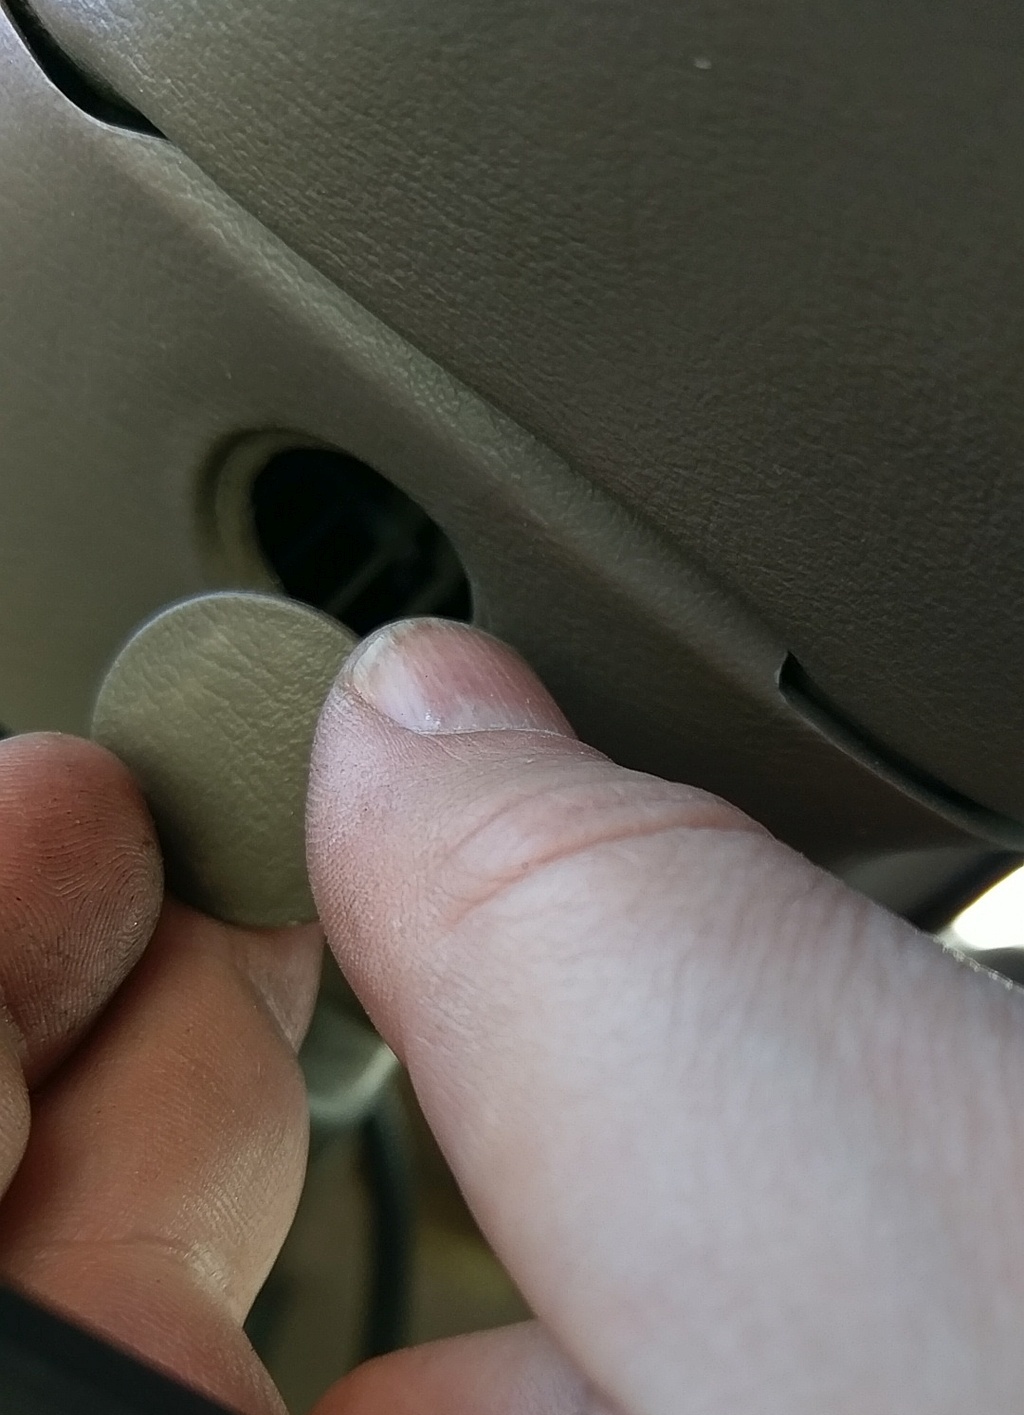
Their are 2 of these trim caps behind the steering wheel. You model might be slightly different but on the Excursion and Super Duty Trucks this is what is looks like. Use a small thin screwdriver or other similar tool to pop the plastic cap off. Their are one on each side.
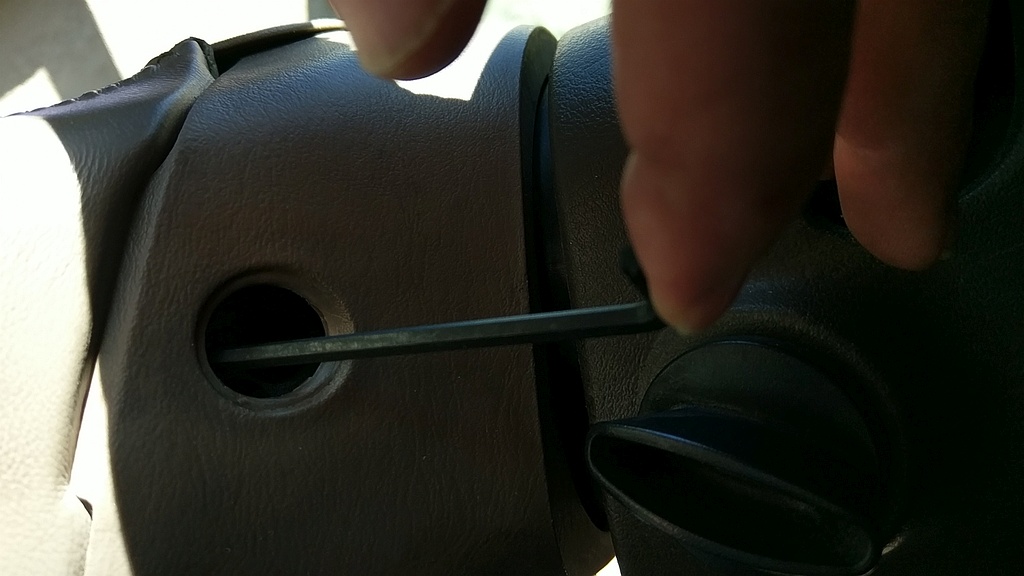
Remove Trim Screws

Remove Trim Screws


On each side of the wheel are 2 small Torx screws that hold the plastic trim (The thing with the hole in it above). These are Torx T25. You may have to fish around to get the wrench into them, but they god in almost at a straight angle as shown. You may have to muscle the wheel (after unlicking the steering column) to get the wrench in.

It might be fine to NOT remove these if you can get to the airbag bolts (coming up). I just did as it allows more movement in getting the socket in to get at the bolts.
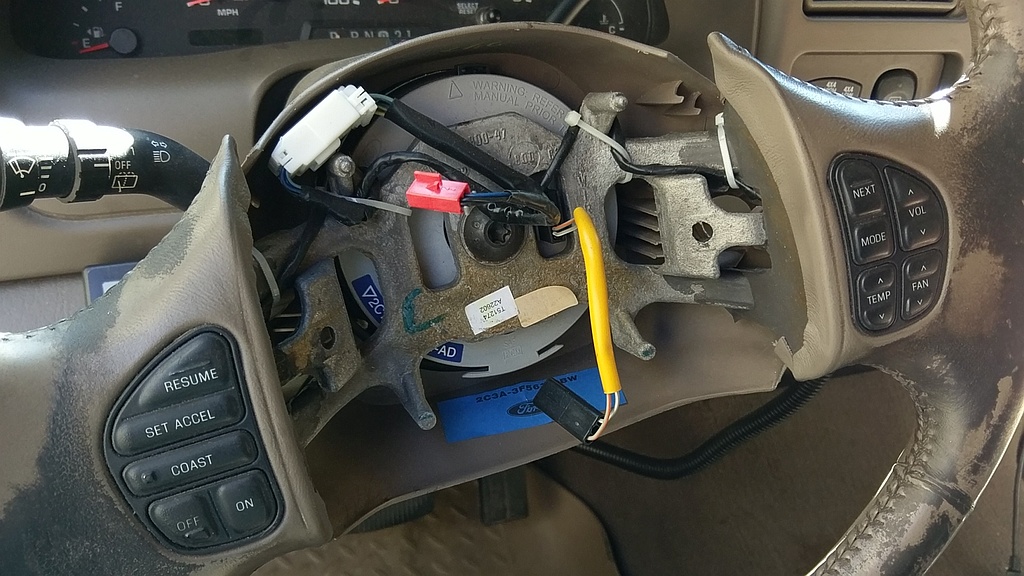
Airbag Removed

Airbag Now Removed From Steering Wheel


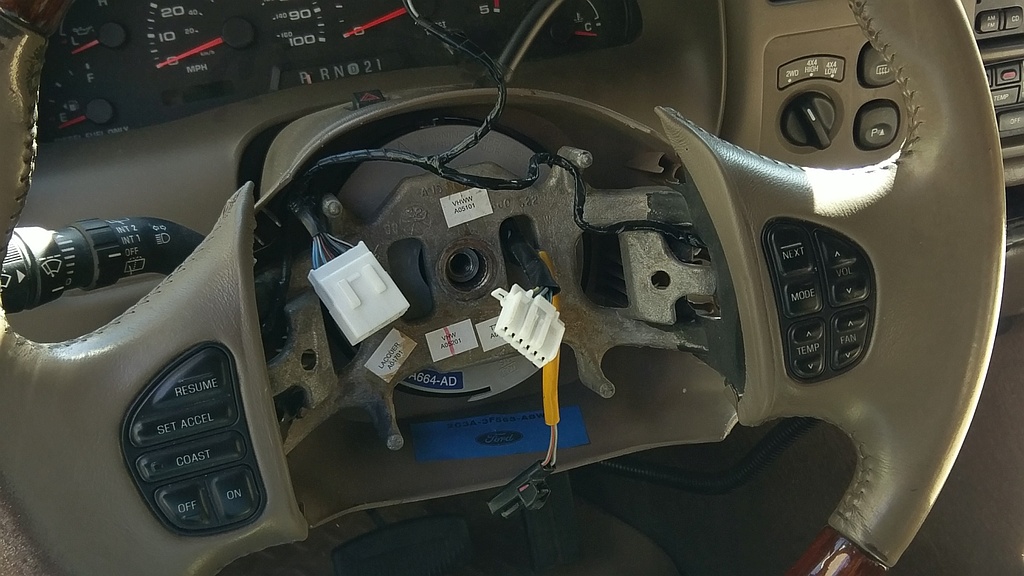
After the last connector you should be able to remove the airbag and place safely aside. This will expose a few things, one is that their are yet one more connector (White, in upper left of wheel), and the Torx bolt that holds the wheel on the steering shaft.
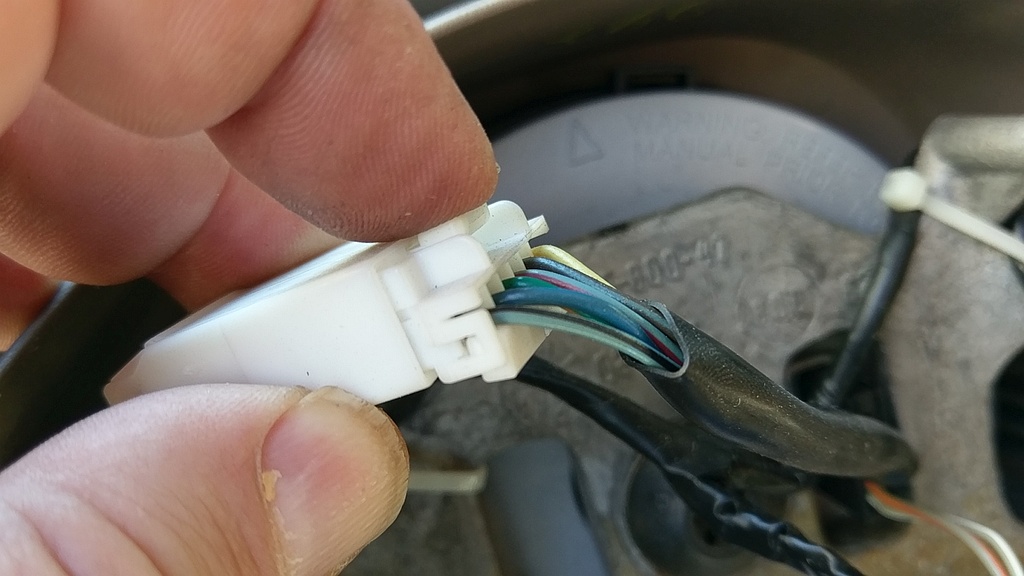
Steering Wheel Control Harness

Steering Wheel Control Connector


This is the last connector that needs to be unplugged. My steering wheel has the extended controls, but I would imagine the regular steering wheel with controls will have something similar. Just press in the tab and carefully pull apart.

Remove Steering Wheel Center Bolt


In the Excursion and Super Duty trucks these end up being a Torx T-50 bit. This bolt is held in pretty tight and also to make it a bit tougher to remove it has some Loctite goop on it. You may need someone to hold the wheel to get the break away torque. It's also a good idea to try to keep the wheel pretty straight so you can keep things easy to re-assemble
Remove Steering Wheel Bolt
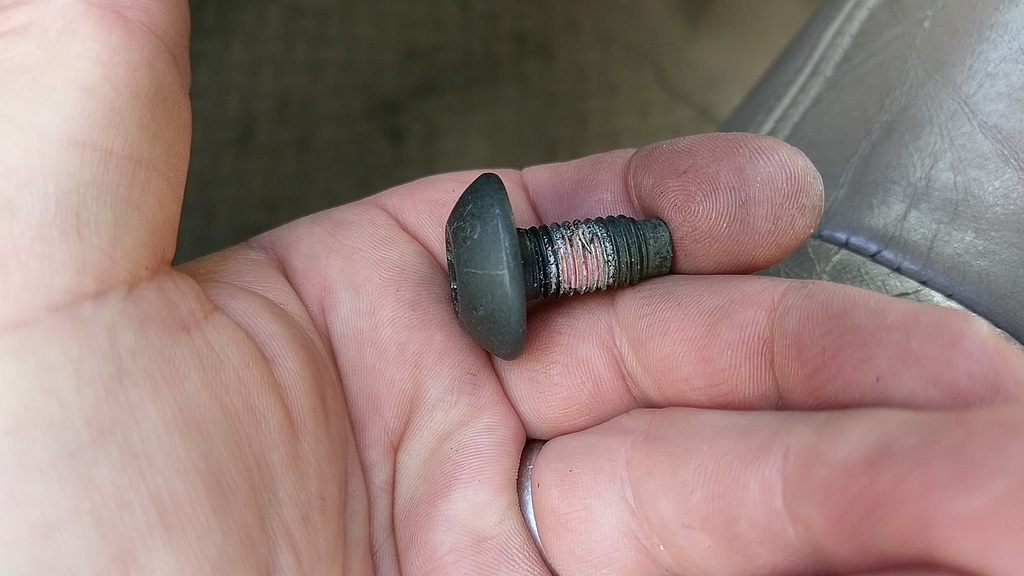
Steering Wheel Bolt

Steering Wheel Center Bolt


In all it's glory, the Torx bolt that holds the steering wheel on the splined steering shaft. NOTE the Locktite (Or locking compound of choice) that was used. It's a good idea to wipe clean and re-apply when re-assembling.
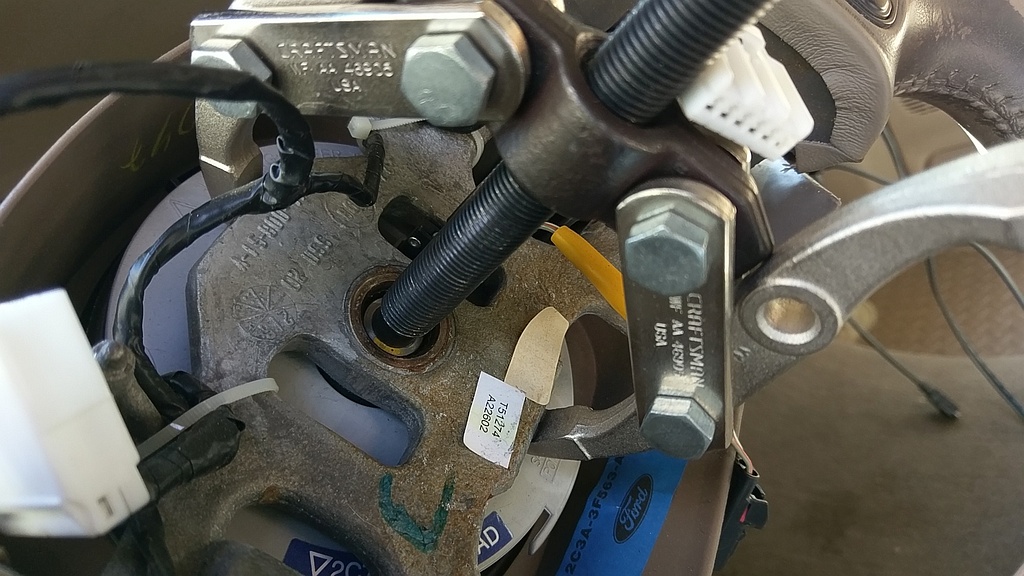
Steering Wheel Puller HACK

Steering Wheel Puller - HACK DON'T DO THIS


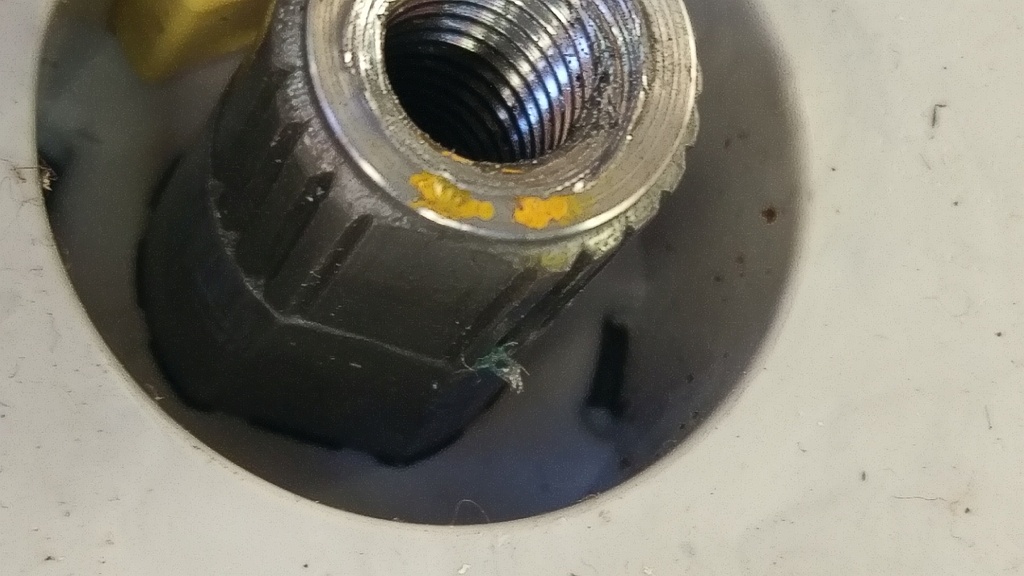
I didn't have a steering wheel puller, so I used one of the gear pullers that I had. I thought this was going to work out fine since the steering shaft has a nice chamfer that fit the puller well.

WRONG

While the tool made haste with removing the wheel it did gouge up the first couple of threads. It made it difficult to re-install the bolt. After I cleaned up the threads a bit, all was fine.

Lesson here is use the right tool or make a spaces that will not damage the threads.

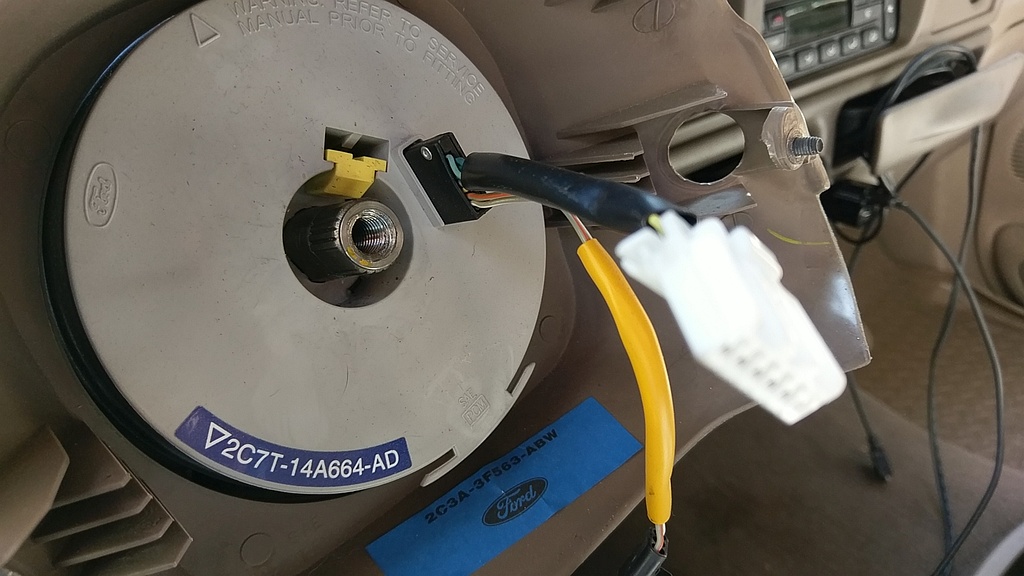
Steering Wheel Removed!


This is the view with the wheel removed. You mist align the connectors to allow them to pull through the opening in the wheel. Otherwise you are almost home!

One things to see is in the upper right corner is the plastic trim fasteners. You can re-insert them and screw them into the plastic part which will make for easy re-assembly. If you holes are stripped clean, you can't do it, mine were OK.
Steering Wheel Removed!
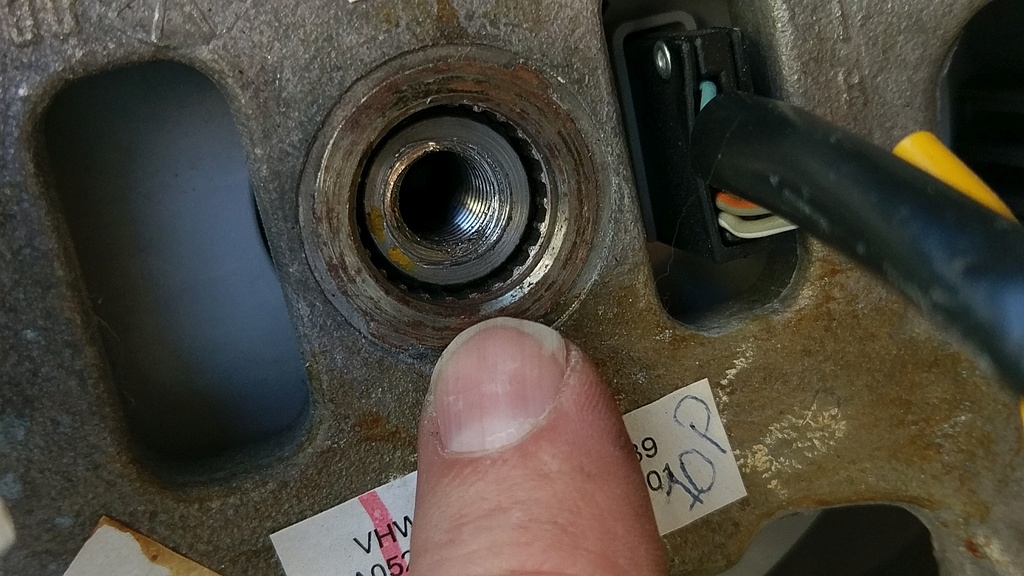
Steering Shaft Splines

Steering Shaft Splines


This is a close view of the steering shaft. You can see some of the thread mangling  I did. More important you can see one of the two flats that are on the steering shaft. I think the wheel will fit either way. That's why I said to try to keep the wheel pretty straight so no confusion on how it goes back. Might be a good idea to double check before putting everything back together that the wheels are steering wheels are all in the right orientation!
Reinstalling Steering Wheel

Reinstalling New Steering Wheel


Well, new to me anyways. It's pretty much the reverse. Feed connectors through the opening in the bottom of the wheel.  Place the wheel on the steering shaft, making sure it in the proper orientation and over the spine correctly. You should be able to push it down about 1/2 way or so.
Align Steering Shaft Splines

Align Splines - Double Check


Before torqueing things down, make sure the wheel is positioned correctly and that the splines are aligned up. Once all good it's time to start thinking about re-wiring all the connectors.

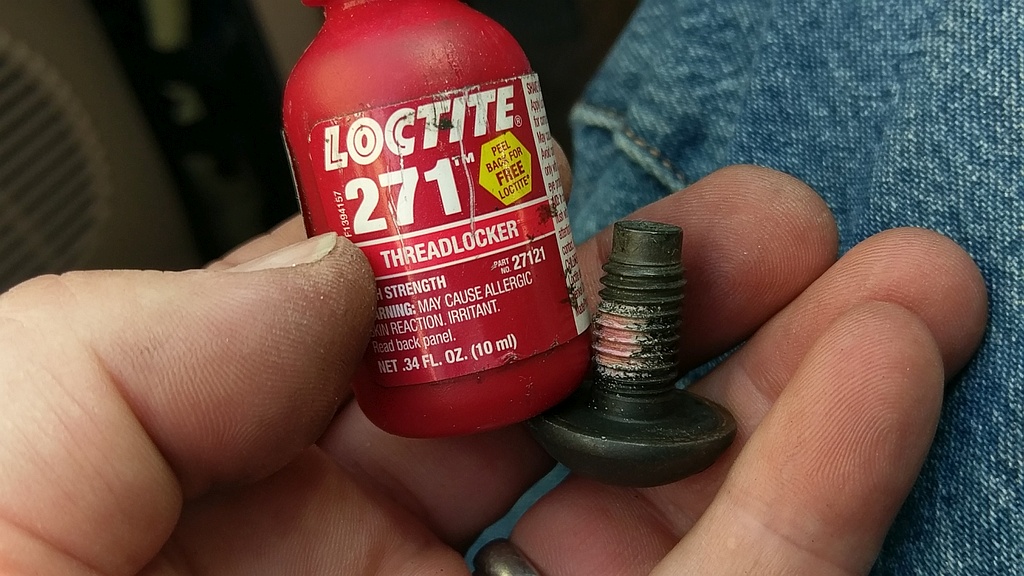
Locktite The Steering Bolt


Like the factory, I will re-apply some Loctite 271 (High Strength). Their are a few different types, but any `High Strength` version of locking compound should work.
Locktite Steering Bolt
Bolt in Airbag

Reinstall


After the wires are re-connected, time to bolt back in the Airbag. Using the 8mm socket do your magic to bolt it back in. Once that is done, re-fasten the 2 smaller Torx screws that hold the plastic trim to the wheel.


Conclusion


This is a pretty easy project. Other than the looming danger of the airbag itself (See warning at top of page) this is a very easy project. For steering wheels check out eBay or auto upholsters in your area as they may be able to do the recovering job for your. Nothing like a new steering wheel when driving!

Happy and Safe Motoring, get your projects done!