Excursion and Super Duty Shifter Replacement
If you have an Automatic Excursion or Super Duty truck from the 1999-2005 era this might apply to you. My Excursion
is an early 2003 version with the 7.3L PSD. After about 15 Year I jumped in the truck and backed out of my driveway. I
hit the gas and nothing. Looked at the gauges and nothing reading! What the @#$^%???
Well after checking out some of the Ford forums and the Ultra-web I found that due to a wire rubbing from the shifter
(Or as some call it the Shift Lever) will blow a fuse that controls gauges and the throttle of all things. So what do I do,
toss in a fuse, order a box and get back to driving. That's not the best idea, but after a couple of days of replacing
fuses my parts came in.
You can fix the old one with some careful soldering depending on where your short happened and how bad it is, but I
decided to just replace the assembly, maybe get another 15 or 20 years out of it. Cost for an OEM replacement is
about 70 Bucks, less if you get non-OEM. Or Just unplug the harness and that's free.
CAUTION : You may need to have the car in neutral so make sure you set the Emergency brake and block
tires so they can't roll. Lastly YOU SHOULD DISCONNECT THE BATTERY (OR BATTERIES).
Needed Tool and Supplies
Phillips Head Screwdriver, Small Flat Head Screwdriver
Very thin flat face punch of very small phillips head to remove lock cylinder
Electrical Tape
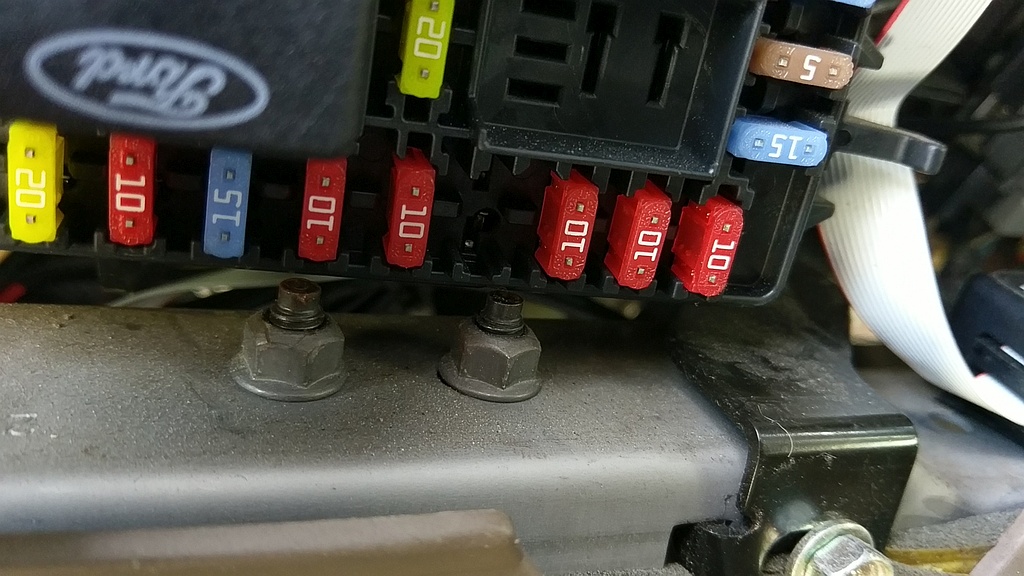
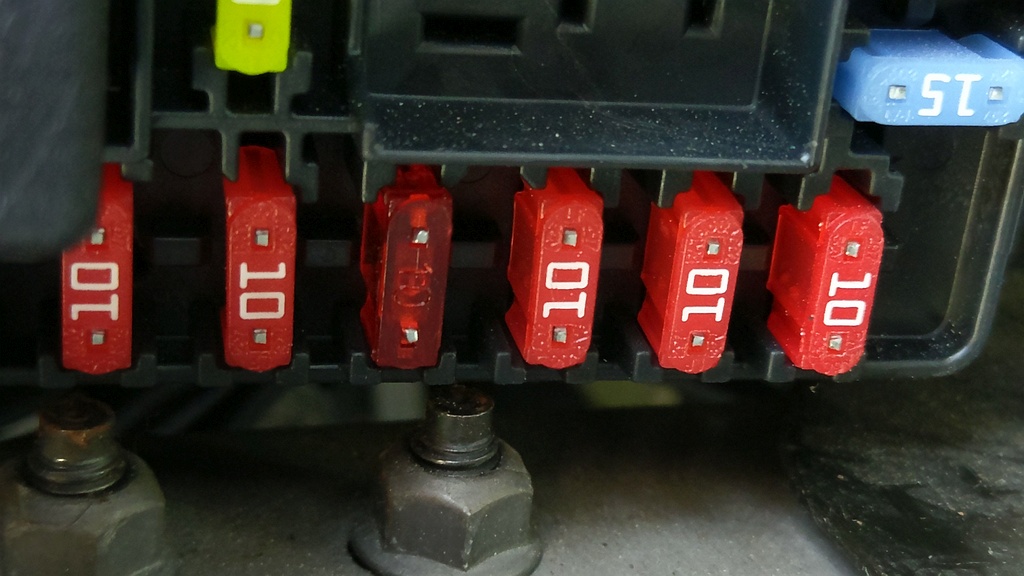
Blown Fuse Location on 2003 Excursion
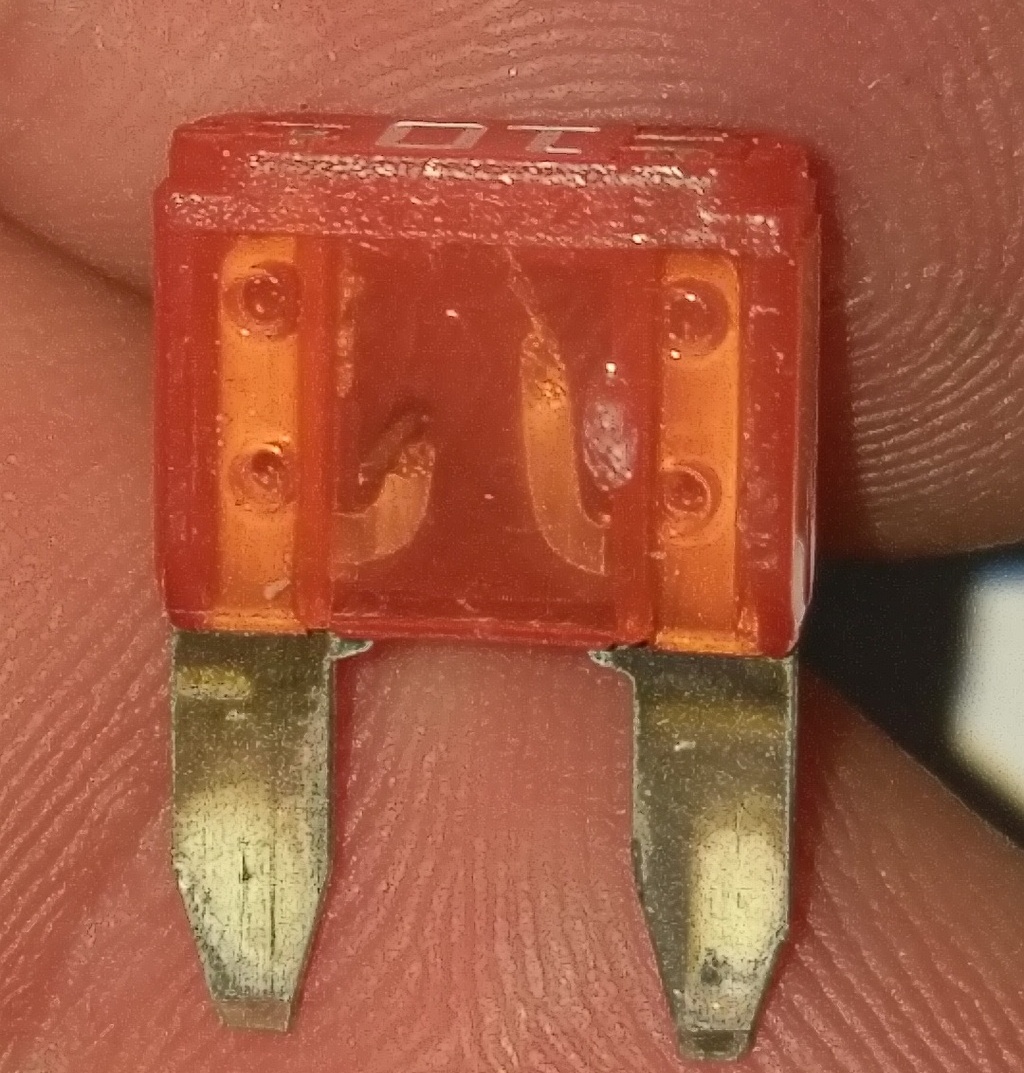
This is where a 10AMP (RED == 10 Amp) fuse was blown by the shorted shifter wiring. It's a good idea to have a bunch of spares. It seems the short happens with shifting in and out of park, and was find when driving but still could lead to a situation while driving where you have no gauges or ability to use the throttle.
Blown Fuse
This is what it looks like. It's difficult to tell with the fuse in the panel. Check your manual or online for different trucks and years as I think the position of the fuse is different on some trucks.
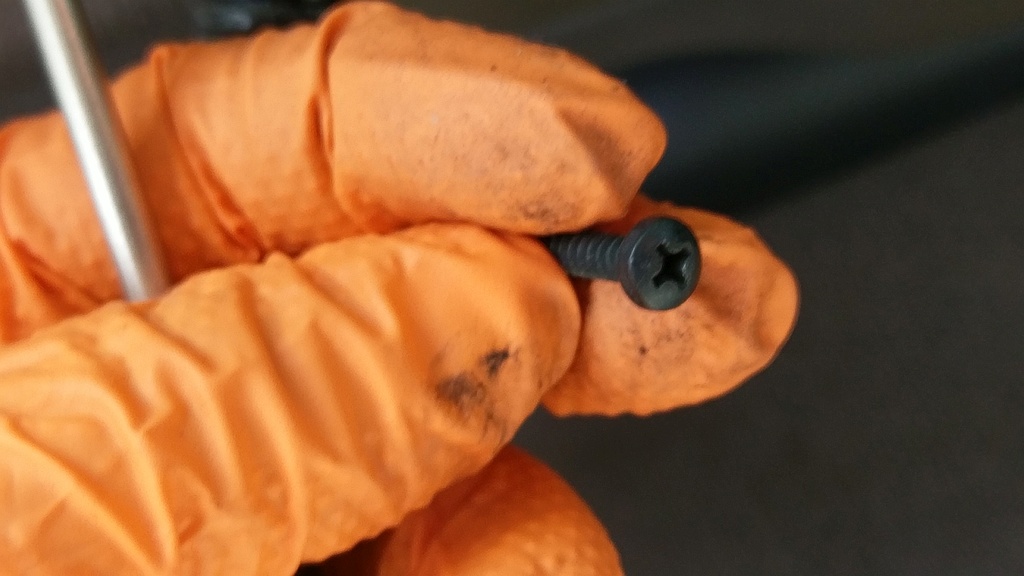
See, Philips Head Screws
You should pull 3 of these out.
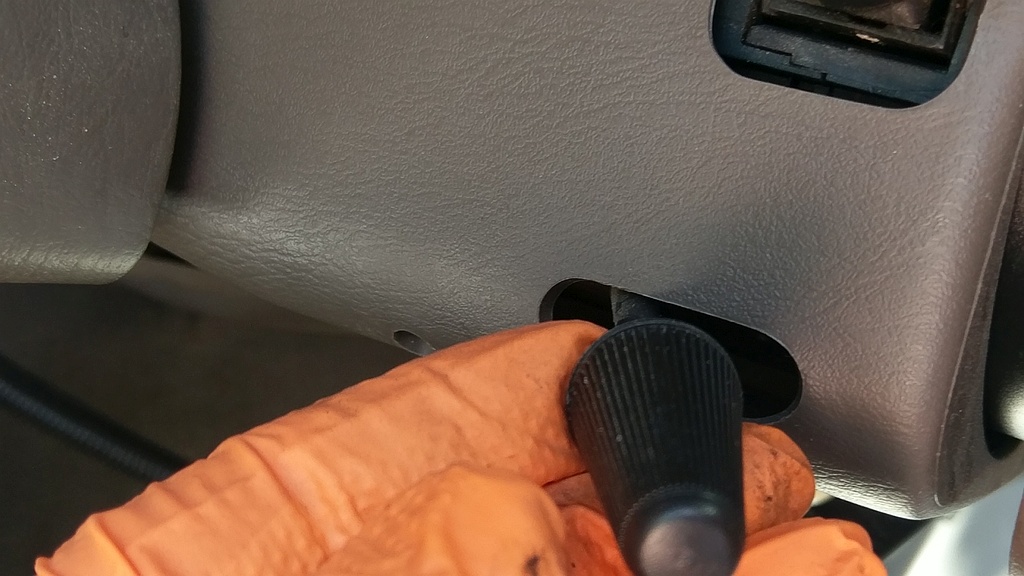
Remove Tilt Wheel Adjuster
You might be able to get this off by just unscrewing it with your hand. If not their is a notch you can get a small wrench on to unscrew it. Mine had some locking compound on it but still could remove it by hand.
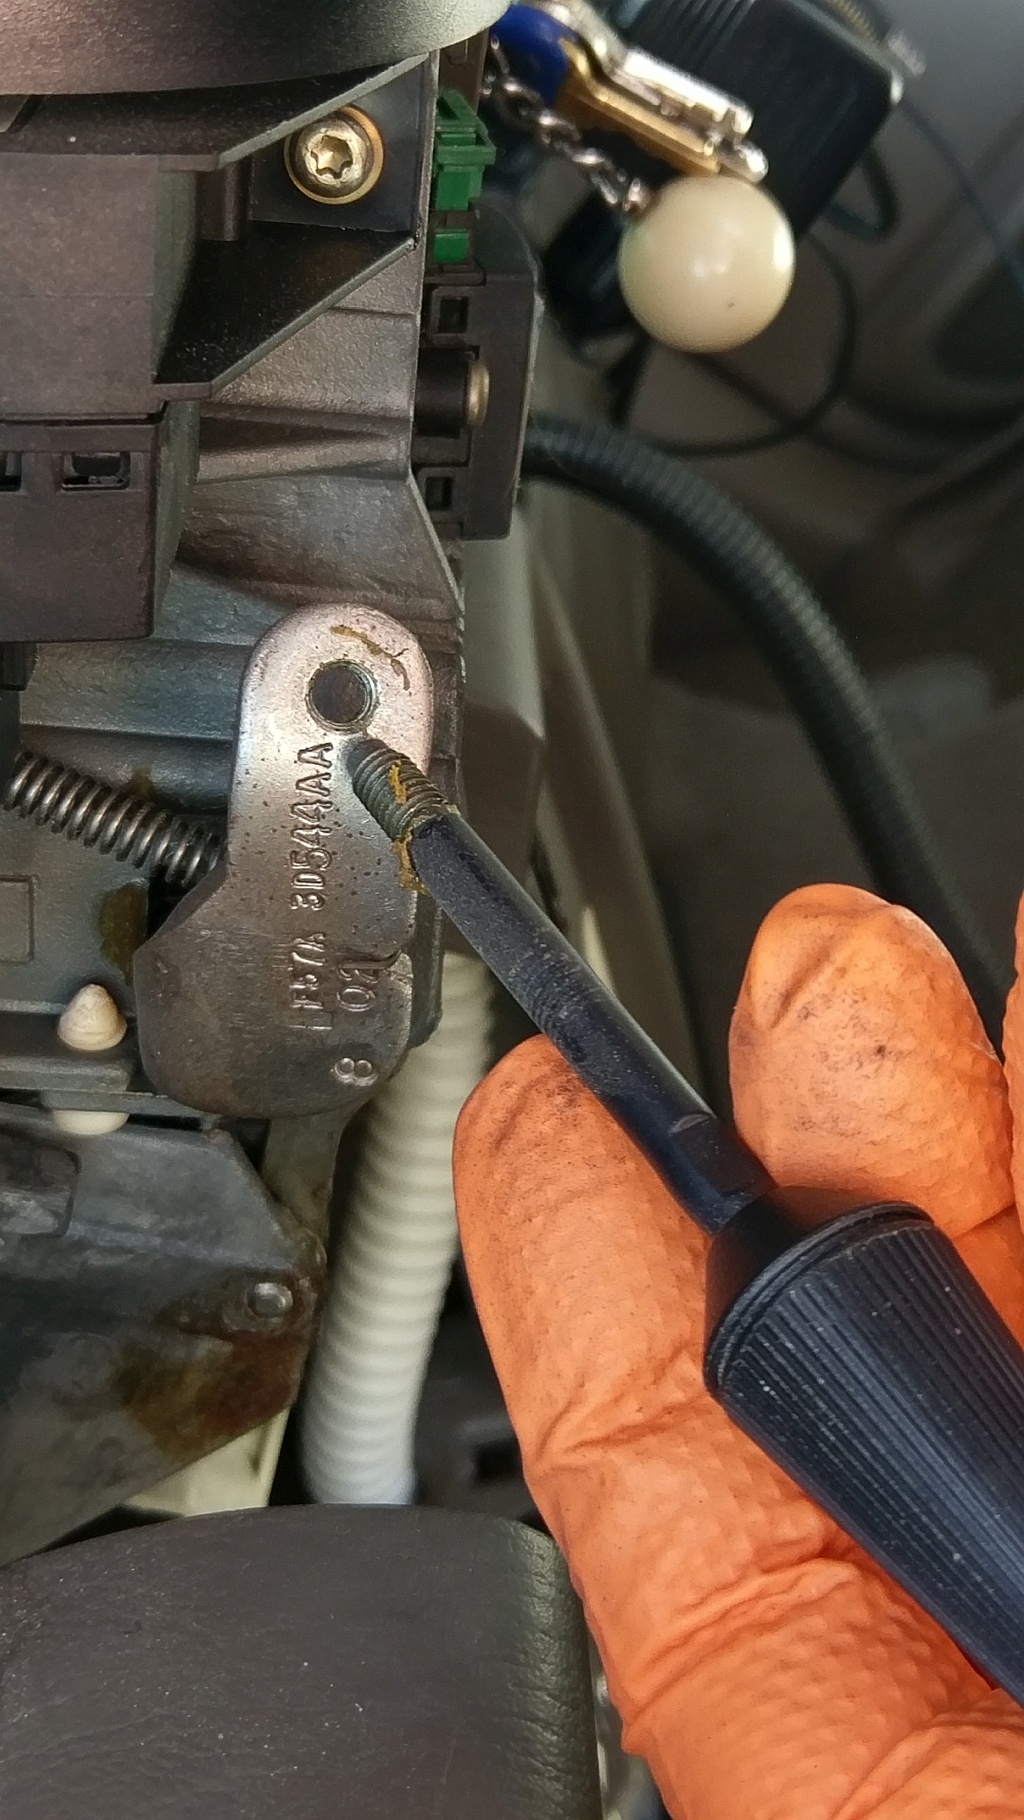
Tilt Lever Removed
With the cover off this is where it screws into.
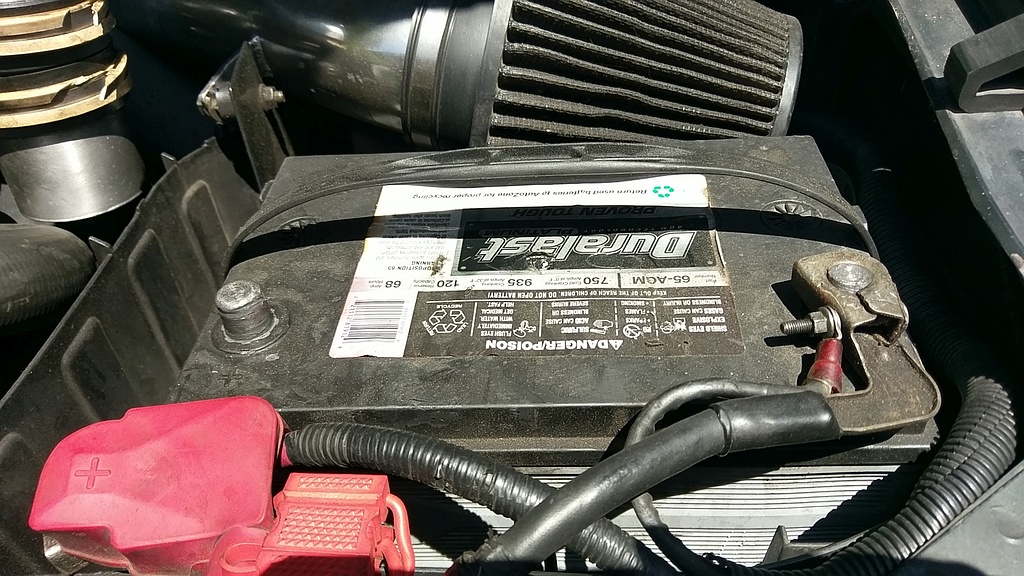
Disconnect Battery or Batteries
If you have 2 Batteries you should disconnect both of them. It's a good idea since you will be working on some electrical stuff... Don't worry it's not a big deal to reset your radio if it loses it's presets, and does anyone really listen to the radio anymore??
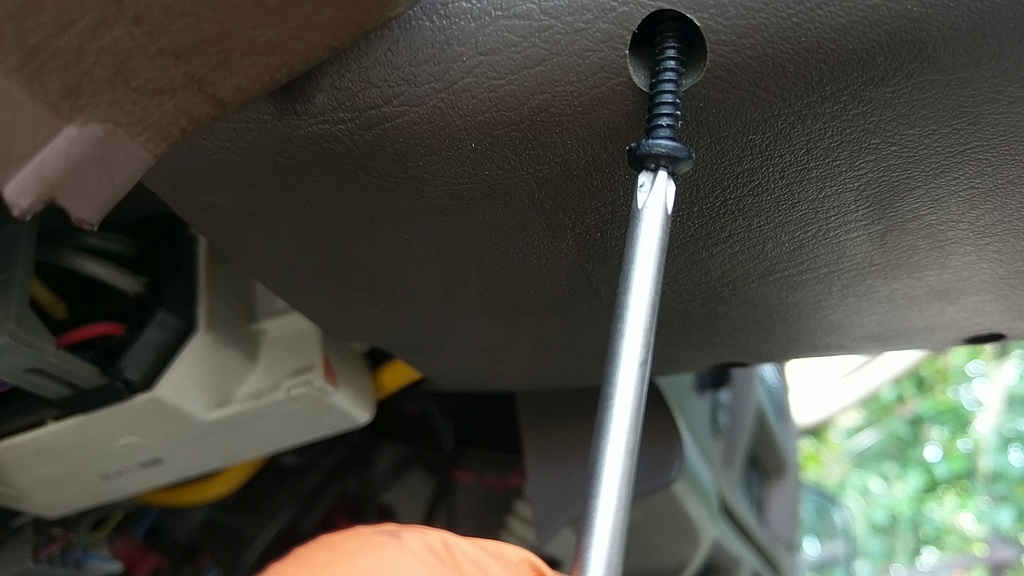
Remove Steering Wheel Trim Screws
Under the steering column is the trim with 4 Holes. 3 are Phillips head screws, one is to access the lock cylinder's pin release mechanism. Guess which one that is... You can get away leaving this panel on, but it's really a pain to try to hit the cylinder release just right, and their may be wires that get into your way. My advice is take a bit more time to remove the bottom it will make the job easier as well as removing the top cover later.
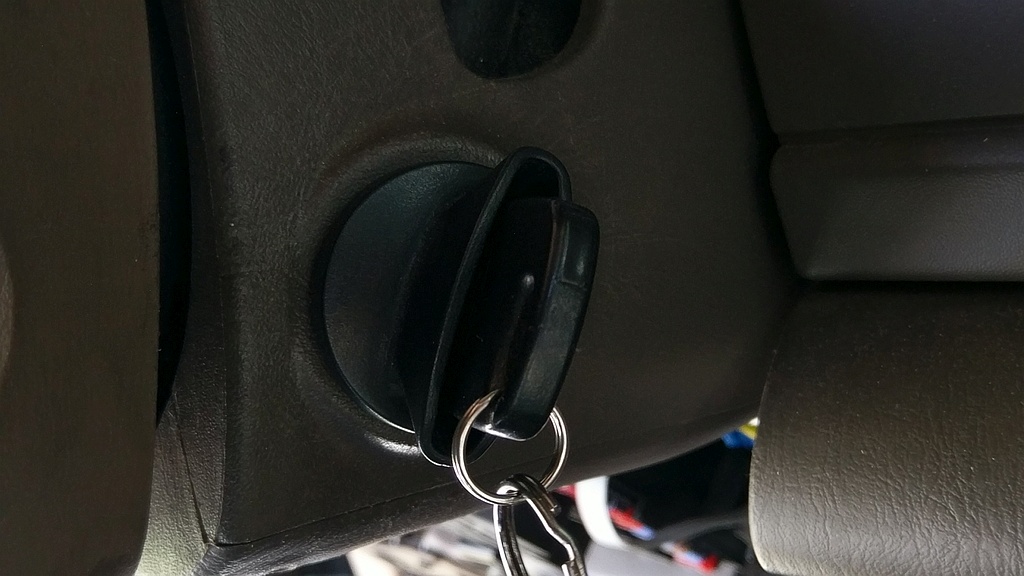
Lock Positioned For Removal
To get the lock cylinder out (you must) you need it to be resting in the ON position as shown. Remember I said to block the wheels and remove the batteries? This is why. Your power would be on for a while and you may be adjusting the shifter so again, remove batteries and block wheels.
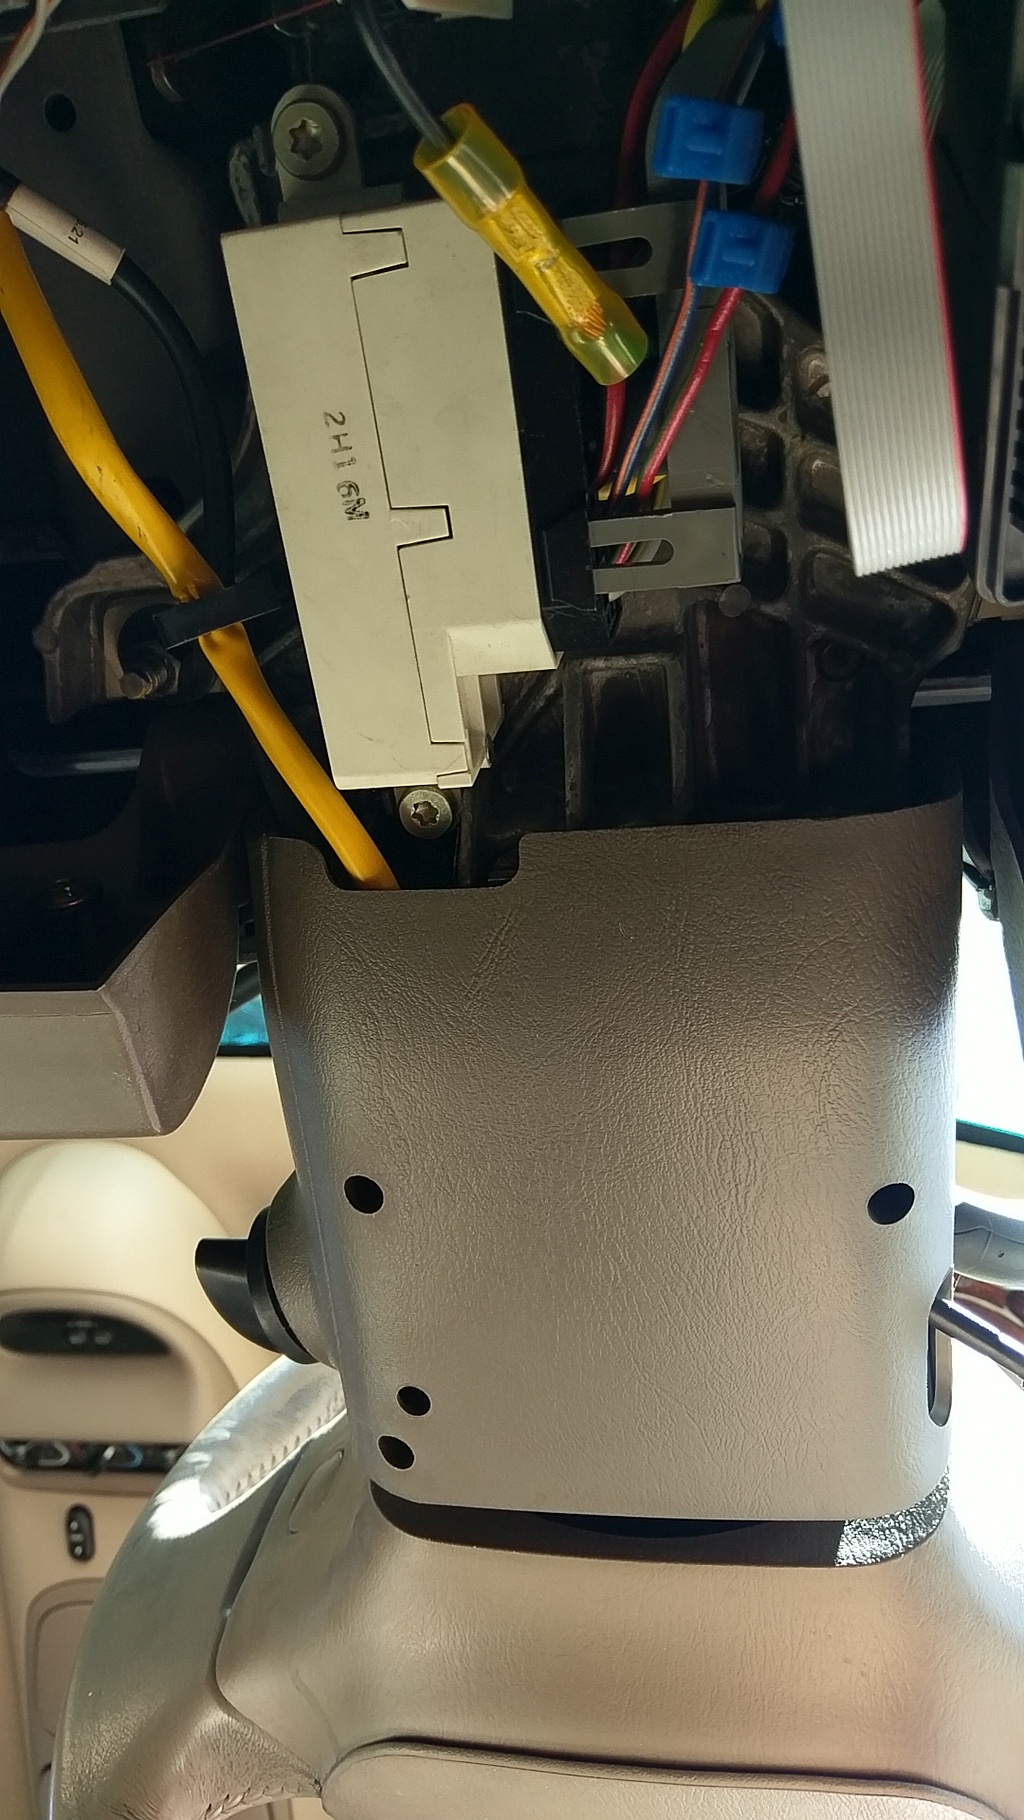
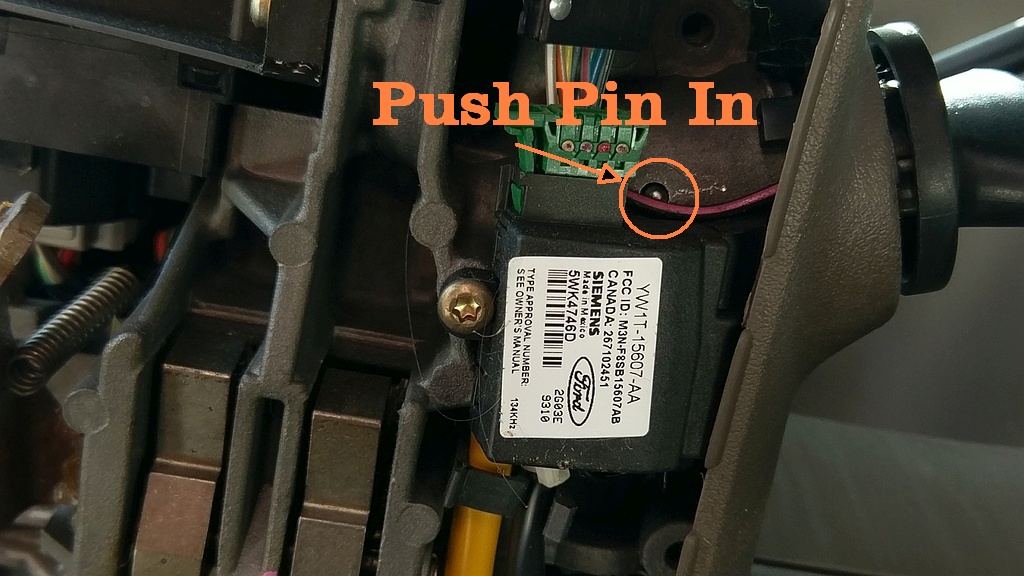
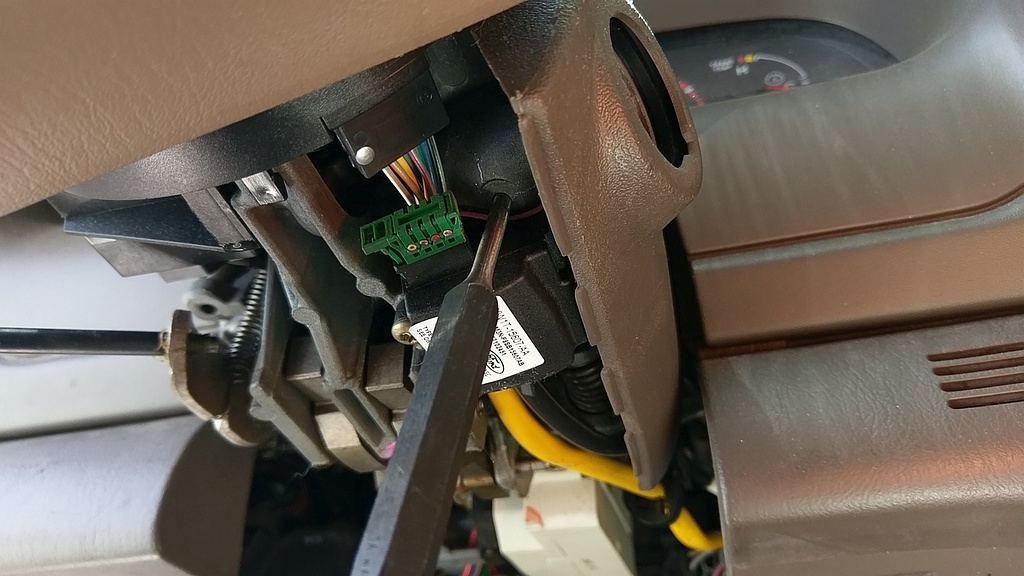
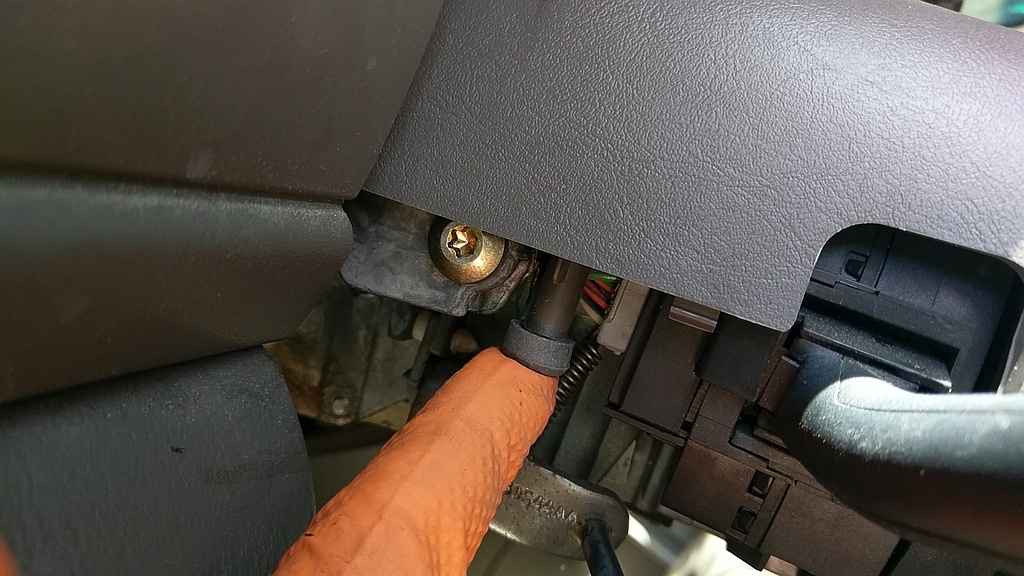
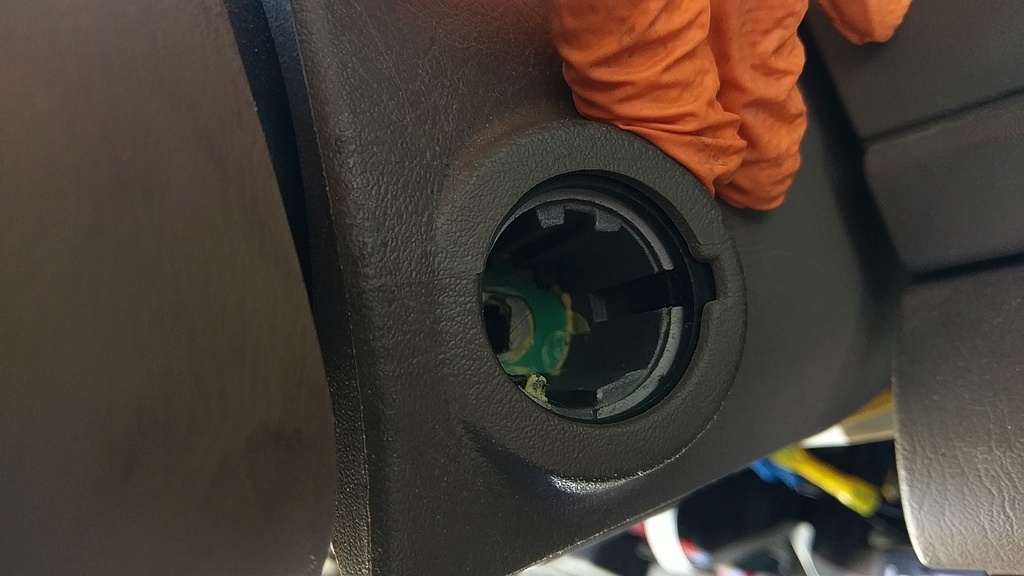
Lower Panel Now Removable Cylinder Lock Pin Visible
As I said it's way easier to remove the bottom, see the wire that is partially covering the lock pin release? You would be bummed if you cut it when trying to release the lock cylinder. This view is looking up and the underside of the steering column.
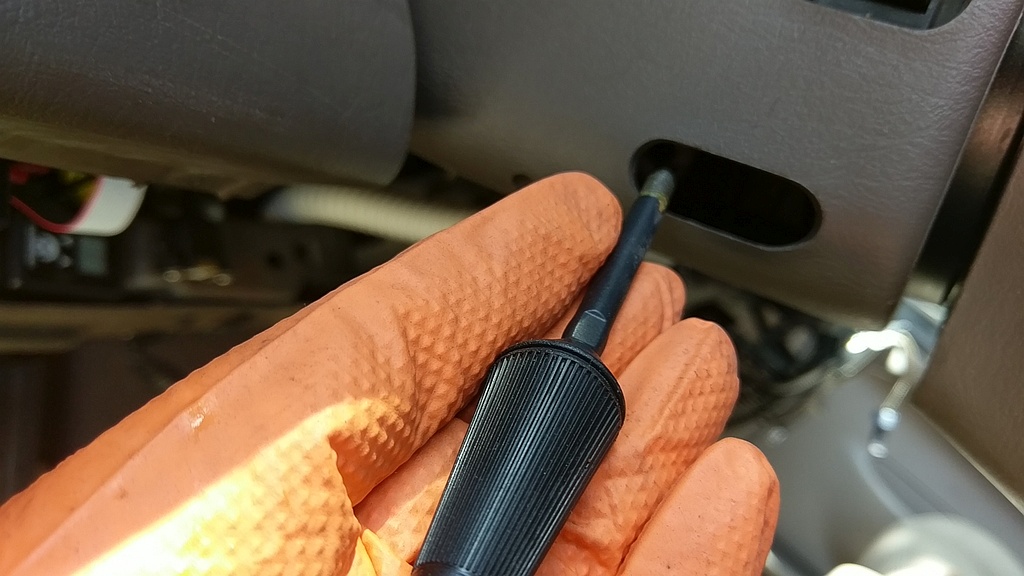
Press in Cylinder Release Pin
Using a thin flat faced punch (small Phillips head would work too) push in the pin as shown. The lock will come out. Again it must be in the ON position. The above picture has the lock removed, but just wanted to show how it's done.
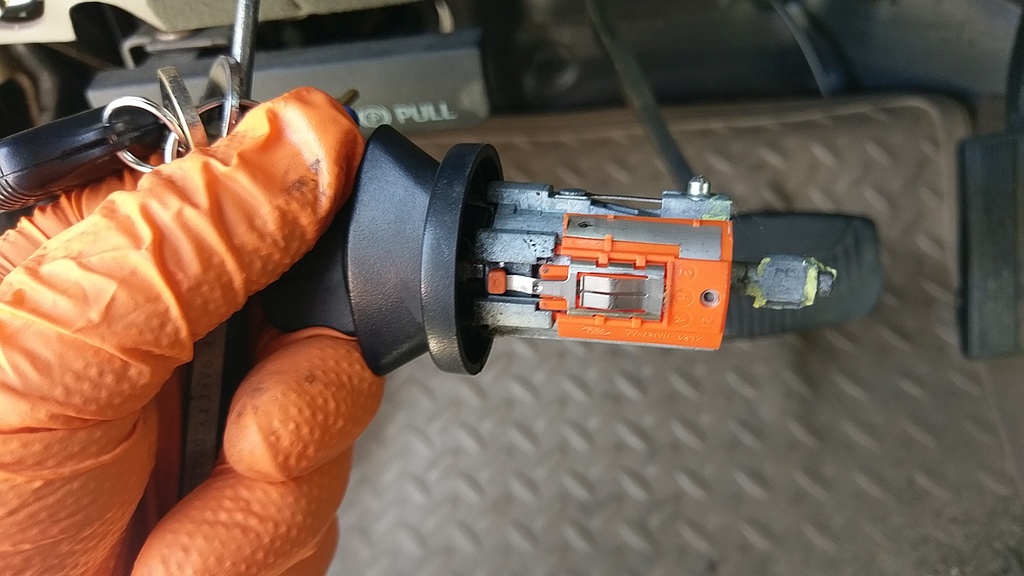
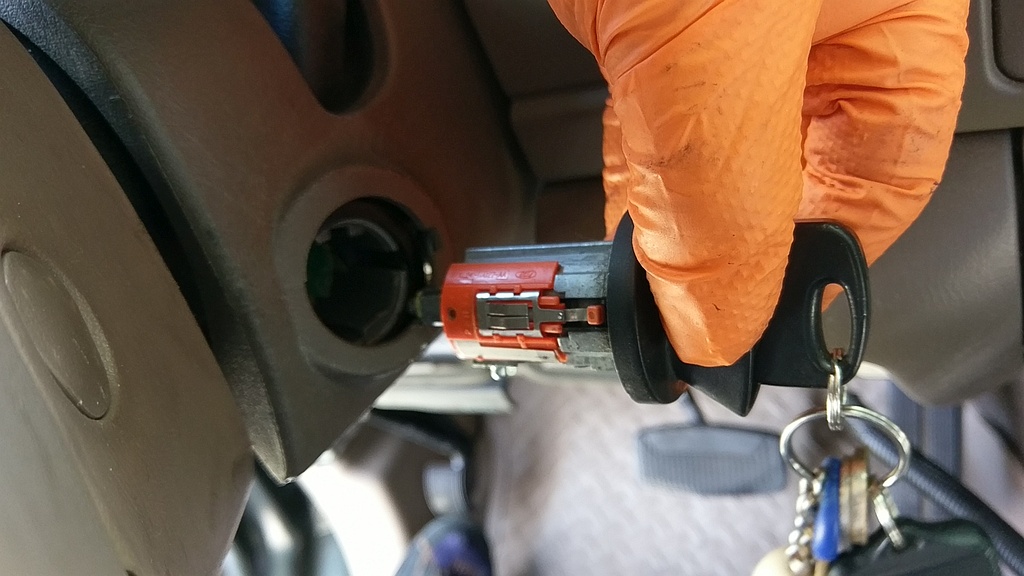
Excursion Key Lock Cylinder Removed
This is what it looks like when removed. If you haven't figure this out yet the key will be still in the lock. You can see the little bump that needs to be press. Scroll on for the animated version...
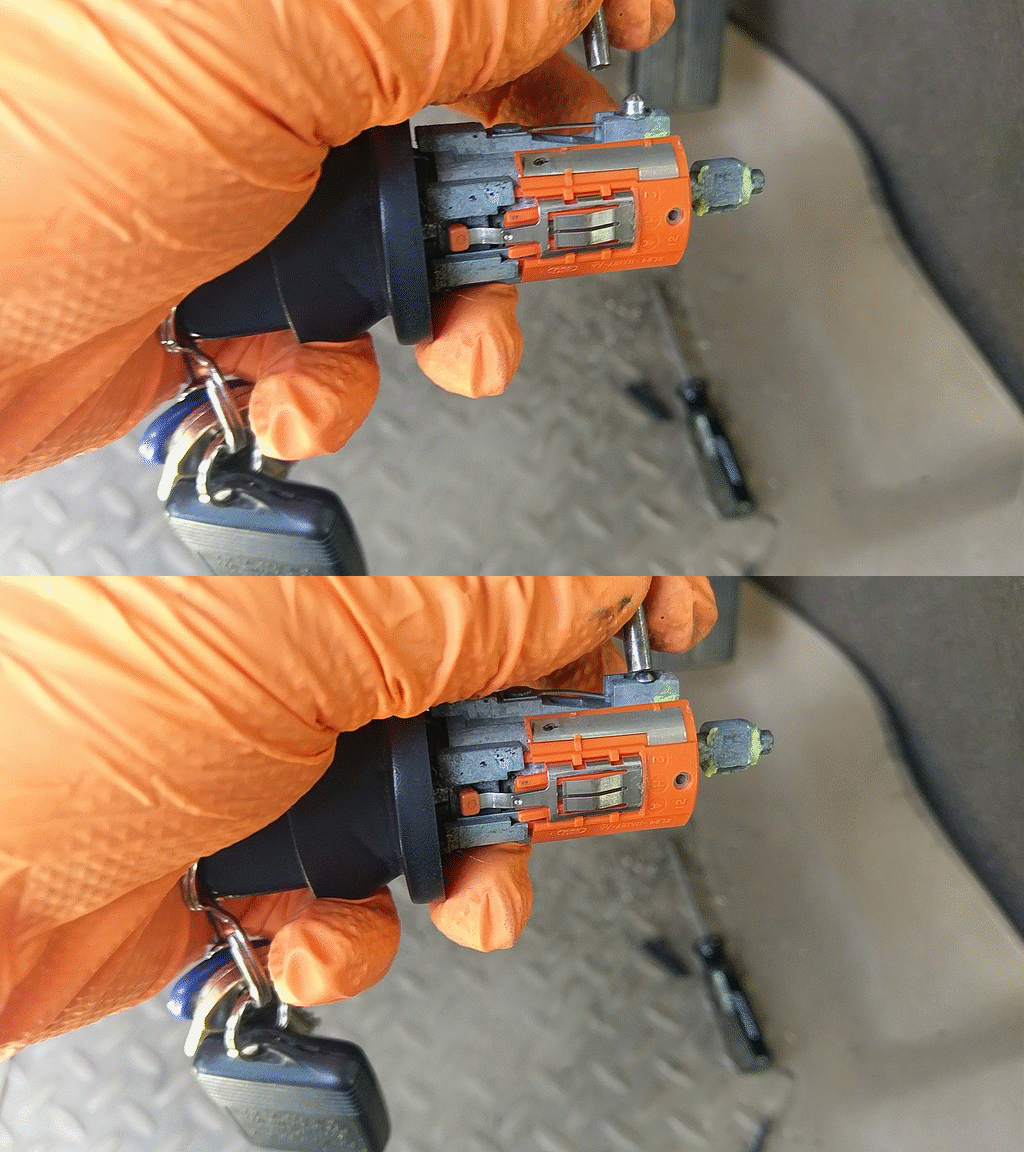
Caution Action Sequence Above
Simple animation showing how the pin works. Had some extra time so I did it. Move along now.
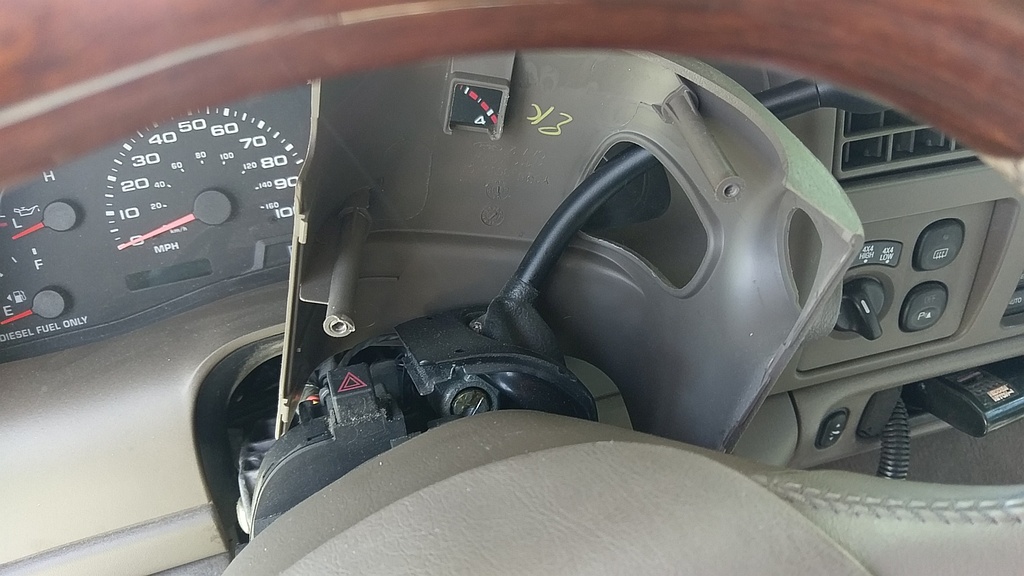
Top Steering Cover Removal
After the lock cylinder is removed you can start to mess with the top cover. I got mine off (2003 Excursion) with a little careful wiggling and messing with steering wheel and shifter positions. It did have to bend a little but it came out pretty easily once I got it all figured out. Be careful here as this plastic can get brittle.
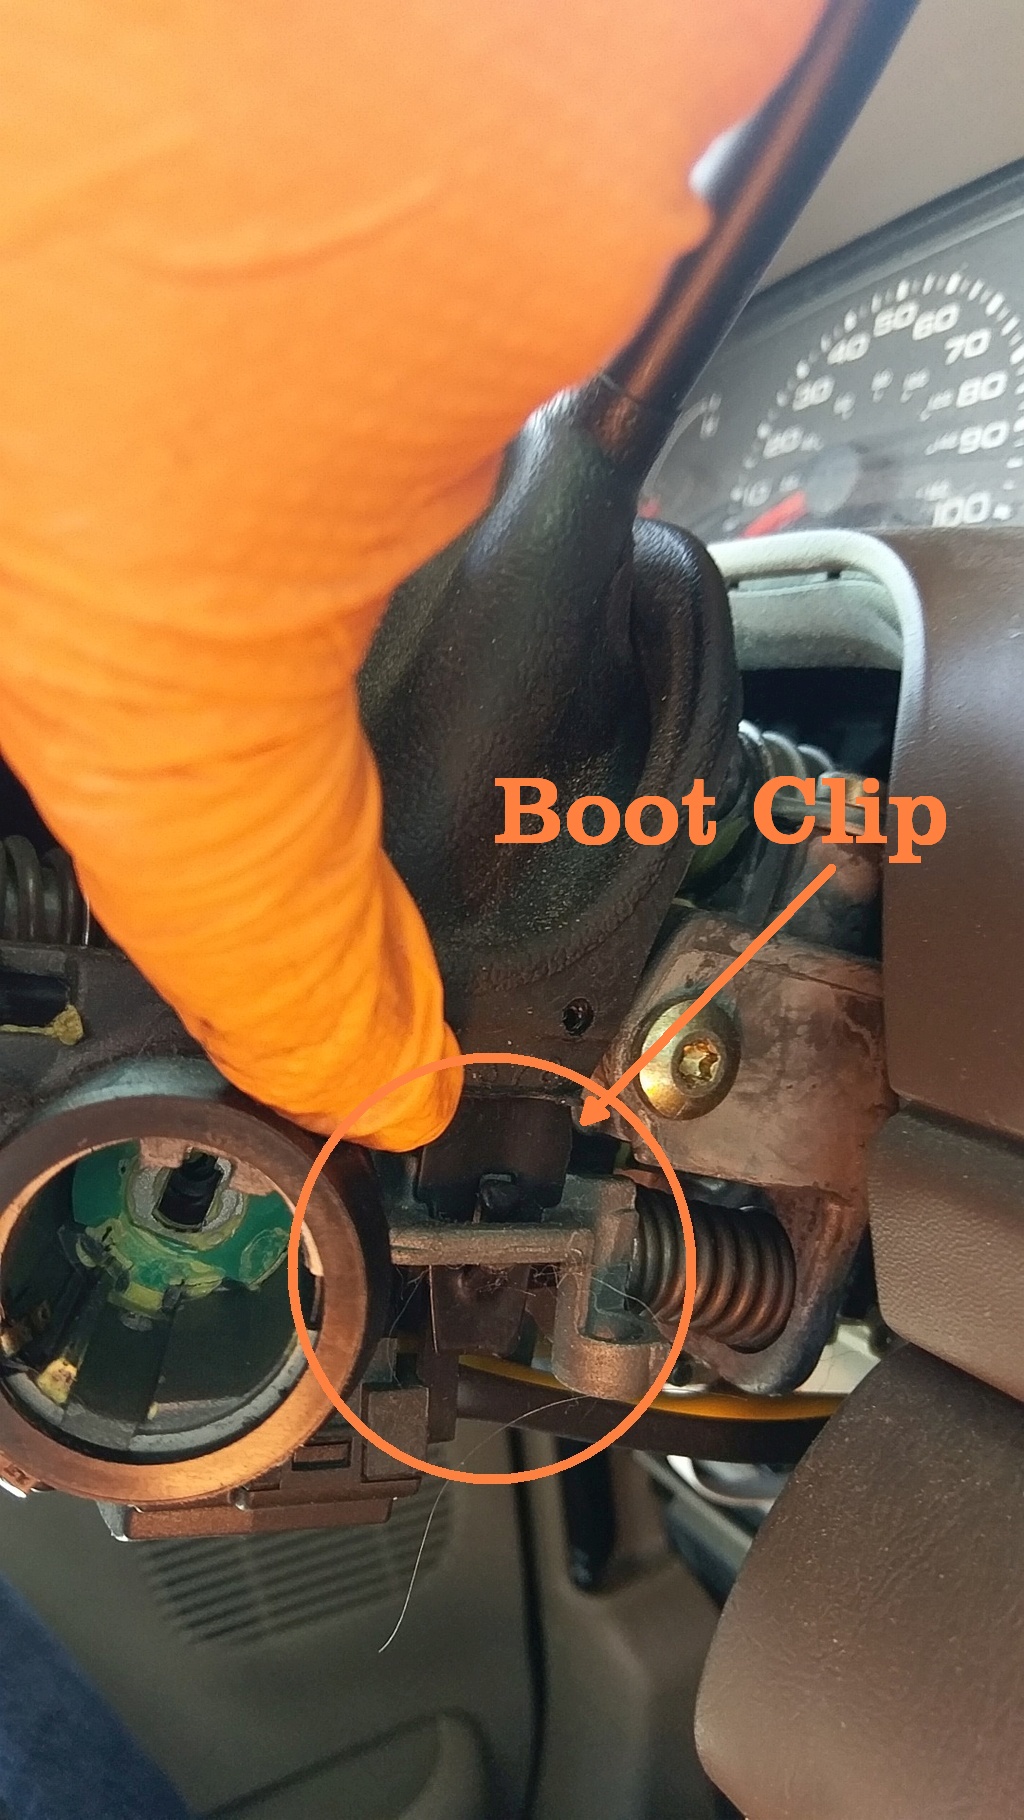
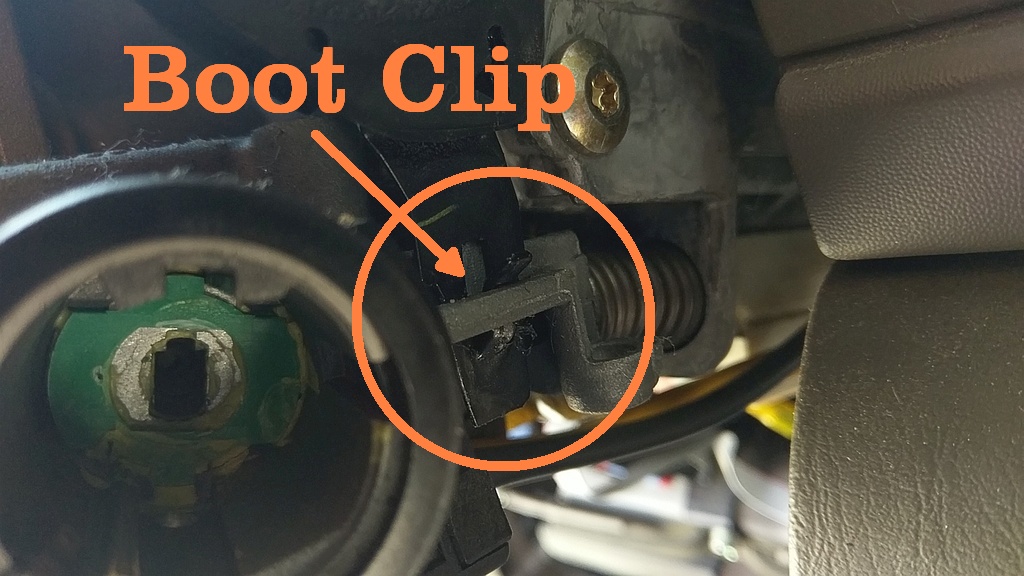
Shift Lever Boot Clip
This thing is just jammed in, just remember for later. Ignore my hairs in the mechanism...
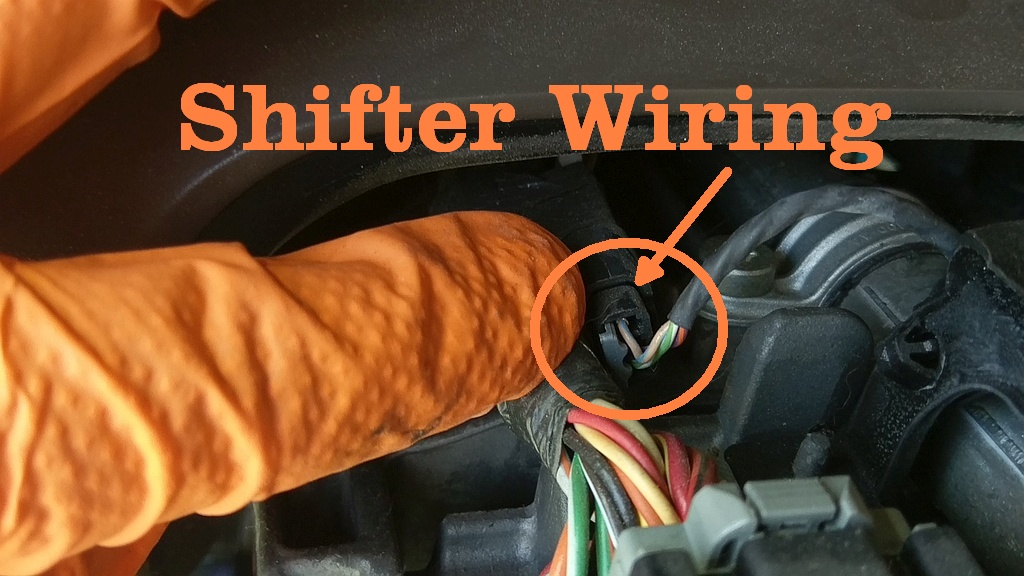
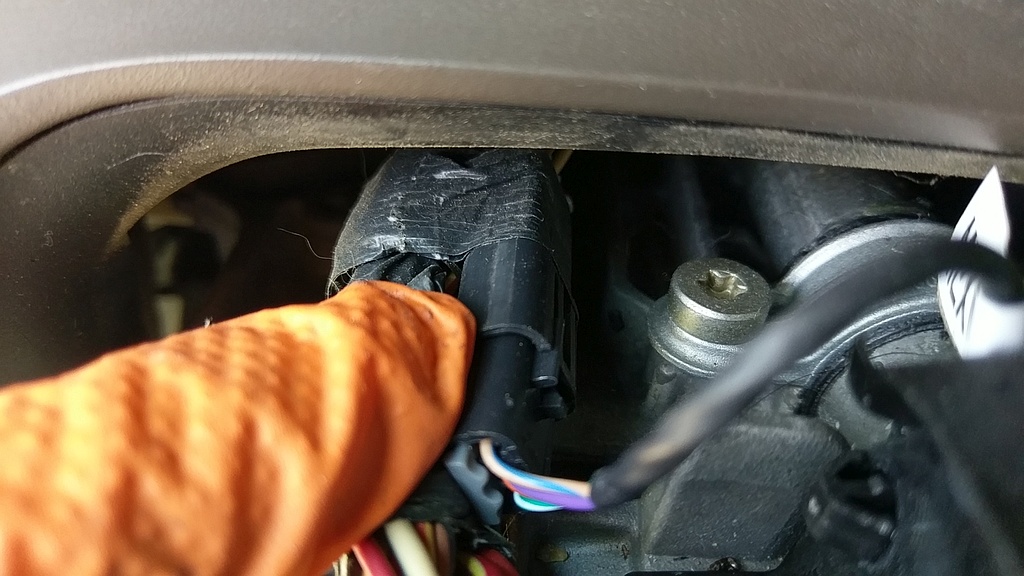
Shifter Wiring Harness Plug
On my truck this is where it plugs into the main chassis wiring.
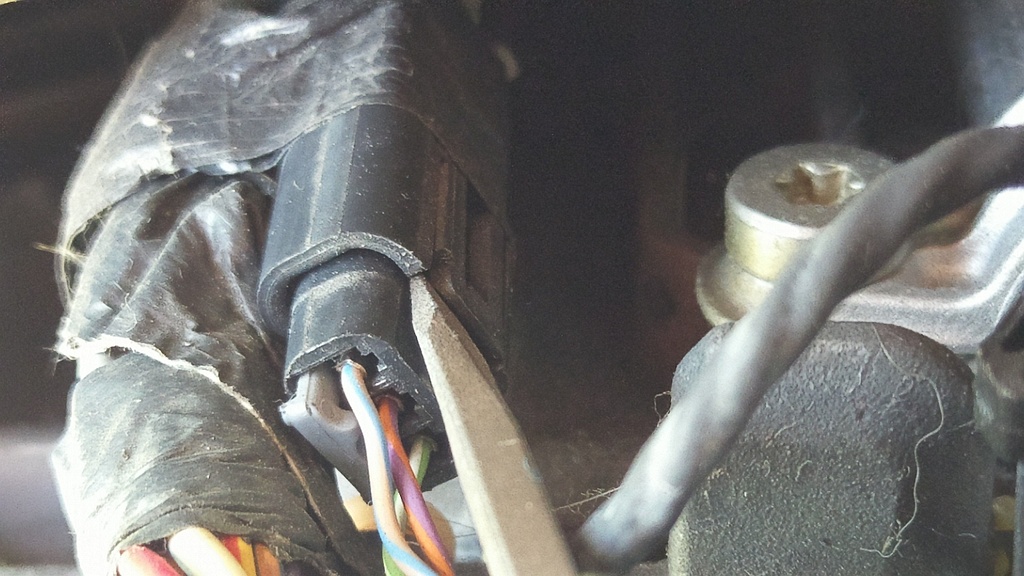
Removing Shift Lever Harness Plug
With a small flat blade screwdriver wedge it in the connector and pull it apart. If you have it released it should come apart with not much force.
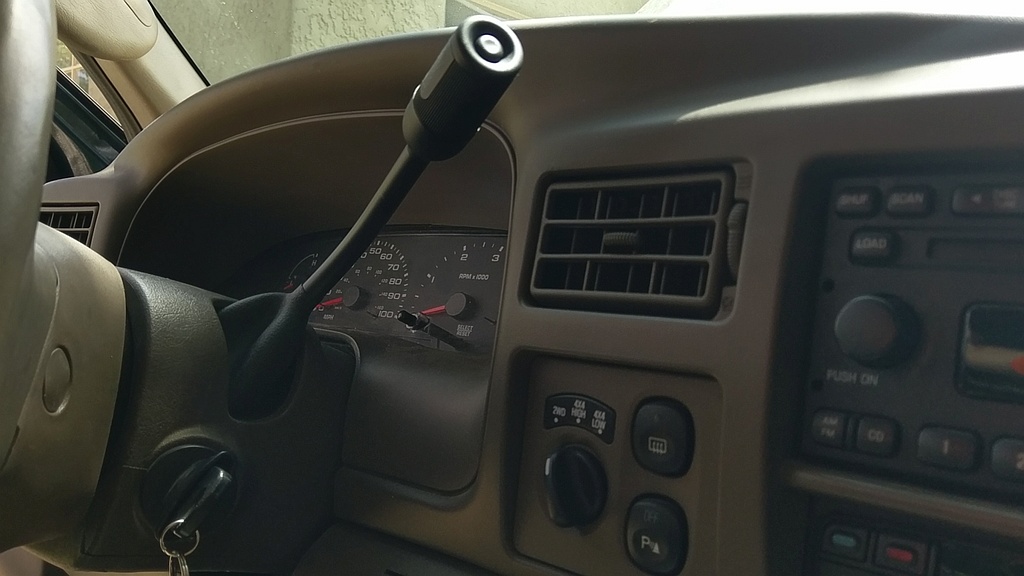
Enjoy your new Excursion or Super Duty Shift Lever
All buttoned up. If you were the paranoid type you might have re-connected the battery and tested, but given how common a problem this is I really wasn't worried. In testing yours you should see no more blown fuses and the Overdrive light should go on and off.
Conclusion
This was a lot of little steps, but overall an easy project once you get the part. Just try to look at things as you take them apart or you will have to come back here.
Happy and Safe Motoring and trying to keep your truck out of the dealer!
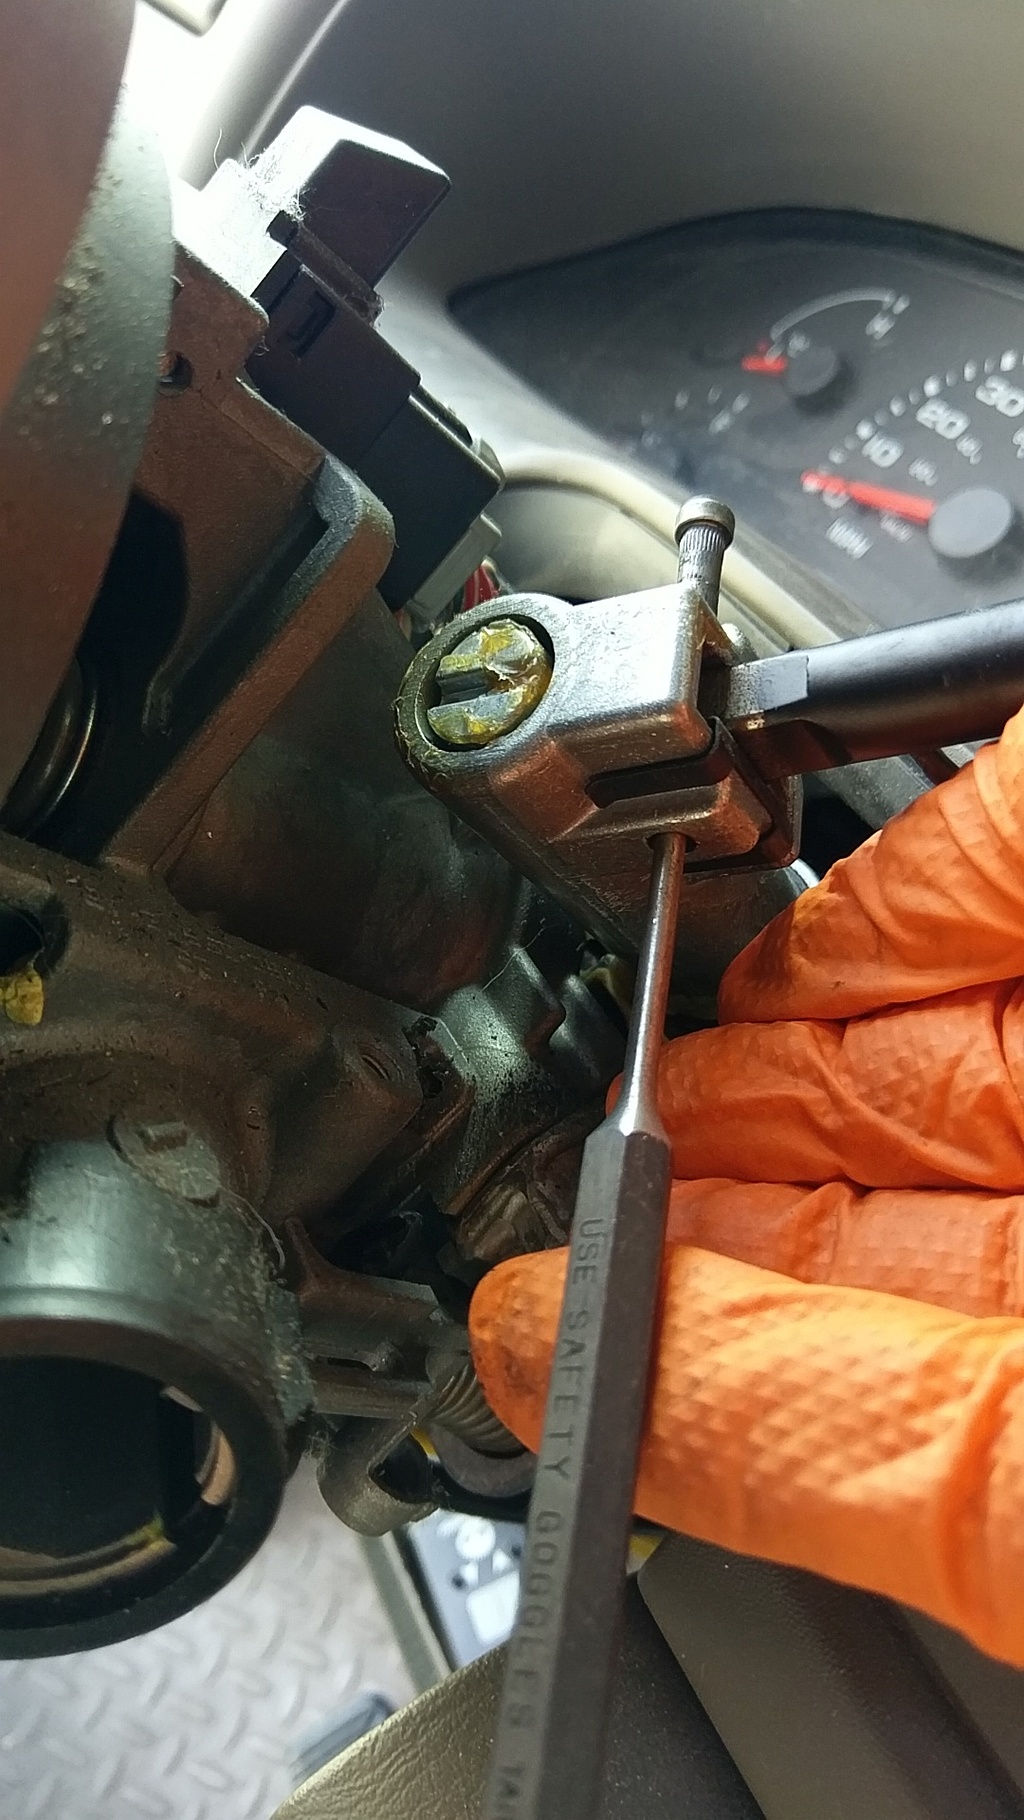
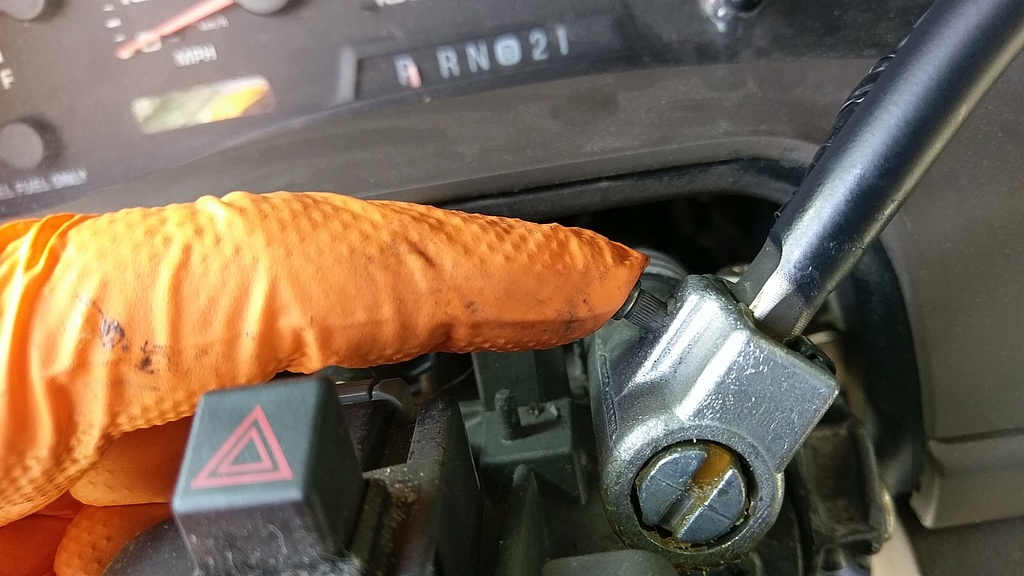
Removing Shift Lever Drive Pin
Using a small drift or punch (or something) tap out the pin in the shifter. You may have to move the shifter around so I hope your wheels are blocked and E-Brake on.
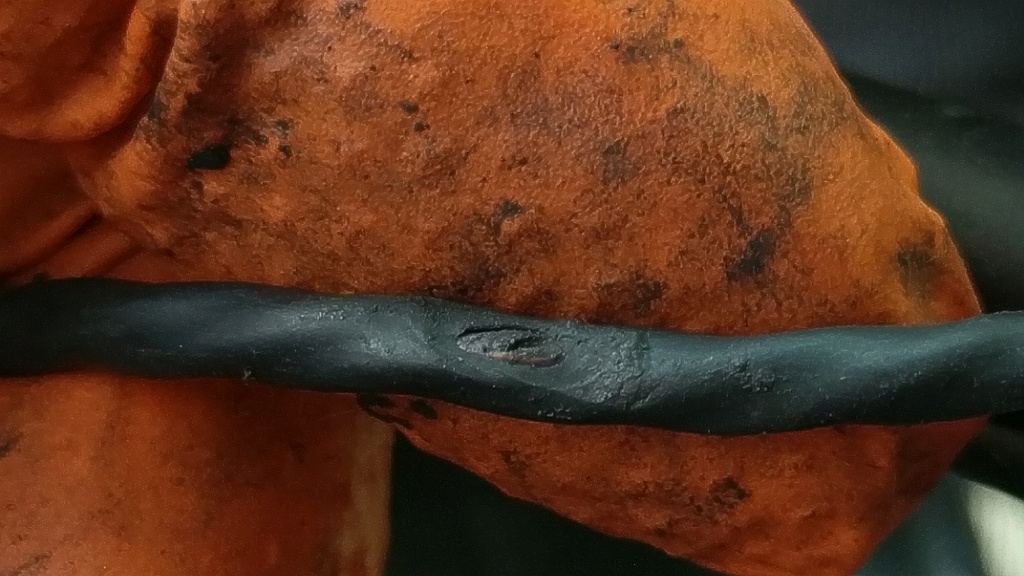
Bad Shift Lever Overdrive Wiring
Almost forgot, this is for a feature that I almost have never had to use, that is to disable the Overdrive. I guess maybe if towing or something.
This is a close view of the wiring that is worn through. The wire has a tough sheath on it but over the years it has just worn through and finally into a wire that has power. Result blown Fuse. This could have been fixed by a careful tape job but why bother unless you are tight on funds. Do it right and once or some crap like that...
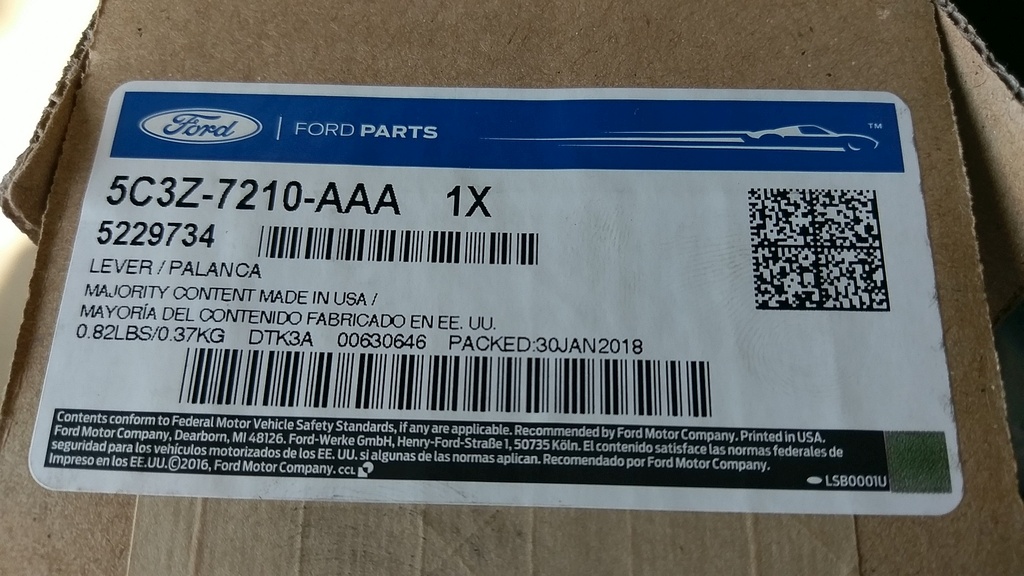
New Ford Shift Lever
I opted for a new Ford OEM lever. I think Dorman products also has them, but figured I would stick with the OEM in this case. The part number above and here Automatic Gearshift Lever 5C3Z-7210-AAA is what I used for my 2003 Excursion. Double check for your application. I do like that the 'Majority of content Made in USA', wonder if that includes the box?
New Ford Shift Lever - Upgraded
Well not much, and likely could have done more, but I figured I would give it a bumpy wrap of electrical tape just to add a few more years of rubbing, so instead of 15, maybe 17 years of service? Next time I'll just unplug it which is totally an option! Maybe I should have said this at the top of the page.
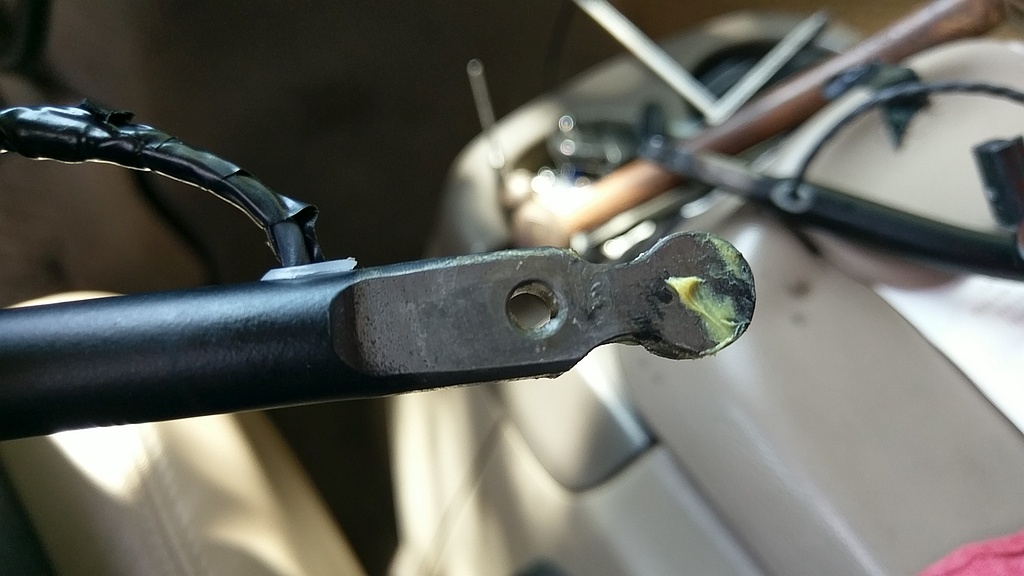
Add a little Grease to the Lever
The old lever had a blob of grease, using that or some excess that is dripping on the existing mechanism swatch some on the end of the shift lever.
Reinstall the Pin
Time to get things back together. You need to get the shift lever back in the mechanism. It will look really wrong if in backwards so best to check now before mashing the pin in. You also may have to articulate the shifter (front to back or side to side) to get it to drop in and align the hole so the pin will drop in. Some light tapping will seat it flat on the mechanism. The splines should NOT be visible when completely installed.
Reinstall the Overdrive Harness Connector
This should be an easy one, just click it in. Double check routing and how bad it's rubbing if at all. You can also give the wire a bend to help keep it from rubbing. Make sure you can shift to all gears without the wire getting pulled or entangled. It should be clear of most of the mechanism.
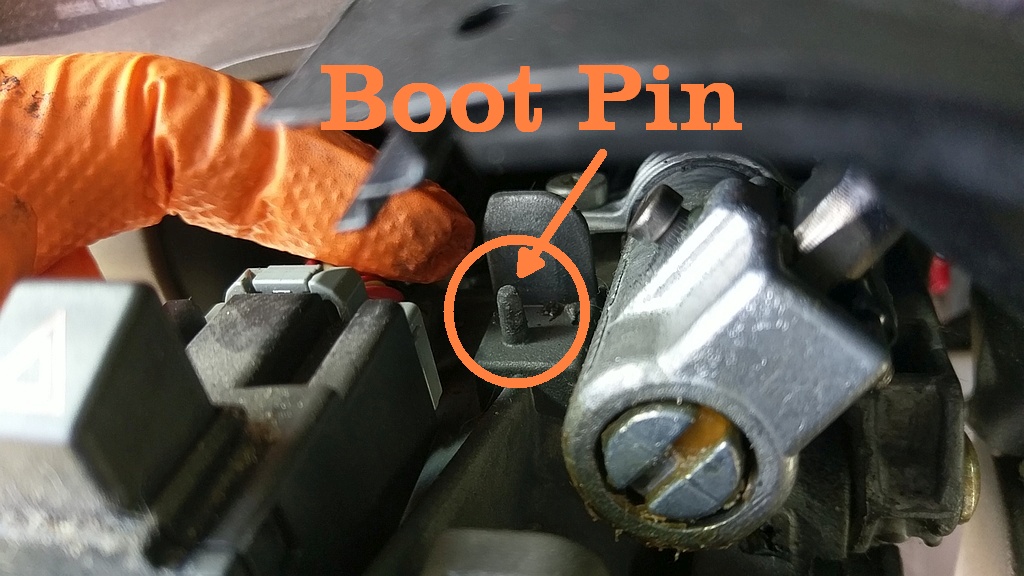
Reinstall the Shifter Boot
The boot just sits on the alignment pin and into a slot where the clip locks it into place. Mine kept popping out of the slide in clip so I bent it to make it stick better. Overall it didn't really want to stay put. The housing cover helps but you just need to make sure the it's still in the slot and over the pin when you drop the cover on.
Replace Top Cover
I can't remember what I'm pointing at, but you will need to wiggle the top cover back on and make sure the shifter boot is in place. This might be a place where it sits into something, who knows, it's been more than an hour since I did it.
Check Top Cover Alignment
If you have the cover sitting right you should see the opening evenly align to the lock cylinder. You may have to hold it down to keep things together until you dump the lock back in.
Reinstall Key Lock Cylinder
Time to get the lock back in. This has to be reinserted in the ON position. It should just click in, and not be removable once it's in place.
Reinstall Lower Cover
Just need to fiddle with this a bit to get the two halves aligned so you can screw it together. A magnetic tip helps a bit here. Don't ham fist these screws as they just thread into plastic. Your on the home stretch at this point.
Reinstall Tilt Knob
This just screws into the metal plate as pictured way above. Mine had some goop on it, not really Locktite but something glue like to keep it from spinning out. I didn't bother with any, just gave it a hard twist tight and done.
Replace The Blown Fuse
Don't forget this step! At least check it prior to testing.
