Ford Excursion DVD Overhead Console
Ford Excursion DVD Console Removal

After some time the DVD mechanism in my 2003 Ford Excursion started having issues with ejecting the DVD's.
After some looking around on eBay I found a replacement DVD player. The place was an automotive electronics
repair shop and they had plenty. You could do a Google search as well for this. The price was about 100 bucks
and all I had to do was pull the Overhead entertainment console off the inside roof of the truck. Some of the
player come only with the mechanism, I got lucky and got one that was a complete unit. If you do have to swap
just the mechanism it's a bit more complex, and if you are not good with small screws and things like that better
to send it in.

Complexity

The Job is an easy one. Takes about an hour or so.

Tools Needed to Replace the Pads and Rotors

Phillips Screwdriver
Clean Hands
That's about it 

Parts Needed

Replacement DVD Player
Try Clicking HERE for Replacement Radio's Web Site . EBay also may have them but be cautious of used as they may have the
same issue.
GTSparkplugs Header
Click for Contact Page Click for Contact Page

Entertainment Console


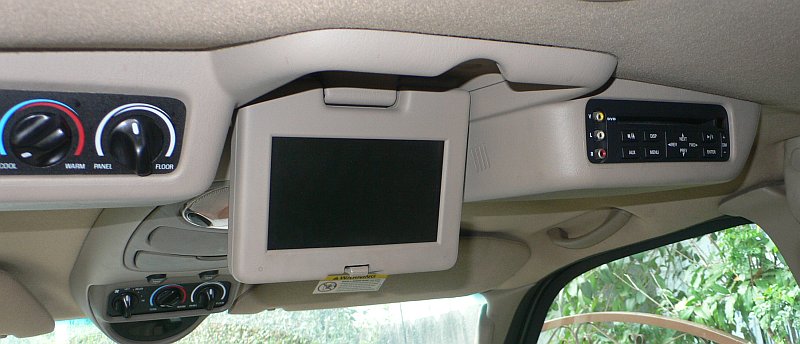
This is the entertainment console in my 2003 Ford Excursion. It's similar to the Ford Expedition and Ford Explorer. The Console houses climate controls, a LCD Screen and a DVD player.
Ford Excursion and Super Duty Entertainment Console
Ford Excursion and Super Duty Entertainment Console Removal

Entertainment Console Removal


Flip down the LCS Screen, and you will see 4 screws remove them. Don't worry their is plenty left holding the console in. The black dots near the top of the photo are rubber bumpers and they can be left alone.
Excursion and Super Duty Entertainment Console Removal

Entertainment Console Removal - More Screws


On each end of the console you will see something that looks like this. Deep inside are 2 more Phillips head screws. Remove them as well. Once you release the these screws the console may start becoming looser but it should still be anchored by a bunch of hidden snaps underneath.
Ford Excursion Console Removed

Entertainment Console Removed


To get the console to release from the internal clips you will have to yank it down with some force. Try to pull it down from the rear sides evenly. Be careful as you are yanking it down as to not break it up. You will need to use some force to pull it out of the snaps. As I recall I did it from the rear, again grabbing both edges and yanking. Remember their are cables connecting things so just try to pop it off. Once off you can rest it on the headrest of the seats.
Ford Roof Console Removed

Inspecting the Roof Console


This is what it looks like. If you have a helper it's nice for them to hold once side while you work on removing the DVD player. Note that their are a few of the clips that stayed on the console that normally would be pressed into the roof. If you do pull them out of the roof mouting points, use a small screwdriver to pry them off the console and put them back in the roof.

Remove the DVD Player


Remove the connectors from the DVD player. You may have to squeeze or push a plastic release to get them out. I think you can get them all off before removing the player from the console. Now you will see a few Phillips head screws with metal tabs from the DVD player to the console. Just remove these. Your almost done!
Remove Ford DVD Player
Remove Excursion DVD Player

Remove the DVD Player - More Screws


More screws on the other side of the player. Note remove only the ones that are on tabs connected to the sheet metal of the player. Their are some more screws below that do not need to be removed.
Console Snaps

Console Snaps


This is one of the snap in tabs for the console. The mating clips for this are in the roof. If you see something like this with metal on it, again, remove it with a small screwdriver and push back into the roof section.

Reinstall


After swapping out the DVD player (AND TESTING) the installion is easy. You simply align the tabs into the snaps in the roof and when aligned give it a pop from the bottom to seat the console. You will have to do this on both sides until the console is snapped into it's resting place. Then put back in the Phillips head screws. That's it.

Enjoy your new DVD player and hopefully the reason you are replacing it is to keep your kids busy on the long trips!