Sunbeam Tiger Throttle Linkage Upgrade


As with many items on the Sunbeam you find things that bug me. One was the throttle linkage and how crude it was.
Basically stamped sheet metal bracket and a stamped sheet metal arm. I won't get into the crazy bent up pedal arm,
that's just how that is to make it fit, but all the rest is cave man era stuff. This project outlines how I did a version that
bolts into the stock location and pretty much uses only the pedal assembly. The upgrade does make it a bunch
stronger and smoother.

Tools and Supplies Needed


Various Drill Bits, I mostly used a UniBit for the aluminum

RivNut inserts for each seat rail and matching drill bit (17/32" as I recall)
1 - approx 5" of 1.5" x 1.5" angle bracket, I used 3/16" thick
2 - 3/8" Rod Ends. I used aluminum as they were red and nice looking, steel are fine too
1 - 3/8" Split collar (eBay, Mcmaster Carr, etc)
Sharpie Marker
Nuts and bolts for mounting

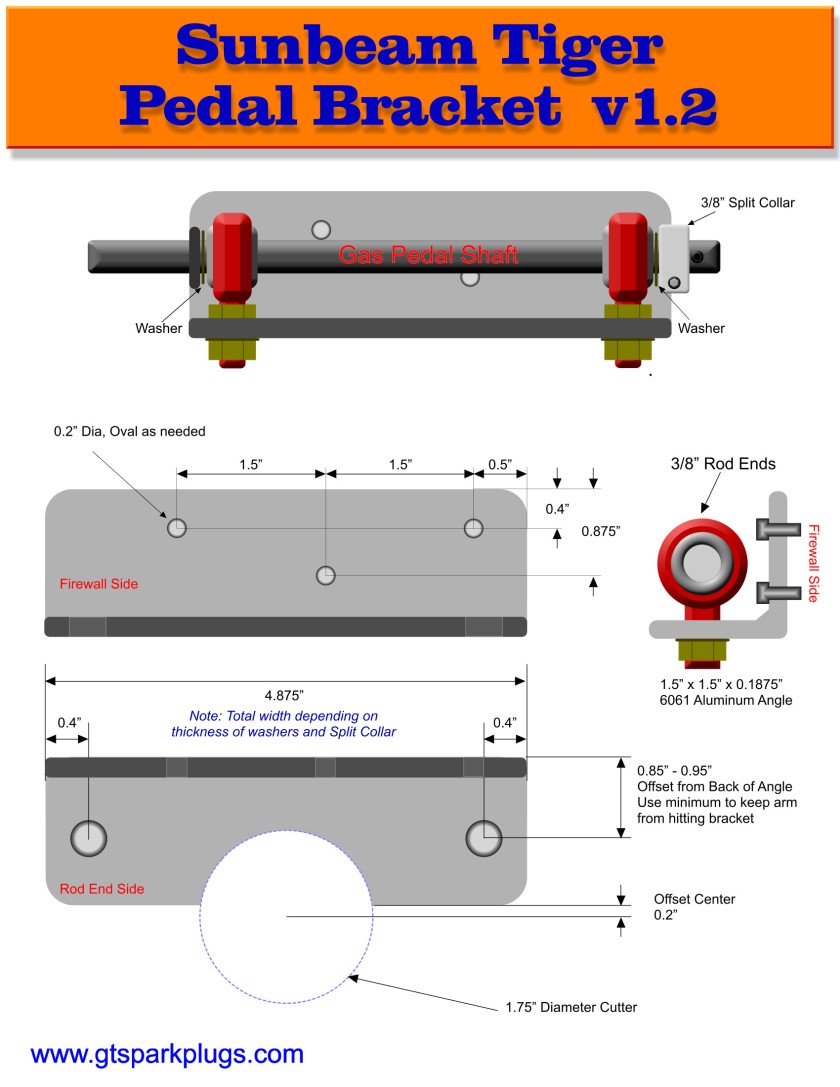
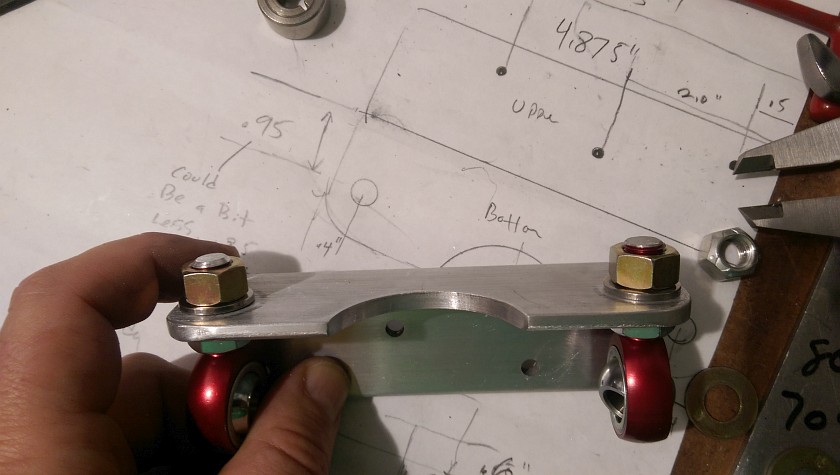
Below is the design I used. Your width may vary a bit due to how you  want your split collar to be used,
it can be omitted and a cotter pin and washer like the stock arm has. Mock it all up to get the length. The
reason I added the split collar is that I could remove it and put it on the front of the pedal to give some
adjust ability. If you want to change the position of your pedal, factor that it as well.
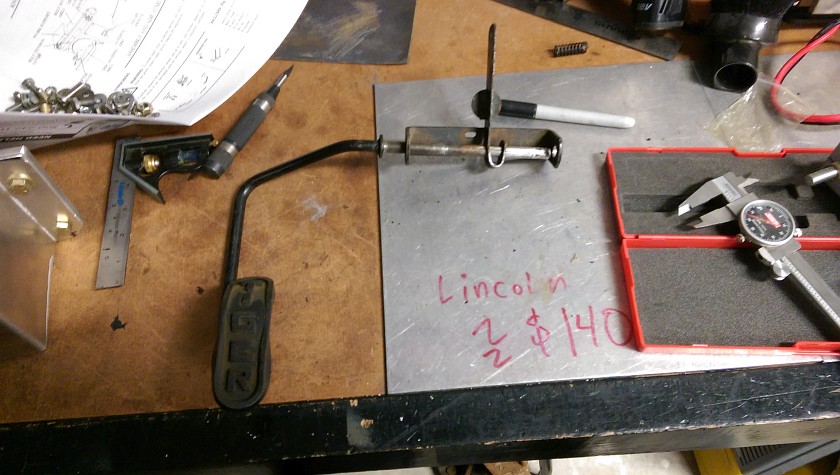
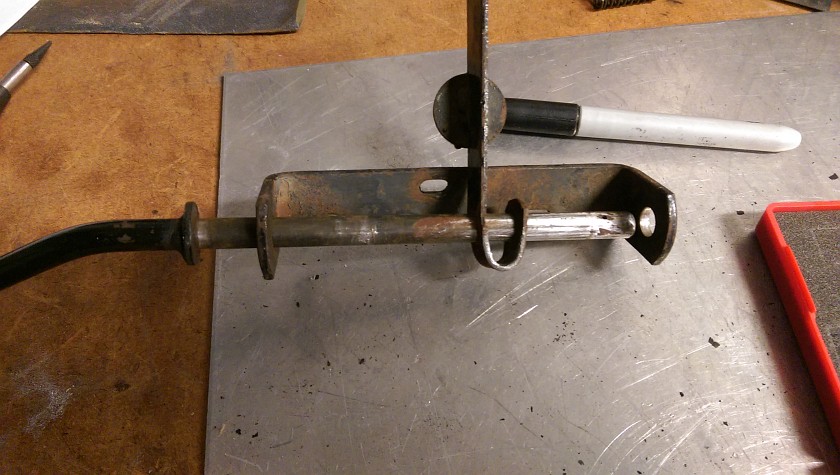
Stock Tiger Throttle Bracket
Closer view of the thottle bracket

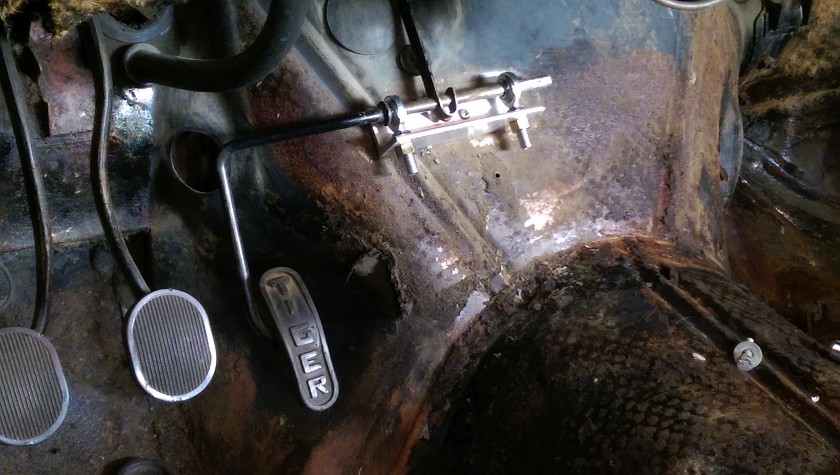
Stock Tiger Bracket and Pedal Assembly


It's ugly. Not very smooth and prone to slipping if been wrenched too many time. The stock pedal arm is 3/8" diameter bent rod and the rest is just stamped sheet metal.
Back Side of Billet Throttle Arm

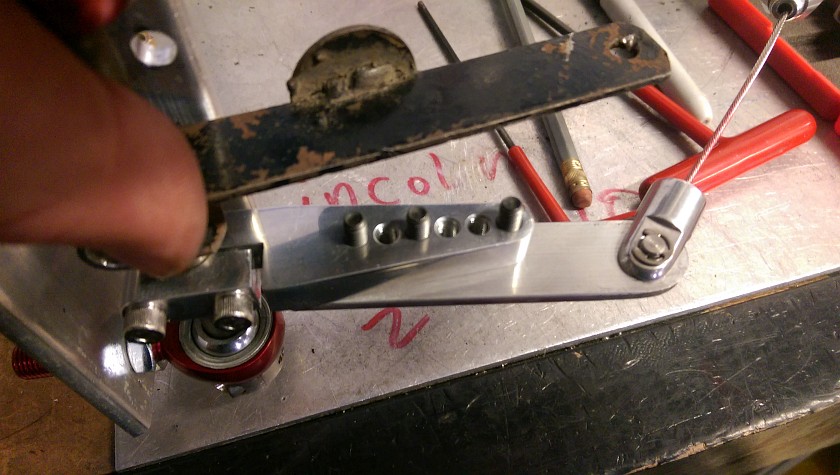
New Throttle Arm


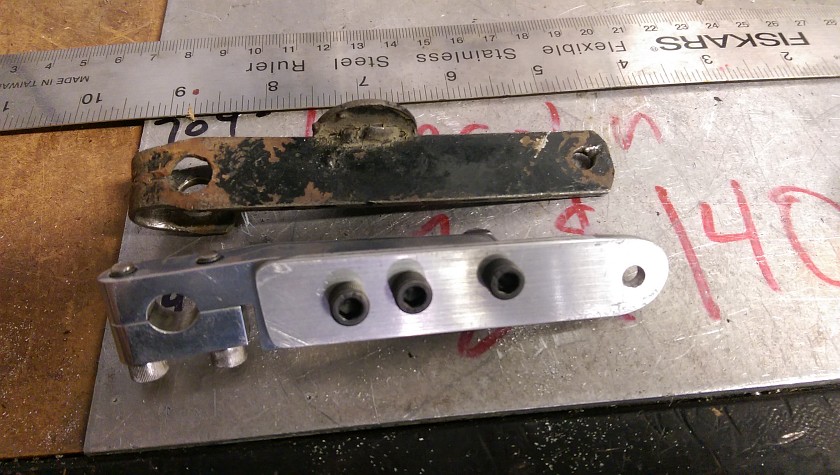
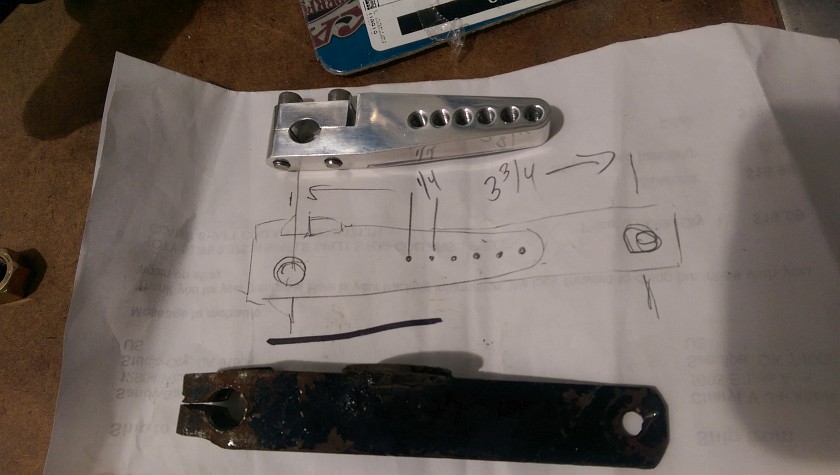
New vs. Old throttle arm. The new aluminum arm has an extension to make it match up with the Tiger arm. It also allows the use of the Lokar throttle cable. Tiger stock should work too.
Stock vs. Upgraded
Sunbeam Tiger Throttle Bracket Plans

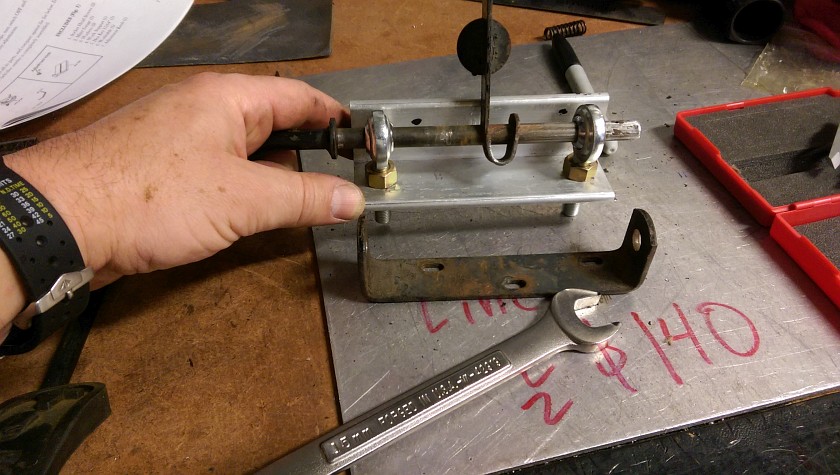
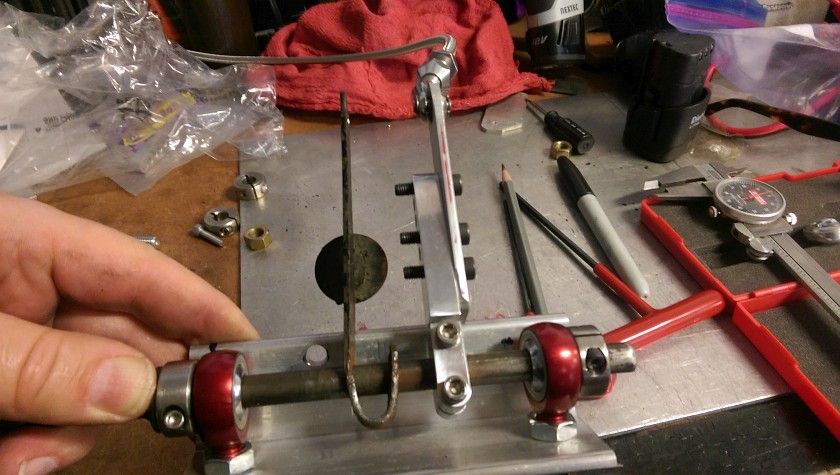
Throttle Bracket Mock Up Installed


Bolting it up with the stock arm and location. On initial testing (well no carb connected) it was way smoother and no squeaky operations.

Back Side of Throttle Arm


This is the back side. Will likely add lock nuts to be sure nothing ever comes loose. Also you can see how the top of the bracket is rounded so the Lokar throttle cable end can pivot. Lastly not the orientation of the extender. It should be flush to the arm's side that faces the firewall.
Billet vs. Sheet Metal
Marson RivNutting Tool

Enhanced Throttle Arm


Using a small piece of 1/8" aluminum flat (about 1" as wide as I recall) the center to center length was matched. Likely only need 2 fasteners to hold it in, but what the heck. Drill the ending hole to match the stock one, and you should all be good. One thing is that I did not have the stock linkage holding the throttle cable on so I don't exactly know what it looked like. Hopefully the thickness differences on the aluminum will not be a problem. If so switch to a thinner steel and you should be all good.
New Throttle bracket

Throttle Bracket Eye Candy


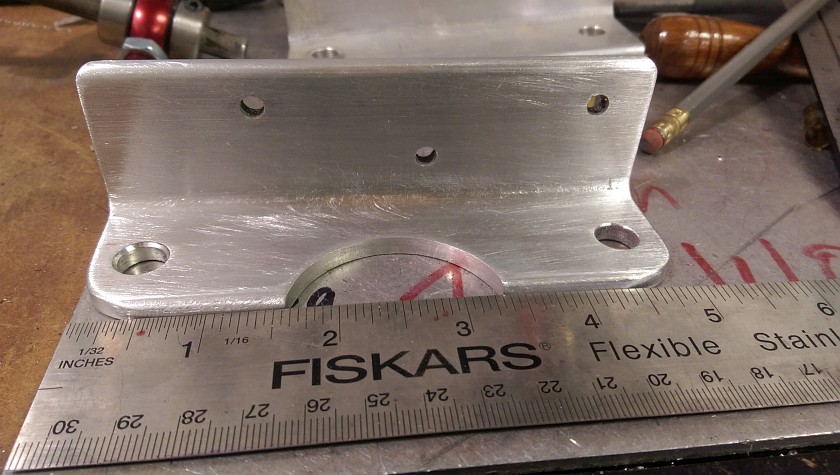
Just to make it less like I used some aluminum angle, I cut a half circle into the bracket. Won't affect strength and makes it look a bit nicers. Corners were chamfered up and excess rod lengths chopped. Make sure you leave enough room for locking nuts and/or lock washers then trim away.
Finished Throttle Linkage

Close View of the Throttle Bracket and Arm


A bit closer view to see the ugliness. The throttle arm does have a nice bump stop (round disk) to keep things from vibrating

Finished Throttle Pedal Linkage


Here is the finished and painted product! Both collars are not really necessary, but keeps things safer if one gets loose. Note that since the pivot points where the rod ends are are a bit closer I can flip around the collar to move the throttle out a bit closer to the brake pedal if needed.

That's about it. I can say that the motion is much smoother then the stock sheet metal version. Also I don't expect any slipping of the arm as it seems to have a much tighter grip then the flimsy way the old arm clamps onto the shaft. Nice project and does not require any changes to the car for those that car.
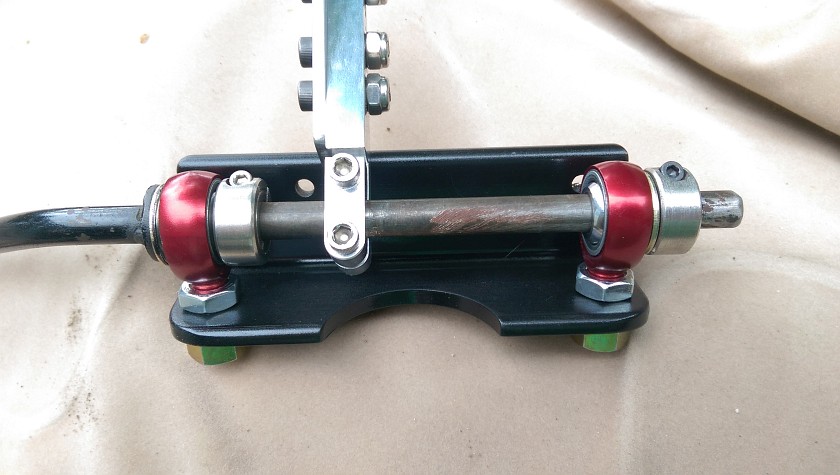
Finished Throttle Bracket

Finished Throttle Bracket


Here is the finished bracket. This is a bit longer then the original mock up, but pretty close. Things are cleaned up a bit and it's ready to assemble.

Stock Assembly vs. Upgraded Prototype


Here is my first cut of the bracket. I used some steel rod ends and a scrap piece of aluminum angle. The angle was a bit too short for what I needed, but I went ahead and made it with the idea I would re-make it once I got some material in hand.
Passenger Seat Rail Orientation
New Throttle Arm

Sheet Metal Arm vs. Aluminum Arm


The bottom arm is the stock (if that's not obvious). The top arm is from Speedway Motors. Was about $10.  A small extension will need to be fabricated to make the lengths match. Read on!
Beautifying the Bracket

Beautifying the Bracket


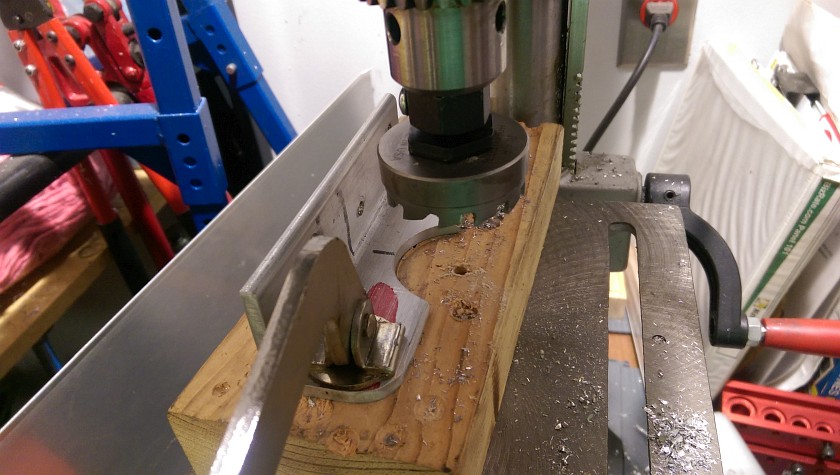
Chopping out the excess metal, really to make it less looking like a pice of aluminum angle. Using the Blair hole cutter to make the clean cut, almost machined.
GTSparkplugs Header
Click for Contact Page Click for Contact Page