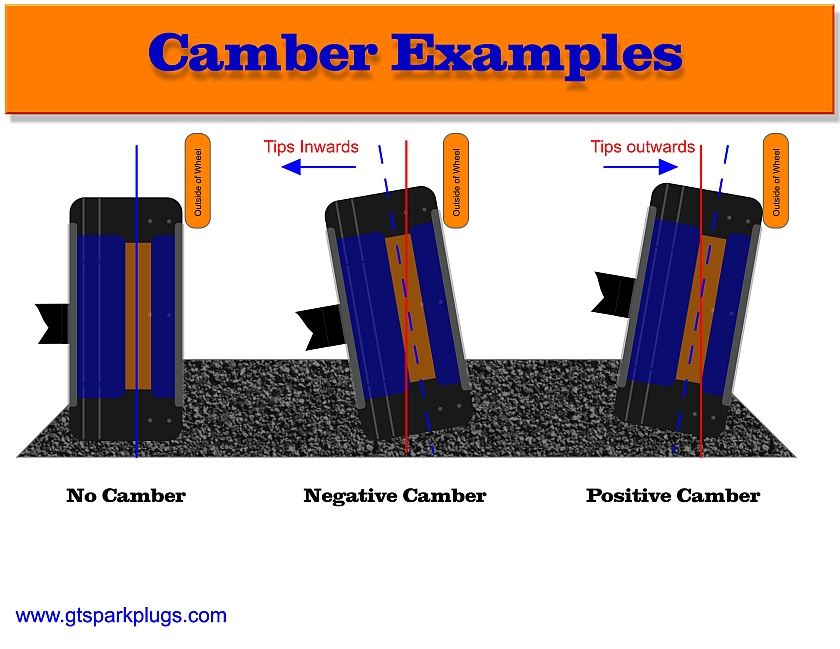
Simple Tire Camber Examples
I have been looking at cambered rear ends for a while. Here are a few pictures and examples of what wheel camber looks like. You typically use camber help with tire contact during corning. The idea is that your suspension is supposed to do that but it may not be able to provide the correct camber during corning or due to poorly engineered suspension geometry. So typically you add 'Negative' Camber to help. You can also use negative camber to help fit tires under fenders but that's not such a great idea, but often done. If your from the UK you may know these at 'Tyres'...
Negative Camber Angle
Typically is used to improve handling, with some cost in tire wear and straight line performance. Most performance handling cars have some amount of negative camber.
Zero Camber Angle
The starting point and can be fine if your suspension really does it's job correctly but as you might guess that all suspension designs have some compromises and this affects how it works.
Positive Camber Angle
Typically seen on tractors. Well that's not totally true, but you might find it on the inside wheel of a circle track car or things like that. Lift the front of your car off the ground and you will see your tires typically flop into positive camber.
Camber is not limited to the front suspension of your car, many cars have adjustments for rear camber as well.
Solid or Live rear ends typically have Zero camber. Sometimes you can cheat and add camber (usually negative) by torching the tubes or if using a floater style rear end you can get special hubs, drive plates and axles that will allow camber to be used. Adding camber to solid axles has its issues, but for racing it's not all that uncommon these days.
Independent rear suspension typically have adjustments for camber. As mentioned above you can also use it to help tuck in your fatty rear tires by putting a bit more camber to help tuck it all in at the cost of increased tire wear and likely still rubbing when the suspension articulates up and down.
Their are tons and tons of books on suspension design, how they work, tuning etc. This is just a simple and quick introduction to the terms and what each style of camber looks like.
See Camber Example Picture Below
First off the drawings are very exaggerated to show the effect of the camber. Also, as you might expect the bottom of the tire will not sit like in the drawings but as you would expect flatter to the pavement.
Camber is typically measured in Degrees. In the pictures below the blue line and red line define the angle in degrees. Tipping inwards is a negative angle, and tipping outwards is a positive angle if that's not already clear!
How do you come up with a good setting? If the car has an initial setting I would start with that and see what others are running (you know Google...) and see what you like. A tire pyrometer, a stop watch can be your friend here.
How to measure the Camber? You can get a bunch of simple tools that will do it our make something yourself (Hint upcoming diy project). But basically you need to measure the angle of the face of the wheel. Try to measure from the rim lip if possible as the tire bulge on the bottom will give a false reading.
Click for the NEW Camber Offset Calculator!


