DIY Pinion Nut Tool
After putting together a few Ford 9" rear ends, I found that I needed a simple tool for holding the yoke while I torque the pinion nut down. This nut can be torqued in the 250 ft/lb range so it does require a strong and secure way to keep it from spinning while building the rear end.
Initially I had picked up a tool from Amazon that is basically a 1/4" laser cut plate with various holes and cut outs so it can be bolted to any number of different yokes. While it is inexpensive and universal, it's really a piece of crap. The metal is not heat treated and distorts badly when really getting things tight. If you are using a whimpy rear end that don't have much torque requirements on the pinion nut it may just work fine. But read on if you want a cheep and more effective way to make something better.

Home Made Pinion Wrench vs Commercial
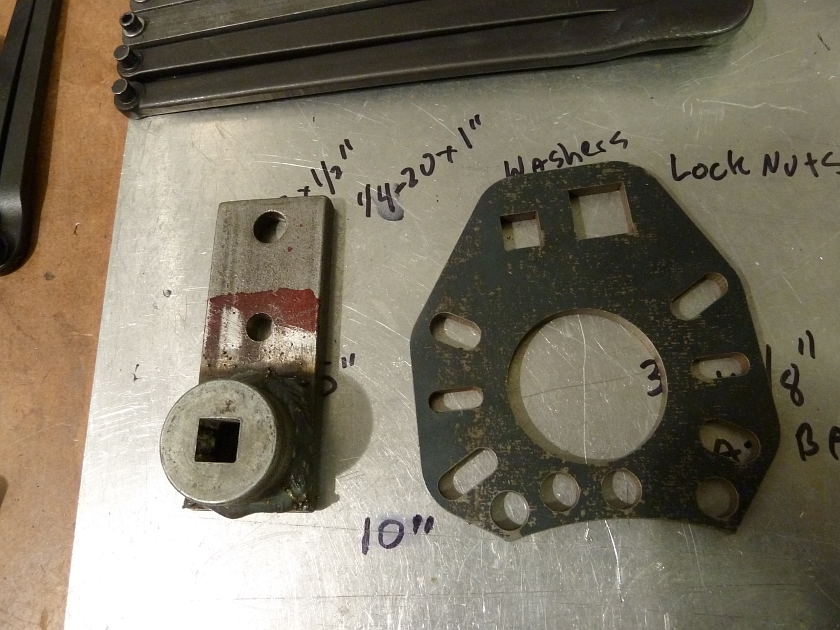
The pinion wrench on the left is obviously the DIY version, and on the right is one I picked up from Amazon (Allstar Performance). Many companies make the same looking sort of thing. The Allstar one ran about $25 bucks when I got it and this is before I used it. Pretty simple, has 2 socket sizes, 1/2" and 3/4" as well as fitment for most any size yoke. The DIY version used an old large 1/2" drive socket and a piece of 3/8" flat bar.
Allstar Performance Pinion Wrench Mounted
The tool is nice and simple, and actually well thought out except for material choice. This fit fine on a 1350 U-Joint sized pinion yoke on the Ford 9".
Pinion Wrench In Action
With the socket wrench popped in it worked pretty good until I started the final torque of the Pinion Nut. I used a 250 ft/lb rated torque wrench for the task (not the ratchet shown). After getting it tight it felt a little loose. And after a couple of install and remove cycles to get the pinion preload set I noticed things going wrong for the pinion wrench.
Chewed Up Pinion Wrench
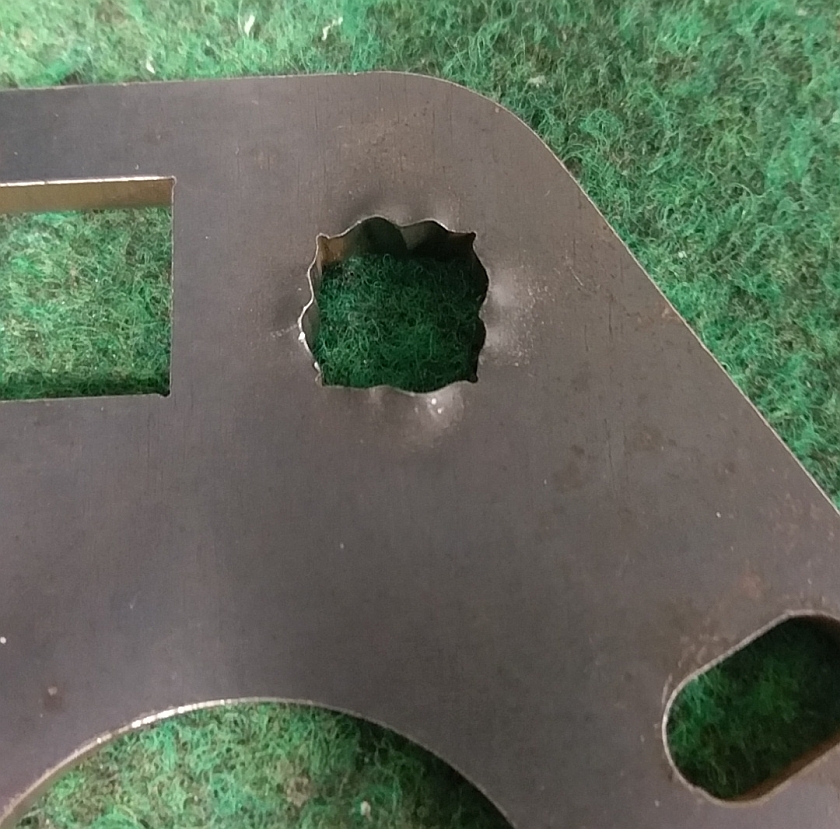
Yikes! This was after maybe 3 uses on the build. Things not looking good for the 1/2" Drive slot. I didn't have a 3/4" torque wrench or adapter but might be a better way to go. Still did not expect it to be this weak. Hmm, needed to make something and didn't want to spend a lot of $$ so read on to see what I cam up with.
DIY Pinion Wrench Tool vs Allstar (and others)
This is my attempt at a home made tool. I found an old UGLY 1/2" drive socket and a nice thick piece of steel in the scrap bin. With some eyeballing things I drilled a couple of holes and welded up the socket to the bar. Not pretty buy a $hit pot stronger then the flat plate style pinion tool. Net cost was just about only the scrap and electricity. You can see my DIY Spanner in the background right next to the Armstrong forged unit.
Home Made Pinion Tool Mounted
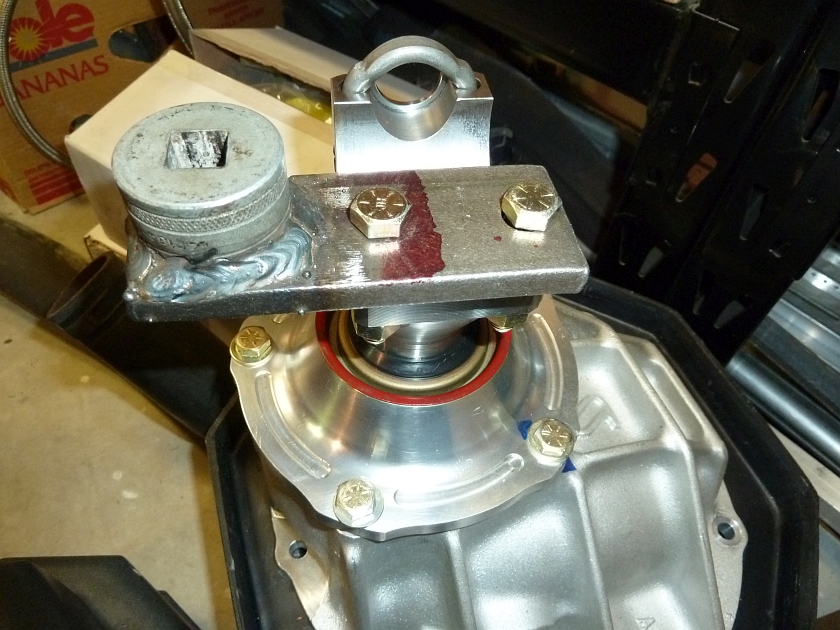
Here is the tool mounted as the other. Note that Their is plenty of room to get to the pinion nut and also very securely hold the pinion from spinning while torqueing the pinion nut. While not universal, I guess I could make it for other rear yolk spacing, but I only have Ford 9 inch rears so not a problem.

Getting the Pinion Nut Tight
Just getting things tightened up a bit. This is just with a ratchet, but I can say that it's solid and no flex or chewing up of metal like on the flat one. Best part is it was pretty low cost and now the Allstar one can move to the scrap pile!
DIY Pinion Wrench Conclusion
This was a quick simple project made out of scrap and an old socket. It's infinitely better then the el-cheep one I picked up. You can find better ones at some of the automotive tool supply stores but they get pricey, but likely worth it if you do a bunch of work like this. For my use the thicker metal and welded socket did a great job.
Have at it and get your project done!
