Build Your Own Differential Stand
- Page 1
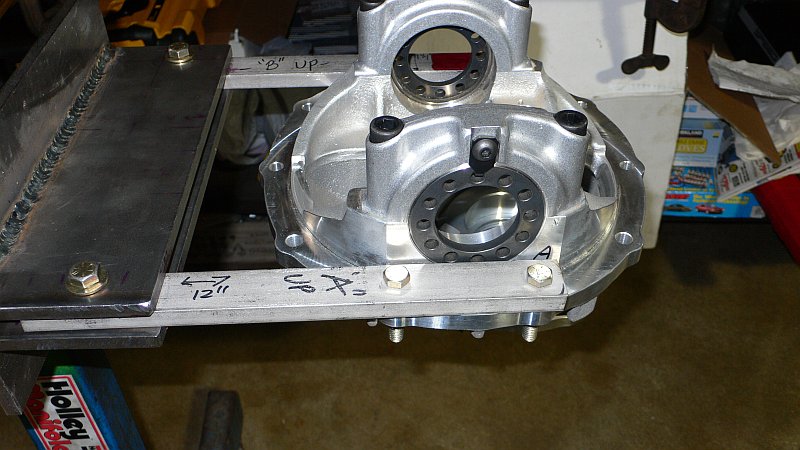
I have a few cars with Ford 9" Differentials in them (The Ripper, The VSE Cobra, and possibly soon the Tiger) I thought that it would be a great idea to learn how to build one up. The 9" is much easier then most since you do not have to deal with the entire axle assembly when putting it together. I quickly determined that I needed one of those trick holders that allow you to mount it on the bench or in a common engine stand. After some poking around the web it became clear that it is a hard to find part. So I decided that I would just make one up. Most of the metal was from Online Metals or the local IMS metal shop, some of the tubing was scrap and it was lucky to be very thick walled and just the right size. About the only tool that you might not have is a welder, but other then that common tools can be used for just about everything else.
Link to PAGE 2 of the Differential Stand Project

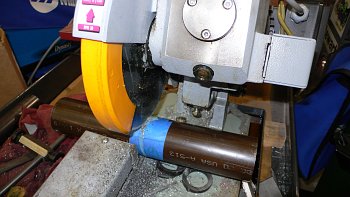
Chopping Mounting Pipe
This was some thick walled pipe that I picked up from Industrial Metal Supply (local vendor). It was scrap but was the same size as my engine stands so it was just right. Cut the length to at least longer then the engine stands female counterpart. If you want a hole drilled into the end for a turning handle measure and account for that too. My stand had a hole for a lock pin and that was drilled out afterwards
Finishing Pipe Surface
After cutting the pipe face it should be made flat and clean. The cold saw that I used left it very flat and square. Only a small burr needed to be cleaned up. This was a lot of metal for my small belt sander, but it did the job.
Swivel Plates
These plates will be welded to the back plate on the stand and will sandwich the 2 arms that hold the 9" to the stand. These were made out of 1' length of 0.375" x 4" 1018 Cold Finish Mild Steel Rectangle Bar. It was cheaper to order 2 feet and cut with the plasma. This was a bit too wide to use the cold saw for the trim.
Plasma Cutter and Rollers
1018 - FLAT BAR COLD FINISH 0.375" x 4" 1018 Cold Finish Mild Steel Rectangle Bar about to get the chop. Note the training wheels on the plasma cutter. These will make the cut a lot nicer then if I tried freehand. The result is a lot less grinding.
Swivel Plates Cut
Here is the cut plate. Not too bad. Most of the mess is slag and that comes off quick on the belt sander. Mission accomplished with the 'Training Wheels' keeping the cut straight and clean.
Swivel Plates Marked
The plates have been ground flat and clean. Then dychem-ed for some later drilling for the arms that can be seen to the left.
Measure Pipe
Measure pipe which should be around 2.375" and divide that by 2 to get the radius
Center Pipe
On the Backing plate draw lines corner to corner and across the centers. This should all align in the center of the plate if it's square. It doesn't have to be super accurate. Center Punch it. This plate will hold both the pipe and the swivel plates, each on opposite sides.
Center Pipe
Set up some dividers with sharp points (under the caliper) to 1/2 of the diameter of the pipe. Dychem up the center.
Scribe it!
From the center punched divot spin the dividers and mark the pipe, then open up the dividers a bit to scribe a line that can be seen outside the pipe. Why both? Not really needed, but looks good in setting it up.
Placed Pipe
The pipe should be placed in the center of the larger scribed circle. Again this does not have to be super accurate, eyeball is OK. But if you want to do it center to center exaclty you can figure that on your own.
MagTab
If you are working with pipe this handy tool can keep things centered and stuck until you can weld. The tool has magnets on swivels and on all other surfaces that makes it is easy to hold the pipe from moving around when you tack it. The Strong Hand Tools is the maker of this tool and they have other unique tools that are really useful.
MagTab in Action
This is the tool holding the pipe to the plate. In this case it's not critical, since the pipe is heavy and it's easy to tack weld, but it makes the job a bit easier. NOTE : Just tack weld in a few spots and remove the MagTab or you will melt the glue that holds the magnets in.


