Sunbeam Tiger Lower Dash Pad
This project is a sub-project for the Sunbeam Tiger Dashboard. This also applies to the Sunbeam Alpine for those
that have one. The lower pad is a metal angle that fits under the dashboard and is surrounded on the front and
bottom with a nice vinyl coated padded trim. After some time the vinyl cracks and time for a renovation.
In my case I had picked up a spare for my car and stripped it, removed rust, and hit with some primer and paint,
then finally added the foam bumper and 'pleather' vinyl cover to make it look like new.
It's not a hard project, just need to take your time and watch out for a few gotcha's that I'll mention below.
Tools Needed
Razor Knife or Blade (SHARP!)
Sharpie Marker
Scissors (they may get glue blobbed)
Get a nice clean place to work!
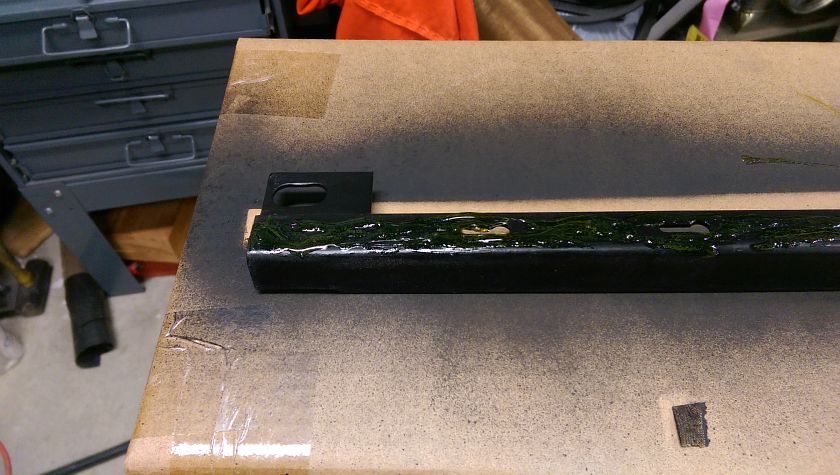
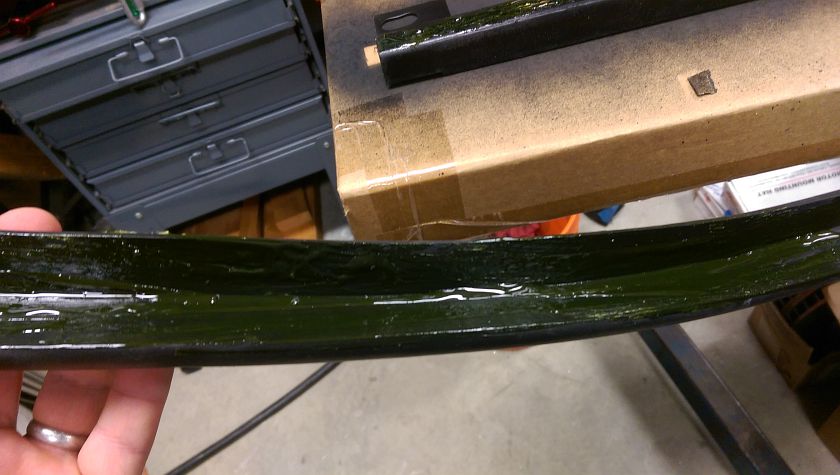
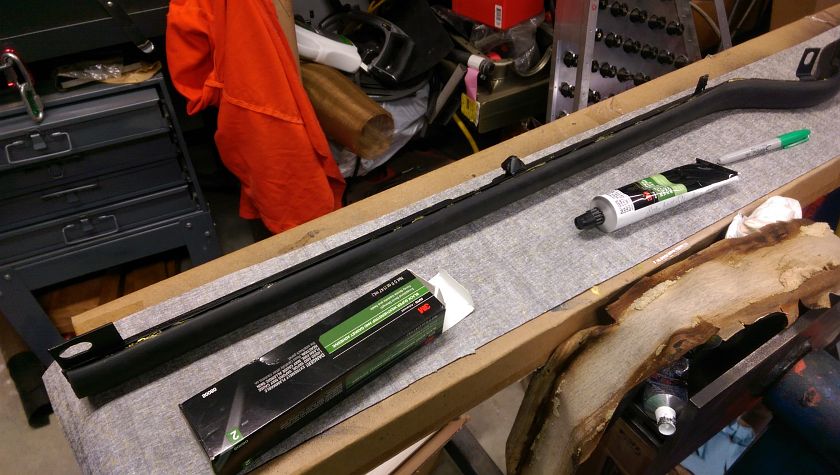
Applying Contact Cement - Bracket
I had an open tube of yellow (sometimes called yellow death) and used that up on the bracket and foam. I applied to the top first, let it tack just a bit, then to the other face so things did not drip off. Again, black 3M Weather Stripping glue is a better way to go.
Applying Contact Cement - Foam
Now do the same to the foam. I tend to over apply glue which unless you catch it just right can be a problem for assembly. I think I will say LESS is MORE when using contact cement.
Now just follow the directions on the glue, which amounts to 'wait until tacky' which means just that, but really check with your finger for it to still be a little squishy and still smell strongly. If it dries too much it won't stick. If it is not dried enough it will 'eventually' stick but will have trouble keeping where you place it. Do these steps in a well ventilated area!
Contact Cement Again Too Thick
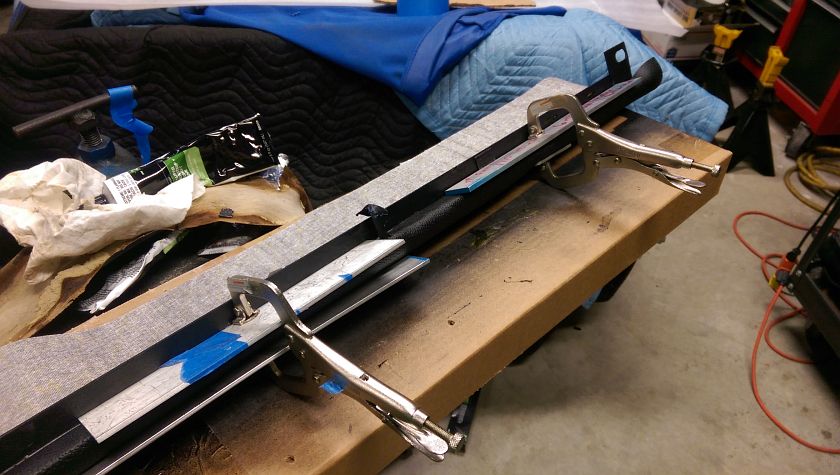
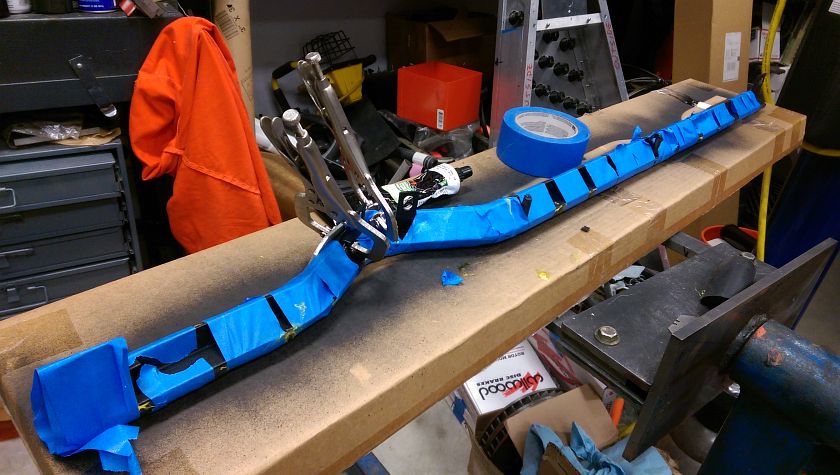
Ok, I'm 2 for 2 on too much glue and not enough dry time. It was close to being ok, so I just used some light clamping force to hold things in place. In about 15 min things set up fine. Things are still movable a bit if you need to make things square unless you glue is dried perfecty.
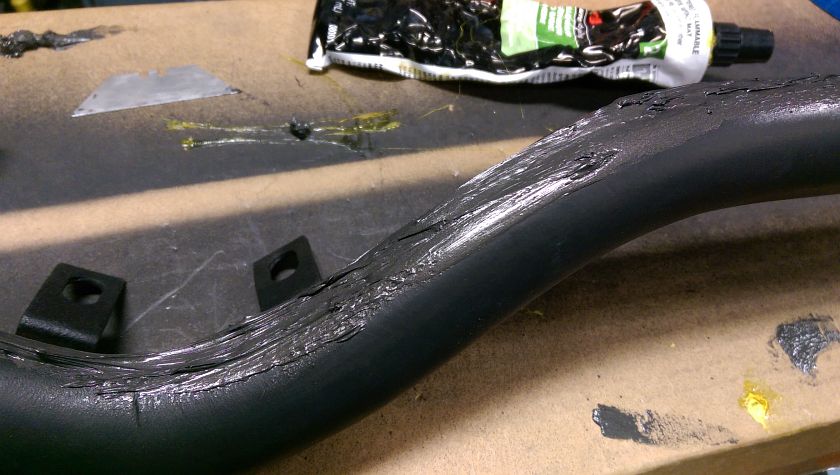
Dash Pad Filling Gaps
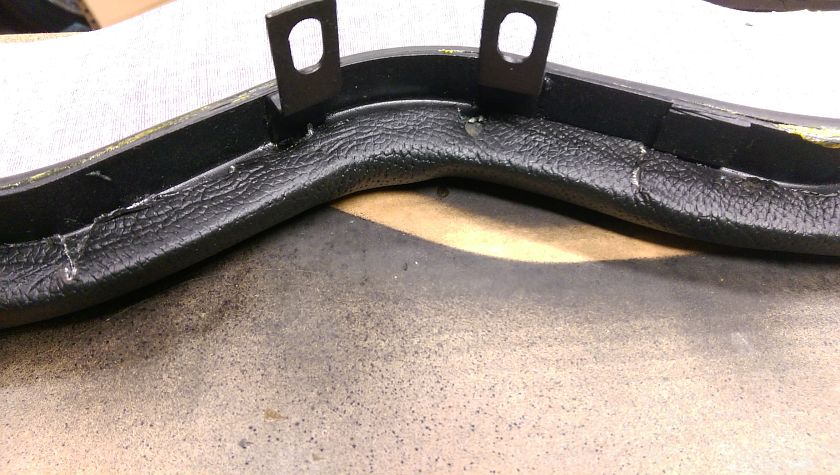
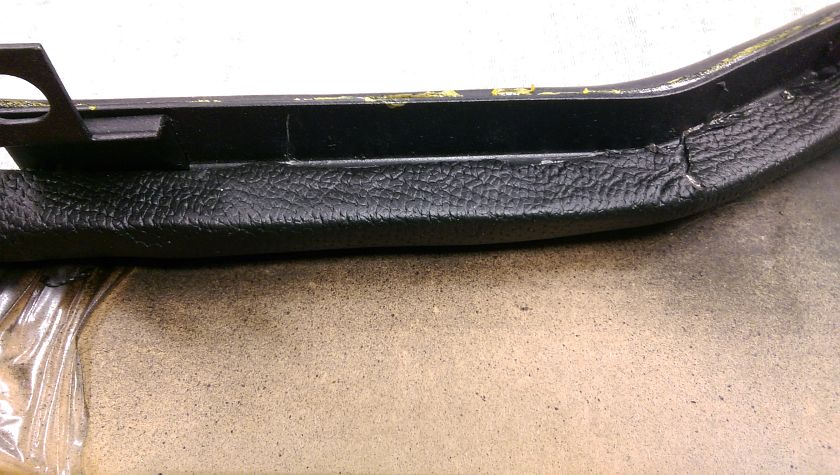
It's hard to get the curve to stick when the glue is not just right. After some fooling around with it I decided that a bit of black silicon glue (really transmission gasket sealer) would fill the gap and make the transition from the curve of the foam where it buckles to the bracket. This make in nice and round for the material to cover. Yes, I did smooth the glue down more...
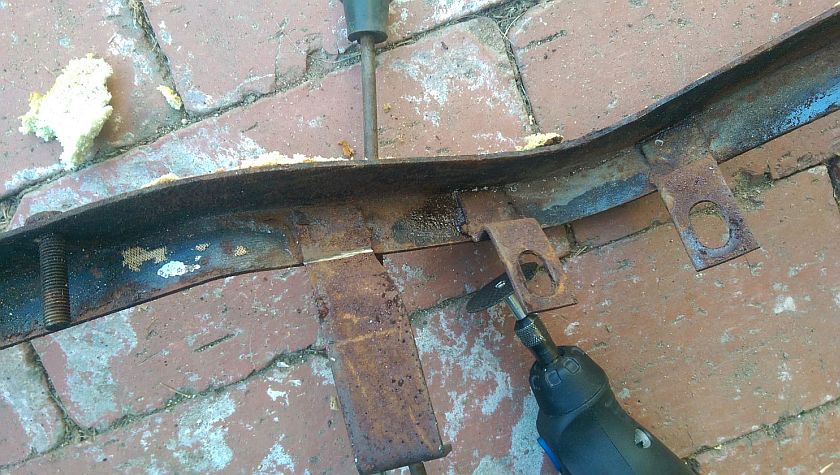
Removing the Vent Control Brackets
The Tiger and Alpine have vent controls under the dash that are held on to the dash pad bracket. I am not going to be using these in my Tiger so off they come. They were cut with a Dremel tool and a cut off wheel. A good cut and one bend and they were gone. I hit them up with a file to remove the burr.
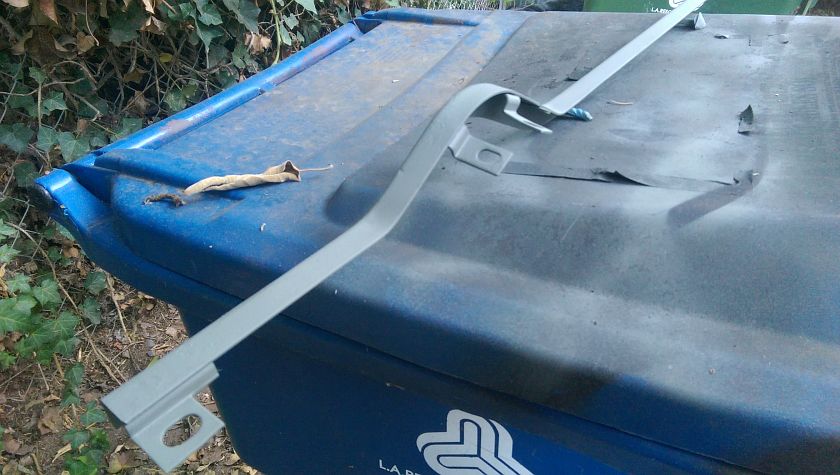
Primer The Bracket
After some liberal sanding I painted the bracket. First with some self etching primer then some black gloss then with some black texture coat to hit most of the rust spots. Note that most all of this is not visible and just a coat of black would have been fine, but you know me, more paint is better (in my head anyway). Tape up the bolt threads (3M Blue Tape), you will want this to stay on until you are done with the project!
Ready The Vinyl Covering
You should trim the ends of the foam flush with the ends of the bracket. Then lay things out and see how things are going to wrap. I planned on only doing one side at a time, that way I could adjust length of the covering as needed. I laid out a line that would allow me to gauge where I was going to wrap up the vinyl around from front (dash side) to the back. Only worrying about the one side for now. Leave a at least an inch or two overhaning on the ends for capping the bracket once all done.
Glue One Side At A Time!
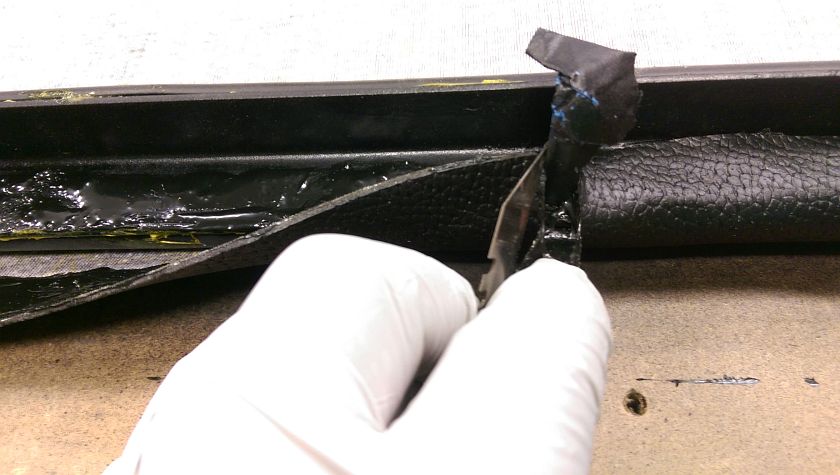
The way I did it again, was to start with the edge of ONE side so it wrapped just to the inside edge of the bracket. The bracket AND the edge of the vinyl (about 1") were previously coated with glue. It's still a bit wet, but that's my mistake. Make sure the material edge is parallel to the bracket edge and start rolling it up, pressing with your fingers as you go. If your glue is dried just right it will stick like a Mo-Fo, otherwise you may have applied too thick or not waited enough time. Don't worry, just wait a bit more if this is the case, you can move things around for a while even after it's together.
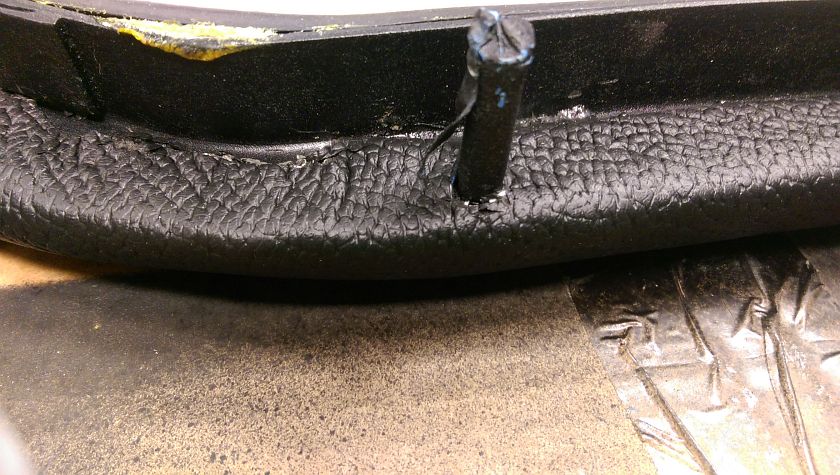
When you get to the bolts (their should be two 1/4" bolts sticking through) use your razon knife to cut a slot. Cut the slot along the sides first, then fold the flap back and trim right up to the bolt for a perfect fit. Don't cut the slits too long, just to the edge of the bracket.
Curves Ahead
You can see the bolt and how the trim is cut right too it. Looks perfect in my mind ;). Now start getting into the mess of the curve. You can bend the vinyl pretty good to a point as seen here. No cuts needed as yet. As we move down the curve we will need to make a 'V' cut to relieve the excess material. I used scissors for more control, razor would be fine too if you are careful. Again just worry about getting the material to sit flat along the bracket, don't yet worry about making it wrap around. Double check also for any buckles on your previous work.
Dash Pad Steering Column Area
This is the tricky part. You can see a few cuts now. One is on the left like a big 'V'. Didn't need to be that big. The one on the right is a bit better. And one near the middle. These cuts help prevent a bubble. You can see a little bubble right in the middle of the curve, but don't worry since it's not pulled down and around yet. It will be gone, don't worry.
Finally at the End!
After all that we make it to the end. Hard to see, but their is about 2 inches of overhang left for later capping. You can also see the cut right in the curve.
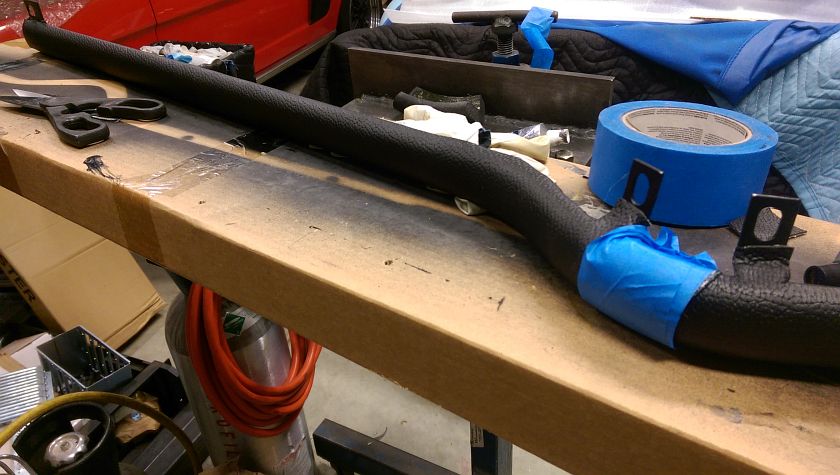
Wrapping Padding
I didn't catch much more detailed photos of wrapping, so I'll try to use words (sorry).
ONCE THE OTHER SIDE IS TOTALLY DRY wrap the side of the material over and try to draw a line where it's length should be so that it wraps on the bracket like the other side and mark where you should cut it. IMPORTANT as you get towards the curve you need to leave extra material! Make sure your wrap is not too long but more important is not too short. If you make it too short, call for a new piece of material and remove the old and file in the trash. Do this in a couple of steps, and again better to leave a little long as you can trim with the razor later.
NOW apply the glue as you did before to both the material and the bracket. Watch out as it can get messy and now you can easily get glue on the front side of the material so wear glove, keep you hands clean, etc.
Once glue gets tacky roll the material around and stick it to the bracket pulling it tight as you go. Again if you glue is not dried enough it will not stick well, so take a bit more time if this happens.
As you work towards the curve you will have to do a couple of slits for the brackets that hold the steering column. You may have to do a small slit to make things sit flat. Try pulling the material tighter prior to this, but if all else fails make the shortest possible slit to make the material sit flat.
In the picture above I made my slit a touch long and glued it back together and held it with '3M Blue Tape' which again saved the day.
Keep an eye on things, re-press with your fingers all the glued areas to make sure they are sticking.
NOTE : DO NOT GLUE THE FRONT SIDE OF THE PAD, ONLY THE METAL BRACKET WHERE THE VINYL WRAPS!
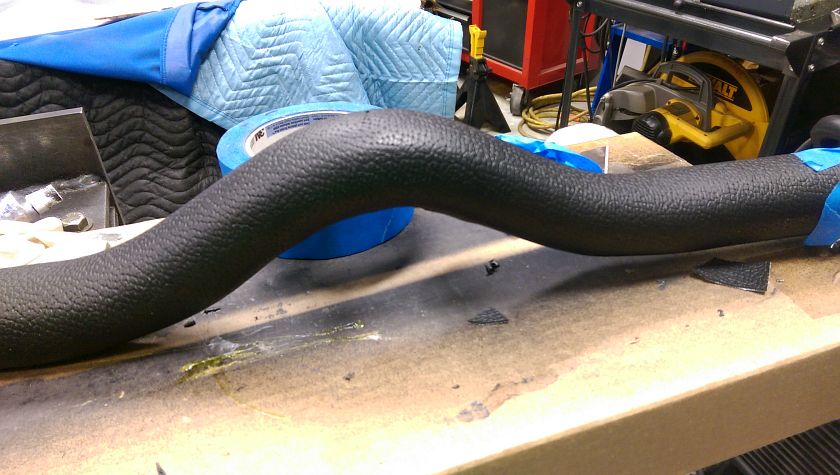
Just About Done
After fixing the 'glitch' in the steering column area all that is left is to trim the ends and fold them around the edges. Look at how this sits against the dash, and think about folding it a bit like wrapping a gift, leaving some extra lengths of material folding over to the metal bracket. Again, look at how this is going to sit and make the part that is facing front the nice fold. After you are comfortable with all of this, do the glue thing again. You may have to do the ends in steps depending on how you fold things over. I had to glue one fold down. Let it dry, then apply glue on top of that, and go again. The ends are a bit tricky, look at your old one for ideas as well.
Conclusion
While this might seem like a complicated job, it's pretty straightforward. You don't need anything fancy except for the Blue Tape and some good glue. The black glue can make a mistake much less visible, otherwise yellow is fine. Watch out for blobs of glue on your hands as you touch the finished side. If your daring you could use simulated Tiger skin fabric for this bumper, but only for those special folks...
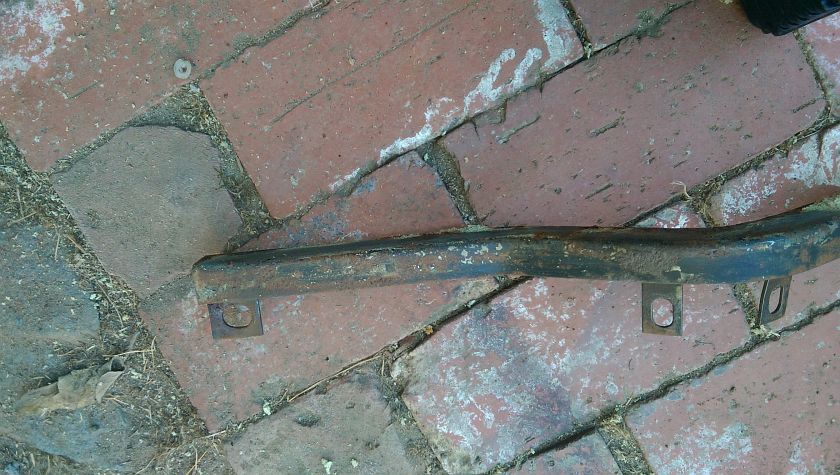
Stripping Bracket
After a wire wheel job (mounted on a drill), I removed as much of the glue and foam as possible. The pic is before sanding which I did to remove as much rust as possible prior to primer.
Contact Cement Too Thick
As I mentioned if you put the glue on too thick (just make a nice FLAT layer) or you don't let it dry enough you may have to put some light pressure on it to make it hold in place. In this instance of too thick I just used 3M Blue Tape (a key to all projects) to hold things down. Let things dry for a couple of hours and it should be almost permanent.
Tip : Where the heads of the 2 dash bolts are against the foam, carefully take a small piece out so the foam sits flush and the heads does not bump the foam out


