Sunbeam Tiger Rear Sway Bar Install
Moving along on the rear end work on the Tiger. It was time to make the sway bar. After talking to a few Tiger folks and with their good authority I though I would press on with a rear sway bar. Some say it's not necessary on a Tiger but I think having the option to have it will be so here goes with that installation.
A few of the racers and another performance Tiger enthusiast gave me a few hints on how they did it. Well more then hints...
The car actually did have an ADDCO sway bar on it and all I can say was it was a piece of $hit. Add a very poor installation by the installer it was nothing less then a dangerous mess that was about to cut through the rear brake lines. Nice job.
Off it come. Really had to go since the new Speedway Engineering 9" was a totally different ball game.
What the others were using was typically a 34" wide splined bar (from anywhere 3/4" spline to 1"). Remember the spline size on sway bars of this nature (sometimes called Torsion Bars in the racing world) has not much to do with the stiffness or thickness of the bar.
I had initially though about using a 3/4" bar but found more parts for 7/8". 1" also has a lot as well but though it unnecessary for this car. And one big reason for using a 7/8" bar was the mounts (Coleman Racing).
Parts used
Coleman Racing Spherical 7/8" pillow blocks for the mounts. No rubber here. These are a bit costly but I think well worth it.
Schroeder Steering 28" Wide 7/8" sway bar .655 thick. Picked it up on eBay for under 50 bucks new including shipping!
Hyper Racing torsion bar arms. They were about a perfect a match, and inexpensive as far as arms go. I used the 1 1/8" offset Micro Sprint car arms. Note the will do any offset you need to make fit for little or no extra $$. I liked Hyper Racings product, nice anodized black with machine highlights. About the only thing that could be problematic was the bolt hole size which is 7/16"
FK Aluminum Rod Ends. Note I had already mounted a 1/2" hole bracket on the leaf plate so use a 7/16" ball bolt to a 1/2" thread. Perfect.
McMaster Carr for the locking collars. I used 1 piece stainless, but regular steel would work just fine as well as the 2 piece.
2 - 1018 Cold Rolled Bar 5"x7"x.25" steel. I think only this thick so I could tap into it for the mount, otherwise 3/16 or 1/8 might be fine.
2 - 1018 Cold Rolled Bar 2"x??x.25" I don't remember the length but make it long enough to catch the hole already in the frame.
4 - 3/8" RivNuts for holding the bracket into the frame rail
Nuts and bolts - You can figure this out,
BLUE TAPE - Mandatory
Tiger Frame Rails Note
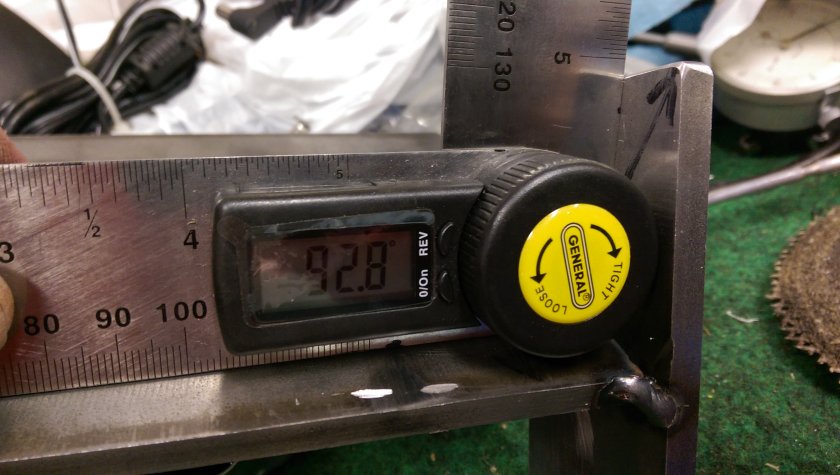
The rear bulk head and the Tiger frame rails do not make a 90 degree angle so do NOT final weld until things have been trial fitted. And expect to do this many times. Do NOT assume the brackets will be symmetrical. They should be close but given how things are assembled and years of road abuse each must be fitted individually. Now on to the show!
Sway Bar Bracket
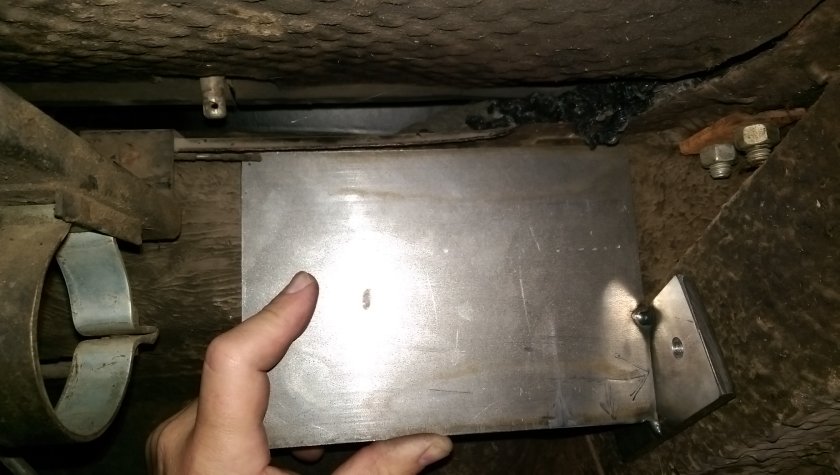
This is the passenger side (left hand drive car). The bracket is to sit flush to the back of the bulkhead and to the top. It may be a bit long (7") trim as needed. The frame rail side should look something like that. One NOTE is that their is a hole in the frame that can be used for the RivNut if I had made the 2" wide part a little longer. Look at it before doing that bracket. It might even be nicer to use a 2.5"-3" wide strip on the frame side of things if you are looking for super robust.
The pieces were tack welded and that is a good thing as I found out that the frame rails are no 90 to the bulk head.
In my install it will not have the lame stock pump or brackets. This will be an issue if you intend on running it as this sway bar will not fit with a stock pump.
Angle of the bracket parts
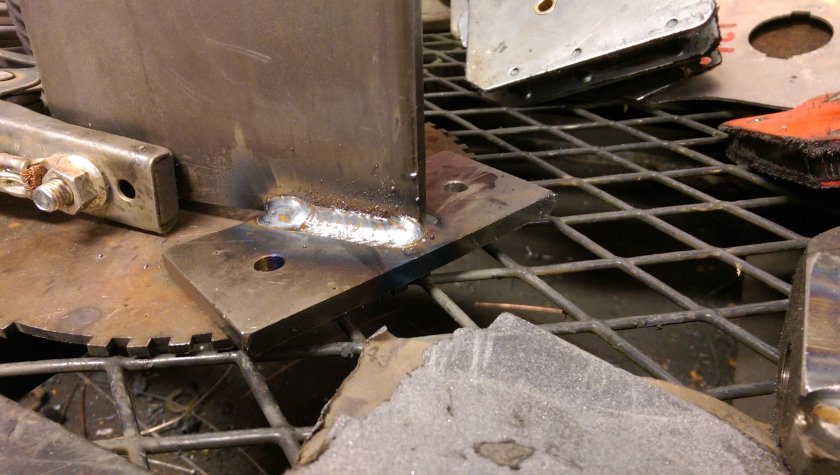
After carefully tacking the plates together at 90 degrees I test fit and found that it's not quite close. So a clamp in the vise and a tap or two with the hammer got it to fit just right. Repeat until both the bulkhead and the frame rail sit flush. Also make sure you clean any crap undercoating from the frame rails and bulkhead panels if that's not obvious.
Corky the Welder back at it...
Well actually this didn't come out that bad. I guess practicing on real projects helps. One thing to note is that I drilled some smaller pilot hole in the bracket. I think they were initially 3/16" so I could mark the frame and then later drill out to the correct size for the RivNuts. Again lots of fitting, marking removing. Take your time or it will not fit.
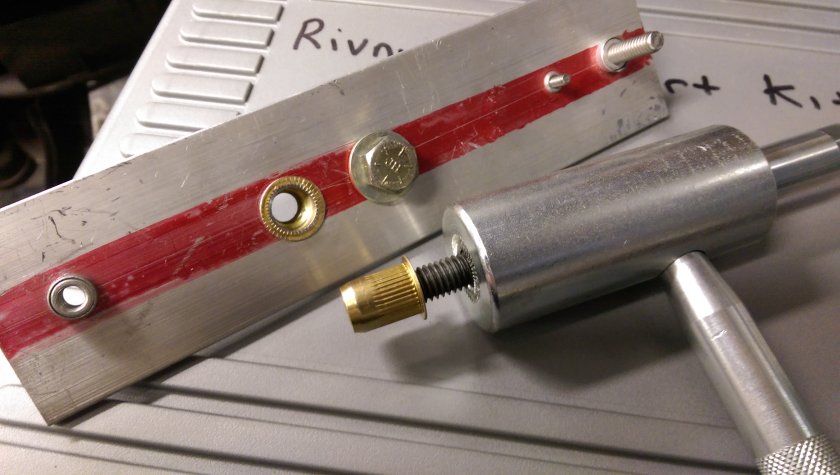
RivNut Tool and Example
You will need to get some Blind RivNuts for this project. You can buy them in small batches from eBay, McMaster Carr and a few other places. The harder part is the tool. While you can make your own with a bolt and some washers it's not the best solution since often the RivNut will twist in the hole and ream it out leaving a not so strong fasting. This tool was one I picked up locally, but it's made in the UK (just like the Tiger). You can also use one like the NutSert Tool that I have done a review on. Both have a serrated edge on the tool to keep things from spinning. These get into tight spaces as well. I have a Large Marson PULL type that does not spin at all but it's too large to get where you need it to. If you do a lot of fixing you would be wise to learn how this tool works (simple) as it will save your a$$. I have save much more then the cost of the tools and an ample stock of RivNuts and NutSerts with a single repair that kept me out of the dealership.
The pic also shows the aluminum NutSerts which for this application are not quite as good as the RivNut.
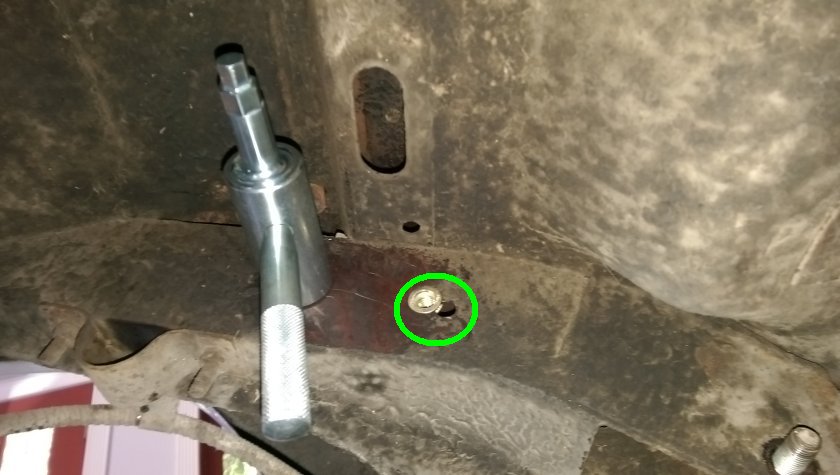
RivNut the Frame Rails
As mentioned I had drilled some pilot holes in the frame rail part of the bracket. I used them as markers so I could drill starter holes and then a final hole for the RivNut. You will need an odd size drill for this. It will tell you when you get the RivNuts on what drill to use. For USA the 3/8" and 5/16" thread RivNut's both require the same size hole, I opted for 3/8". I drilled a a pilot hole then one with the actual specified bit. Again you MUST use the correct size or the RivNut will not correctly secure. Once drilled use the tool and tighten up the RivNut. You can see (green circle) that their is a hole in the frame rail already. If I had planned better I could have used it which would have been a bit better. It's still plenty good in any case. This view is look at the drivers side (USA) frame rail up. You can also see the left over bracket for the ADDCO sway bar mount lower left.
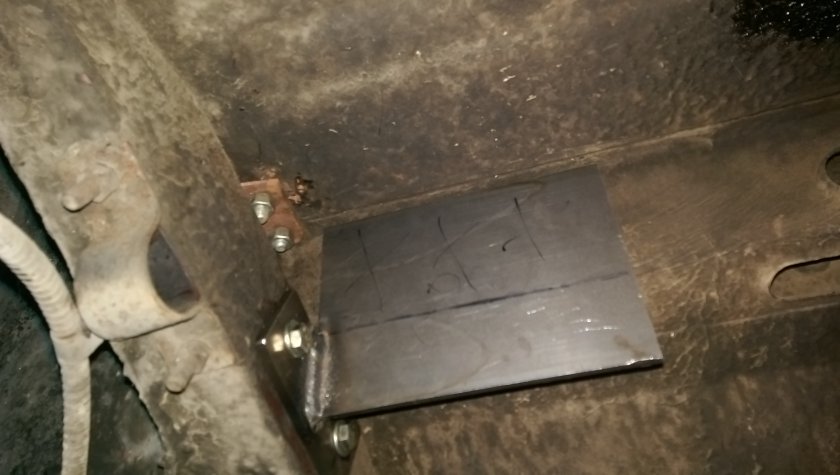
Sway Bar Bracket Mounted to Frame Rail
After all that you should have a nice fitting plate that sits square on the frame rail and square to the bulkhead. You can see the black line thta indicates the bottom edge of the chassis. It will come in handy later. This is the Driver side plate.
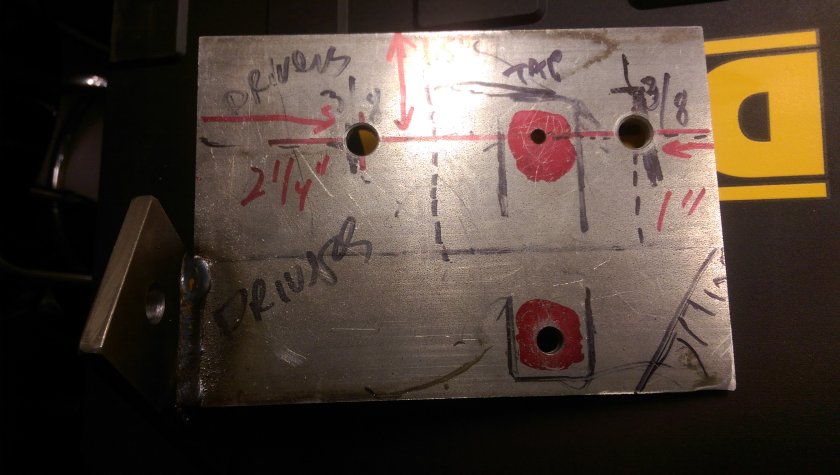
Marking the Pillow block and Frame Mounts
This is a mess, but you get the idea. One thing that I would say to watch out for is how high you can put the bar relative to the trans tunnel. I never really though about it but the clearance between the bar and the drive shaft should be checked at full suspension travel. The location of the pillow block mounts should be moved up another 1/2-3/4". Their are 4 holes in the plate, 2 for mounting the bracket to the bulkhead, and 2 to mount the pillow block. The Tiger has an oval opening in the bulkhead that allows access to bolts for mounting the bracket. You could also mount the pillow block with a bolt and a nut in the bulkhead but it would be a pain to remove the bar if you wanted to change the diameter. So what I did was Tap a 5/16-20 thread into the plate for the top bolt hole (where it would be inside the bulkhead). The bottom bolt hole for the pillow block is just a 3/8" drilled hole (for some adjustablity) since is in the open. Remember that black line? Well above it is the inside of the bulkhead, below is open and accessible.
A Few tips at this phase -
Mark and drill pilot holes (1/8") in the plate first for the 2 outer bulkhead bolts on both plates. This will give you a way to securely mount the brackets with the exception of the pillow block.
With Both plates mounted center up you bar against the mounting of of the arms to the axle so you can make it centered. You may need a second set of hands here. Assemble end links and set to same height and that will also guide the bar with a visual indicator that the links are both centered.
Mark the outline of the ONE of the pillow blocks. Get that marked as best you can and drill and tap the top hole for what ever bolt size (typ. 5/16") you use. Drill the bottom hole 3/8" so you have some wiggle room.
Once done bolt it all back up and mark the second bracket. Make sure the bar is free in the pillow blocks and not binding. Having the collars on the inside helps to keep things spaced correctly and make sure the pillow blocks are not twisted in the mounting.
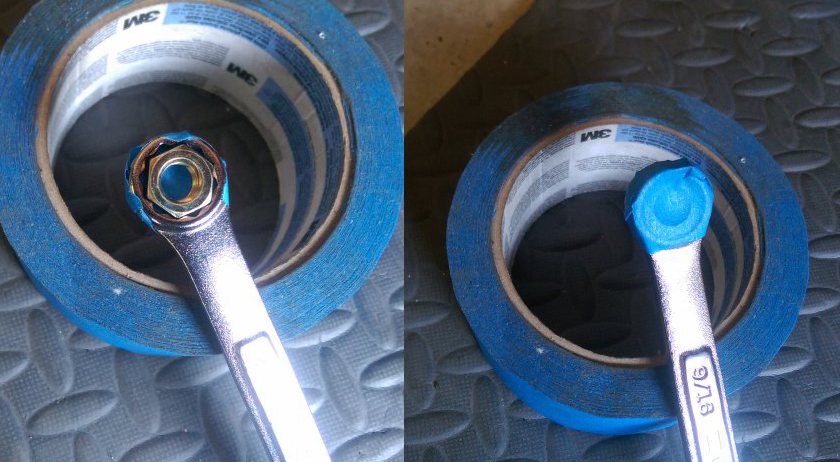
3M Blue Tape to the Rescue
Well you could use any tape, I just really like blue tape.
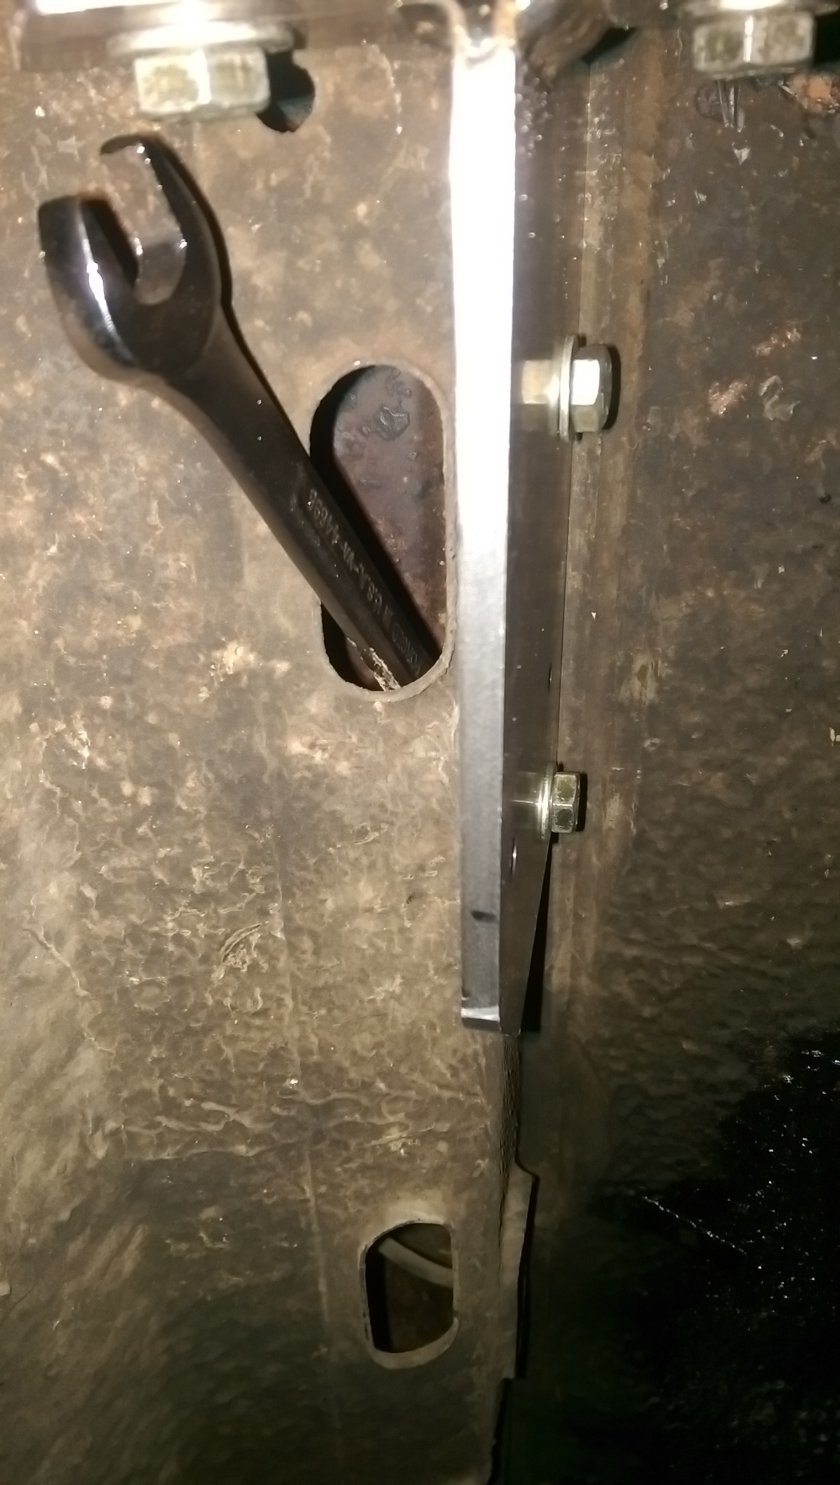
As you need to mount and the bolts behind the bulkhead and only have limited access this top secret technique will help you from smashing your Tiger to pieces. Tape the back of a wrench pop the nut in and it will stick. You will have to play some "pin the tail on the donkey" to find the bolt but it's not bad. Don't push too hard and to start the bolt twist with your fingers hold the wrench until it catches.
For final assembly pick up some 'Flanged Lock Nuts' from Amazon or McMaster Carr or supply house. No need for washers and will stay put.
Tightening the Bulkhead Nuts
You can see how to do this. It's important to plan where you bolt holes are so you can get to them. With the 28" bar and brackets I used it worked out OK. One bolt it almost right above the opnning. The other is a bit further in and may require a bit more 'dexterity' to get it on. This view is looking up.
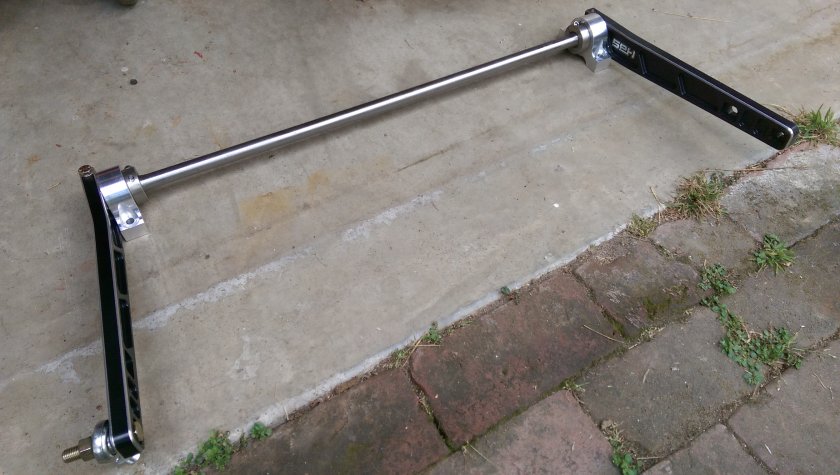
Tiger Sway Bar or Torsion Bar for those that care
This is the 28" bar with the arms (check out Hyper Racing site for all lengths and variants). When working with the assembly make sure arms are clocked on the splines correctly and collars are set. This will make fitting it in the car easier as the Pillow Blocks can't move too much. The arm length is important, if you can't use off the shelf lengths you can purchase arms that are blank but have the spline cut so you can cut to any length and bend as desired.
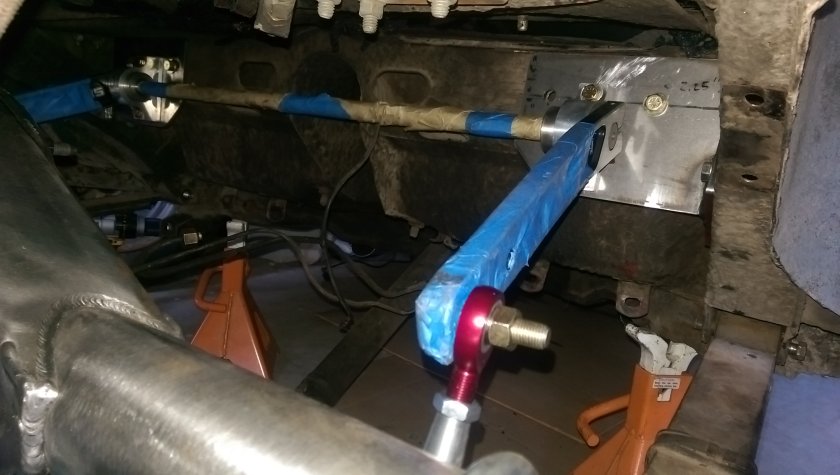
Tiger Sway Bar Installed
Looking back from the rear tire opening you can see the bar mounted and how things align. Everything looks pretty good except for possible bar being a bit on the low side. I'll drill and tap the additional holes for that just in case, but with the pinion being lower on a 9" I think it's going to be fine. Remember as you move the bar up the end links need to get longer, and their angle will also change to be less effective as they leave the vertical position.
Conclusion
While this doesn't go into getting all the lengths for the arms and the mounting points on the leaf spring plate (I used the tiger plate I designed will put up project for that too at some point.) you will need to figure this stuff out. And keep an eye out for interference issues such as the drive shaft, and axle etc. Check things at ride height as well as unloaded and compression to make sure things don't hit!
Questions? Click the tiny spark plug at the very top of the page right side and send a question.


