Wireless Horn Button


While working on the Sunbeam Tiger I decided to swap out the steering column. Then I realized that the racing
column from Sweet Mfg had no provisions to do a horn wire. No fault of theirs it's a racing column. To make
matters worse it uses a Quick Release adapter to the steering wheel.

Options are make a coiled cord assembly and disconnect harness, use the high beam flasher on the turn stalk
to trigger the horn, or think of something out of the box.

Well in my modification of the Turn Signal stalk for the Sweet column I had to cut off the high beam flasher part
of the switch. That would have been so easy to do, and just would have been connecting up one simple wire.

Enter the CrAzY idea I had, how about a wireless transmitter stuffed into the steering wheel?

The Good : I can have a horn button in the right location and a quick disconnect steering wheel hub without
any wires.

The Bad : SEE CAUTION BELOW, It will have a battery and related electronics, it requires a 1" steering
spacer, and I have to make it.


CAUTION : DO THIS PROJECT AT YOUR OWN RISK. THIS CAN BE A DANGEROUS
PROJECT IN THAT THE BATTERY CAN FAIL AND YOUR HORN WILL NOT WORK
WITHOUT WARNING. THIS IS FOR OFF ROAD USE ONLY.
Momo Steering Wheel Spacer

Transmitter Mounting Fitted


The fiberglass board is easily cut with tin snips, and then a quick touch on the belt sander  makes it a tight and perfect fit.

Wireless Transmitter Kit


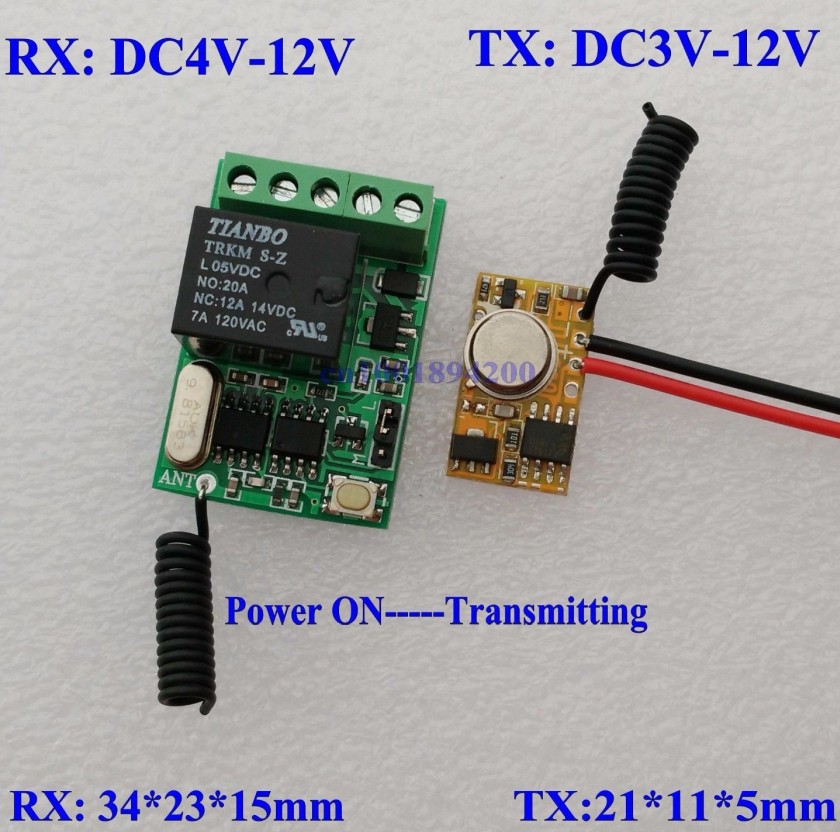
So my idea was to open up a small key fob type of transmitter and make something of that, but given the power of the Internet I poked around and found exactly what I need on eBay. Their are plenty of import kits, the one I picked up was from this seller - Wireless Remote Control Manufacture The kit I picked up was Momentary Transmitter Kit and was under 10 bucks shipped from China, and it took about 5 days to get it. The receiver comes in a small plastic case (not shown) and has a small relay that seems capable of driving a pair of horns directly (max of 20amp). I would say still may be a good idea to use a Bosch style relay as the final horn relay. For more information on Horn Wiring check out the page on Horn Wiring in the reference section.
Wireless Remote Kit

Wireless Remote Kit


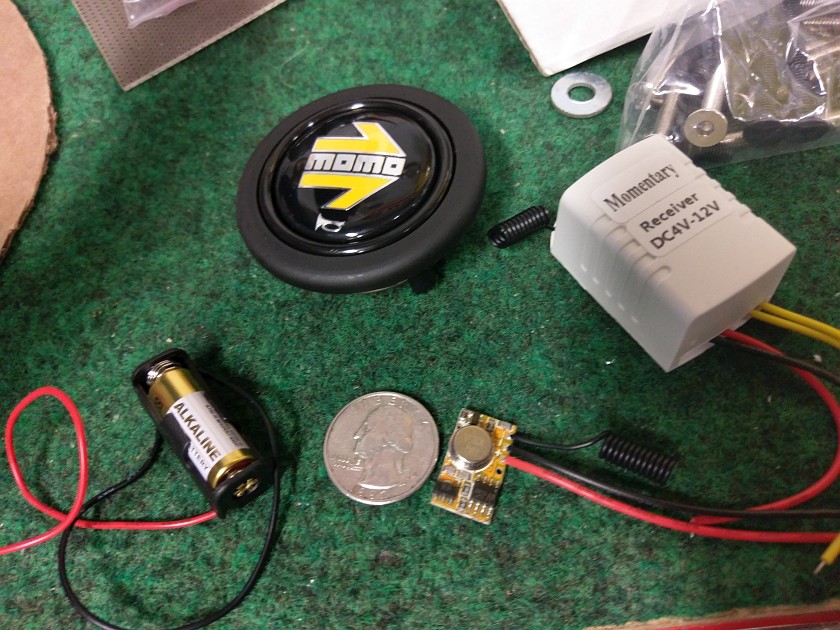
These are the parts from the wireless remote kit. The transmitter right next to the quarter and this is the part that will be mounted inside the steering wheel adapter. The battery is a typical A23 12 Volt battery which is commonly used in many remote controls. The battery holder is a bit tricky to find, but ePay came though again with about a 2 dollar buy from HERE. The Receiver comes in a little plastic case that pops open. This part will be connected to your horn or other circuit. The little black curly wire is the antenna and care need to be taken not to break them off.

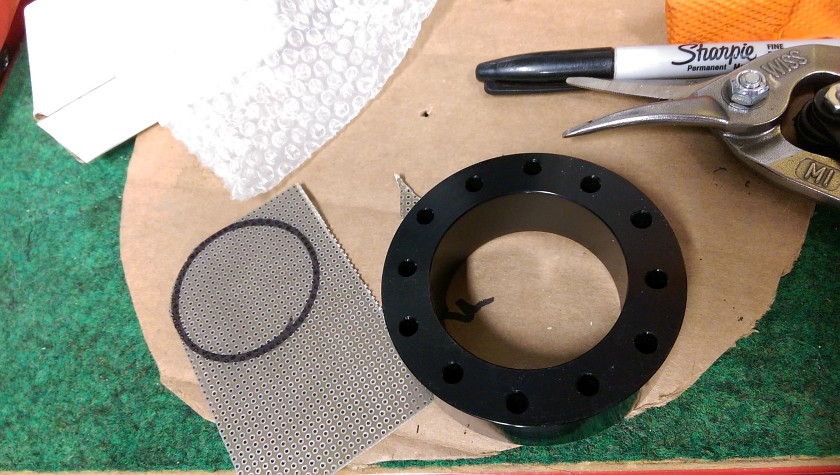
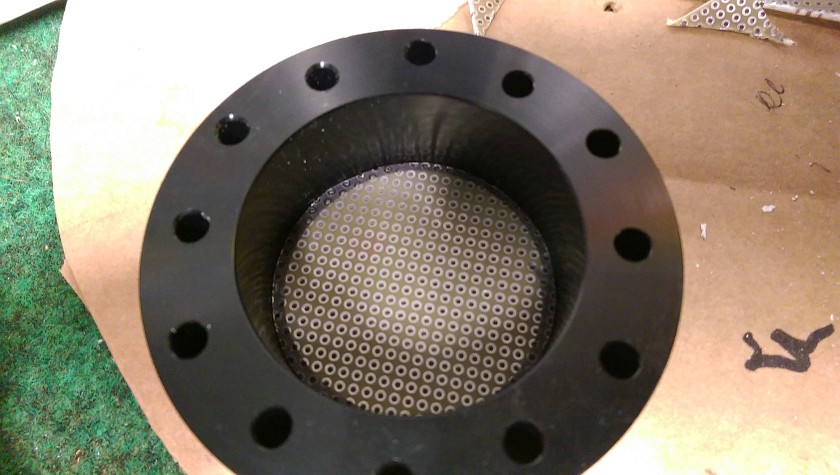
Momo Steering Wheel Adapter and Pattern


This is the Momo (aftermarket) 25mm steering wheel adapter. The ID of the adapter was traced on a piece of prototype circuit board material, but most any rigid material should work. If you use metal make sure it doesn't short out any of the wiring or transmitter circuitry.
Mounting the Remote Transmitter

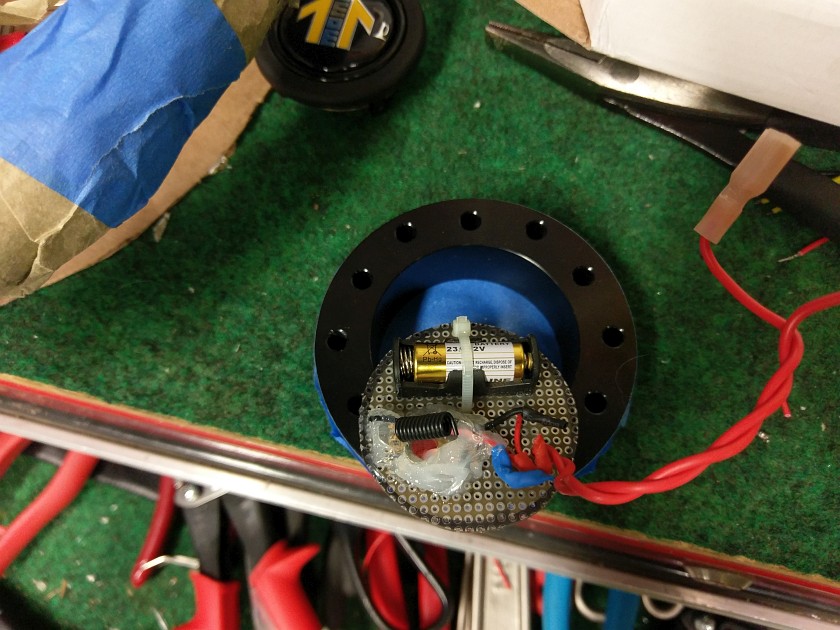
Mounting the Transmitter and Battery


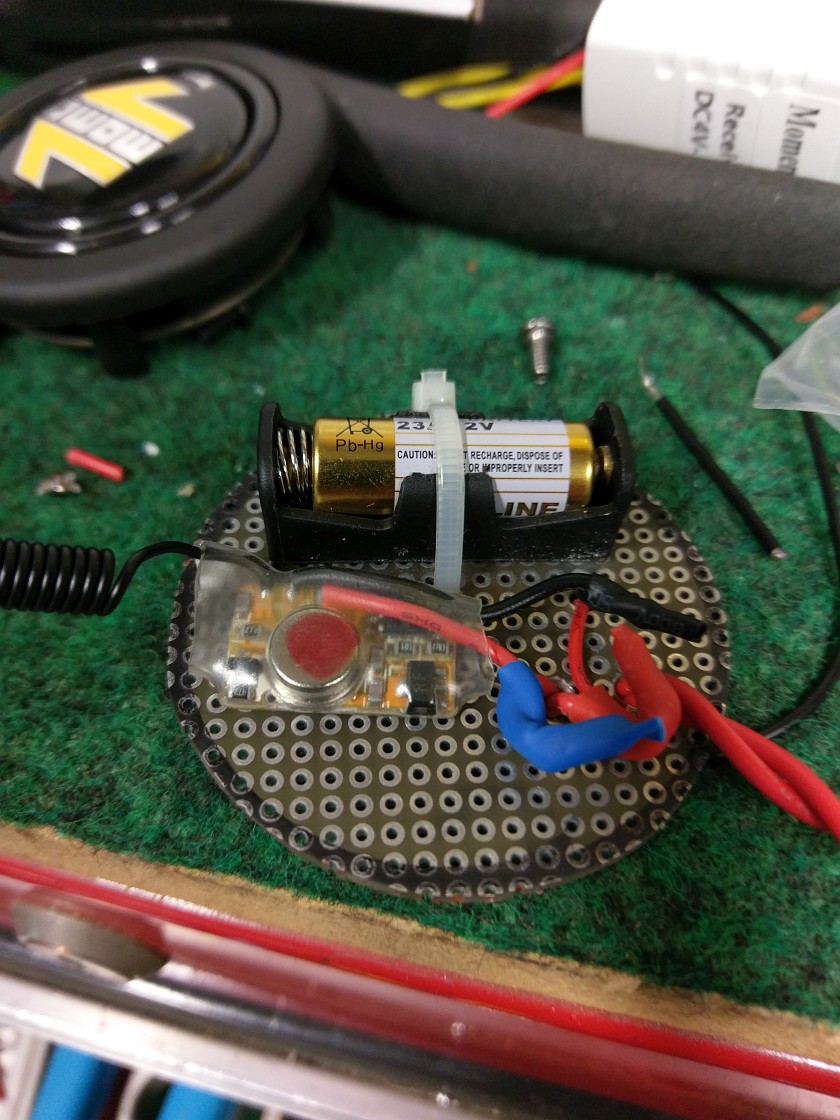
To be safe I used a large diameter shrink wrap tubing over the entire transmitter circuit board. The battery holder can be secured with a small screw and/or tie wrap. Note that if using screws the heads must the really thin or it will keep the battery from fitting the holder. Drill a couple of small holes to feed the wires to the back side. I sanded down the heads of off a couple of 4-40 flat head screws and bolted it down. I also used the tie wrap just to be sure (yes, it will have to be cut to replace the battery). Drill a 2 small holes to make a strain relief (maybe 3/16"). This will be used to keep the wires that go to the horn button from pulling the wires out of the transmitter.

The rest of the stuff is the wiring. I'm going to just tell how to do it as I'm too lazy to draw something up, but don't worry it's easy.

STEP 1:

The Transmitter has 2 wires a
RED and a BLACK. The batter has 2 wires a RED and BLACK. Connect the BLACK from the battery to the BLACK of the transmitter.

STEP 2:

Connect a 6' to 8" thin piece of stranded wire to each of the
RED wires, one from the transmitter and one from the battery. You should solder them and use heat shrink tubing to insulate them. 

STEP 3:

Feed these wires though the 2 holes to create a strain relief, then attach 2 FEMALE spade connectors (or what ever your horn button uses).

That's about it. The Transmitter is activated when you power it up, the horn button completes the circuit and causes it to transmit a signal that will in turn cause the receiver to close the relay and honk the horn.
Fixing the Steering Wheel Adapter

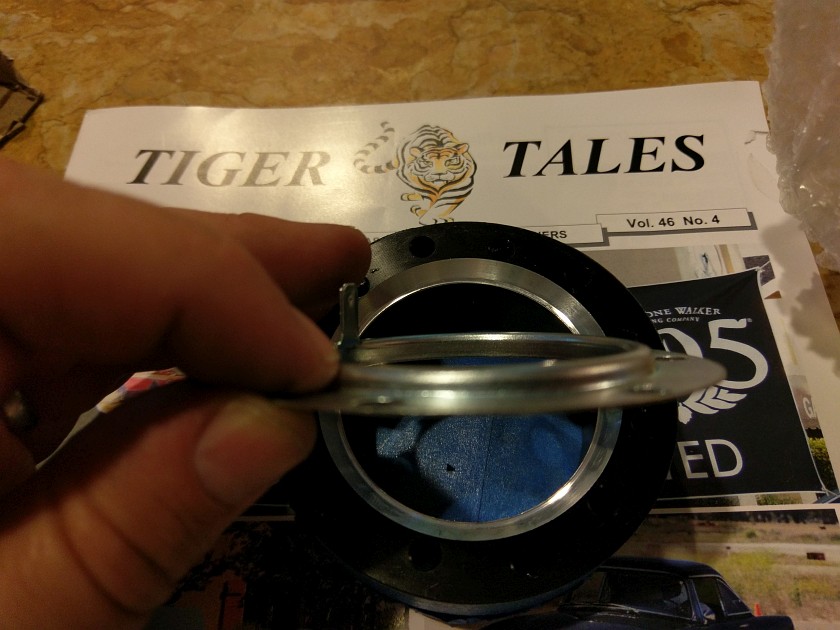
Momo Horn Button Adapter


This is the stamped Momo horn adapter ring. It's about 8 bucks and is needed as it does NOT come with any of their wheels it seems.
Click for Contact Page Click for Contact Page
Wireless Transmitter Kit
Momo Steering Wheel Adapter

Fixing The Steering Wheel Adapter


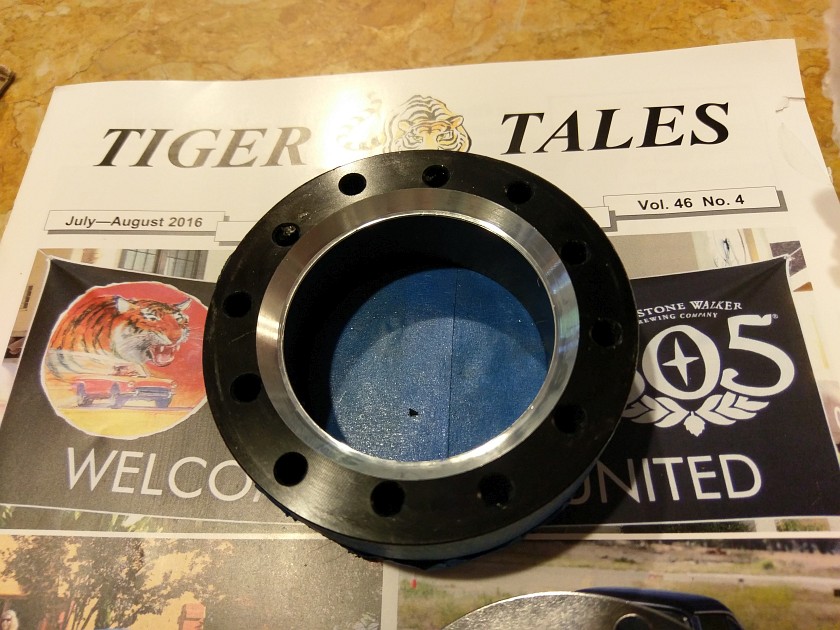
Well I got lucky and tried to see how the horn button mounted with the wheel and found out that Momo adapters have a flange that holds the horn button in, not the steering wheel itself. So I got the Momo adapter and found that the opening to the adapter was too small. I hit it up on the Jr. Lathe to make it work. This is the result.
Momo Horn Button Adapter
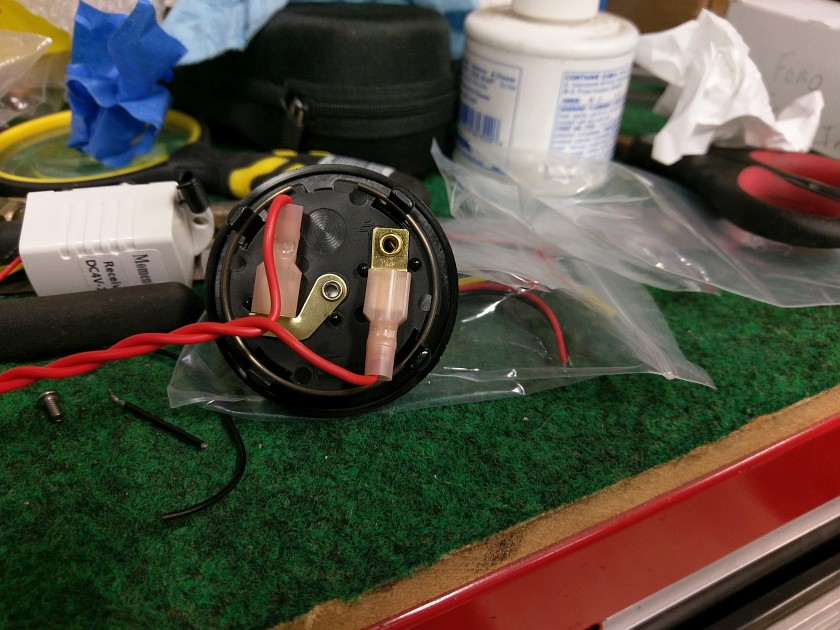
Horn Button Wiring

Horn Button Wiring


The 2 wires coming out of the board are fitted to the horn switch for testing and programming the receiver. Yes, you need to pair the receiver with the transmitter. You will need to follow the directions on your particular kit. It's easy but you may need to hook up the receiver to a 12 volt source (the transmitter has it's own battery, not the receiver).
Sealing the transmitter

Sealing up the Transmitter


Now time to glue things down. Using some GE Silicone glue I sealed both ends of the Transmitter's heat shrink tubing to make it water tight. I left the antenna up just in case I need to route it to a different position.
Sealing the back side

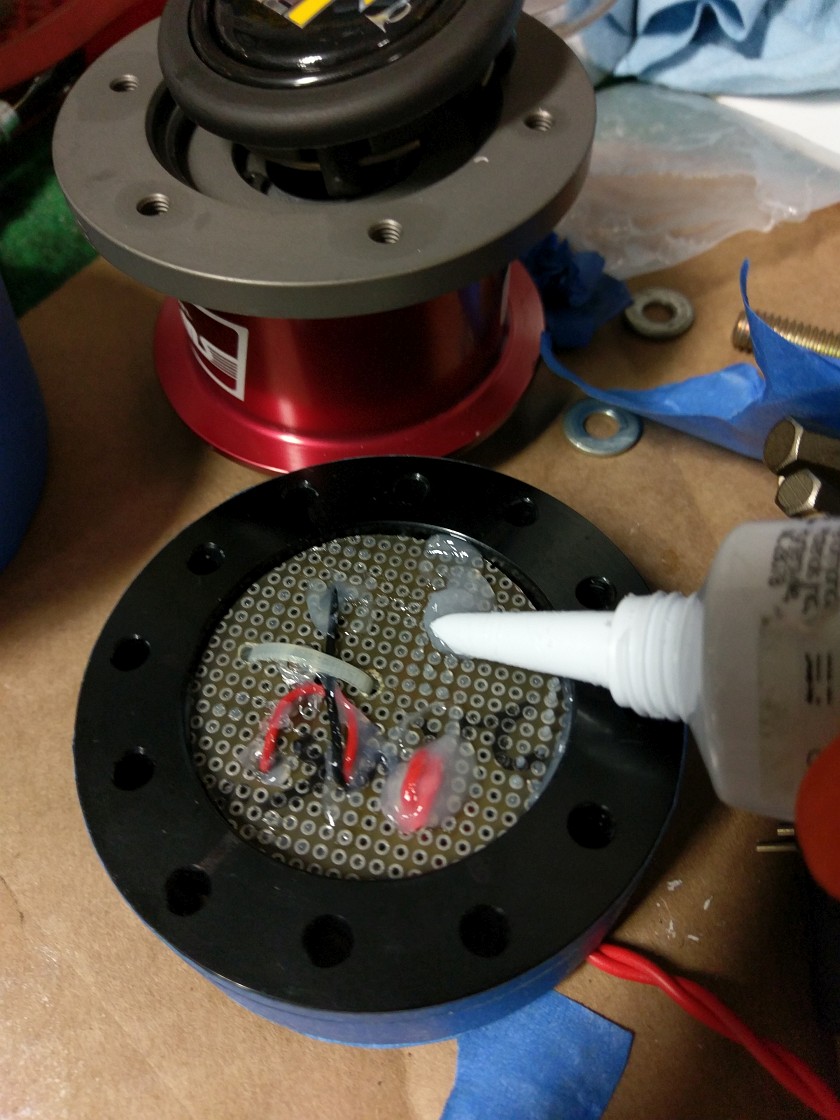
Potting the Assembly to the Adapter


After some test fitting and such, it's time to glue things together. Their is enough room to push the circuit board in about 1/8" and form a area to fill with Silicone Glue. It's messy but it makes it solidly mounted to the adapter. You want to make sure that the Tie Wrap is not glued as it may need to be remove when the battery goes flat. I filled the area and then using a wide scraper flattened it out a bit. Just make sure the board doesn't slide down out of place. I also did more potting on the top side, keeping clear of the battery and tie wrap. The Sweet Mfg. Quick Release can be seen too.
Test Fitting

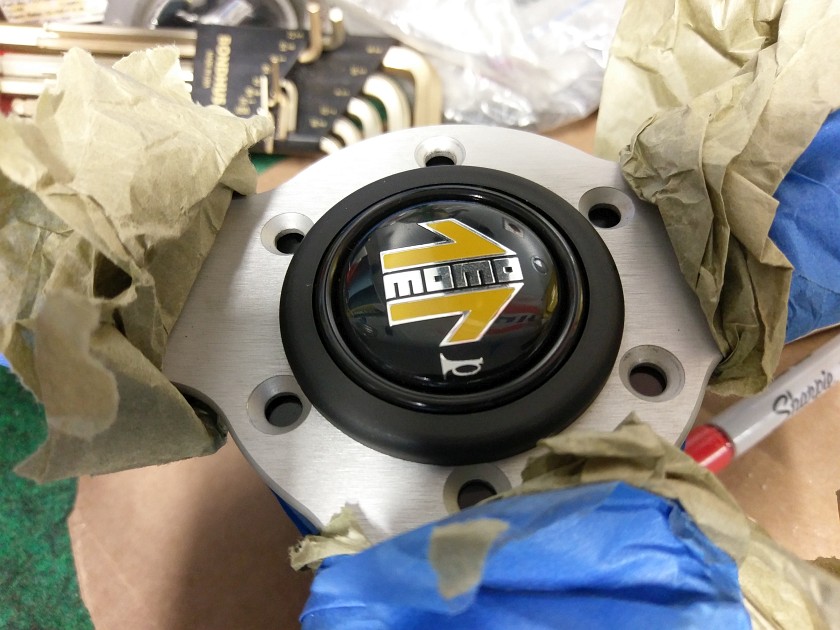
Test Fitting the Momo Horn Button


I test fit a few times to make sure the back of the button clears the battey and wiring. This was after final potting and fits like a glove.


Concerns

Dead Battery and its life in hot environment
READ WARNING AT THE TOP OF THE PAGE

Wireless Horn Wrap Up

At this point you are mostly done. Here are a few things you will need to do to make this all work -

Pair the transmitter to the receiver. The kit will have instructions on how this needs to be done.
Wire up the receiver to your horn (or better yet horn relay) with appropriate fuse for receiver (1 amp inline)
Testing!

Project Update
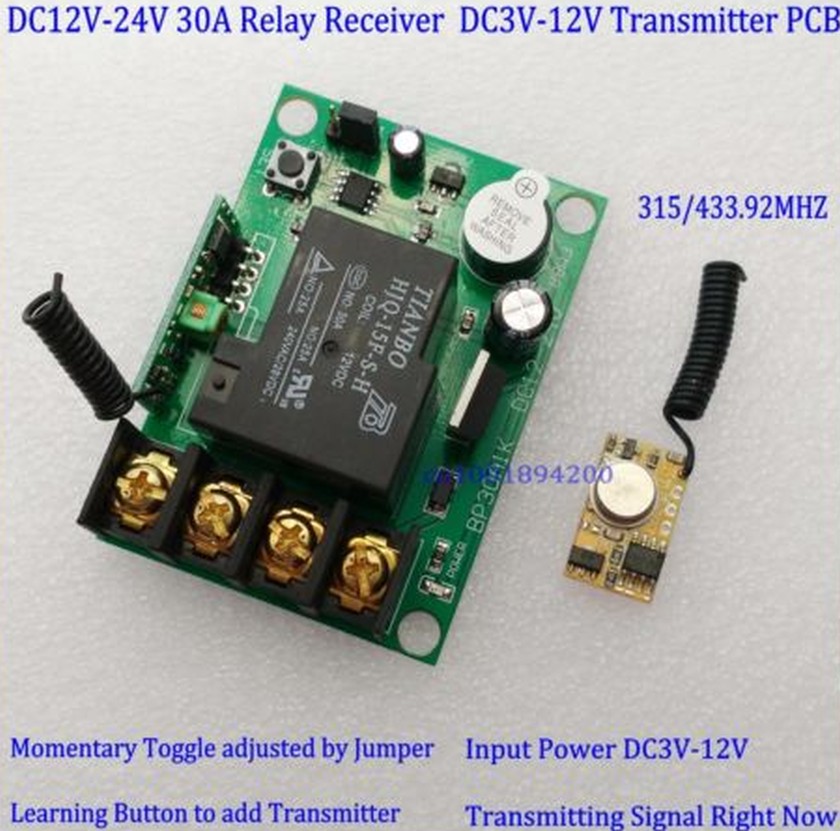
Initial testing with the smaller receiver module caused me to re-evaluate this part of the project. In stress testing the receiver part I smoked one of the boards due to over voltage. I ran the board at 15 volts and burned up what seemed like a voltage regulator IC. Automotive voltages can approach 15V easily and as such either protection from this would need to be made or a different approach to power would be needed. As a last ditch effort I went back to the eBay shop about found a NEW and better part that I'm awaiting. It's has a voltage range of 12-24 volts and also has a much larger relay that should have no trouble driving the horns directly. One last issue was can I program 2 transmitters to one receiver. As soon as I get the new parts in hand will report. Here is the link to the High Current Relay Receiver on eBay.

The NEW relay seems to work just fine. It also DOES allow multiple transmitters to be paired to the single receiver, so this is good news. The new relay module does have a small LED that is on when powered up so I removed the small surface mount LED near the bottom right of the board. This also has an ODD feature in that instead of a LED indicating programming and activation a small electronic buzzer (under the REMOVE SEAL sticker) beeps when programming AND When the relay is activated.  Other then that seems like a better way to go then the smaller unit. The receiver also comes with a small plastic case for mounting. It's not very robust, but will work.

See Below for the new module that is going to be used for the receiver.

Happy and Safe Motoring!
High Current Wireless Receiver